SINGER W310 User Manual
Page 31
Attention! The text in this document has been recognized automatically. To view the original document, you can use the "Original mode".
This buttonhole makes it unnecessary to pivot
the fabric. It is used most often on light and
medium weight woven fabric. The stitch
length dial should be turned to the Pmark or
near 0 so as not to stop the feeding action. A
buttonhole with a width of 3/16" can be
made simply by turning the stitch pattern dial
from buttonhole position 1 to 2, 3 and 4
consecutively.
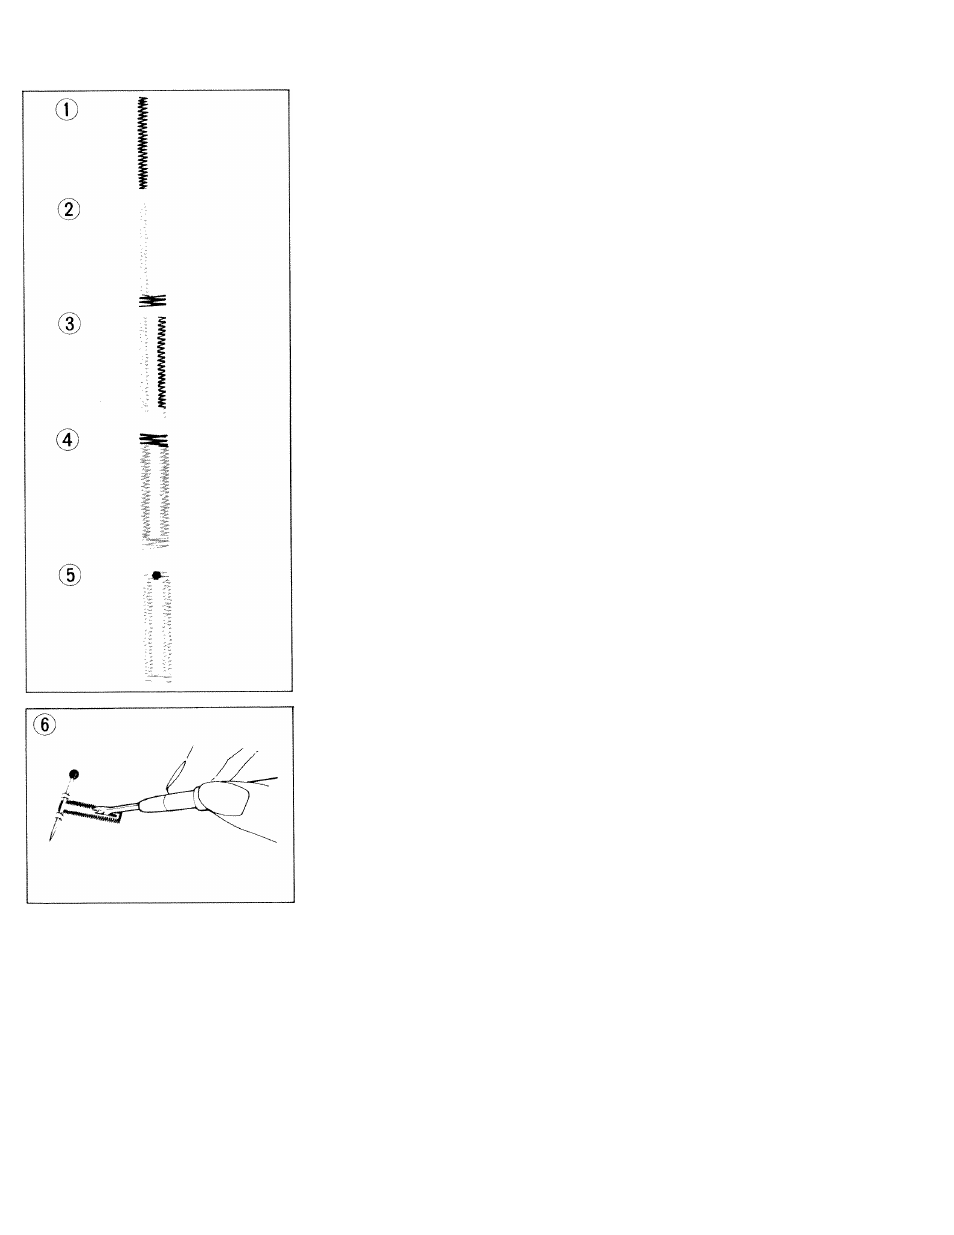
1. Set the dial at the red square marked (1j
buttonhole
position.
Lower
the
needle
into the mark indicating the top left end of
the buttonhole. Lower the presser foot
and sew the left side of the buttonhole
until the bottom is reached.
2. With the needle out of the fabric and the
dial set at the (2—4) position, sew a few
stitches to bartack the bottom end of the
buttonhole.
3. With the needle out of the fabric, turn the
dial to the (3) position. Sew the right side
of the buttonhole. At this position the
machine is feeding in reverse.
4. With the needle out of the cloth, turn the
dial again to the (2—4) position and
complete the buttonhole by bartacking the
top edge.
5. To lock the stitches, make sure that the
needle is out of the fabric, set the dial at
the straight stitch position and the feed
dog at the down position. Then sew a few
stitches.
6. To prevent cutting through the bartack
accidentally, insert a pin through the bar
tack. Cut open the buttonhole.
BUILT-IN BUTTONHOLE
Pattern:
f
~
~ | ~ H~
1
Length: Buttonhole
Feed Dog: Up AA
Pressure: Full
Foot: Buttonhole Foot
OfX