Upper threading – SINGER W310 User Manual
Page 13
Attention! The text in this document has been recognized automatically. To view the original document, you can use the "Original mode".
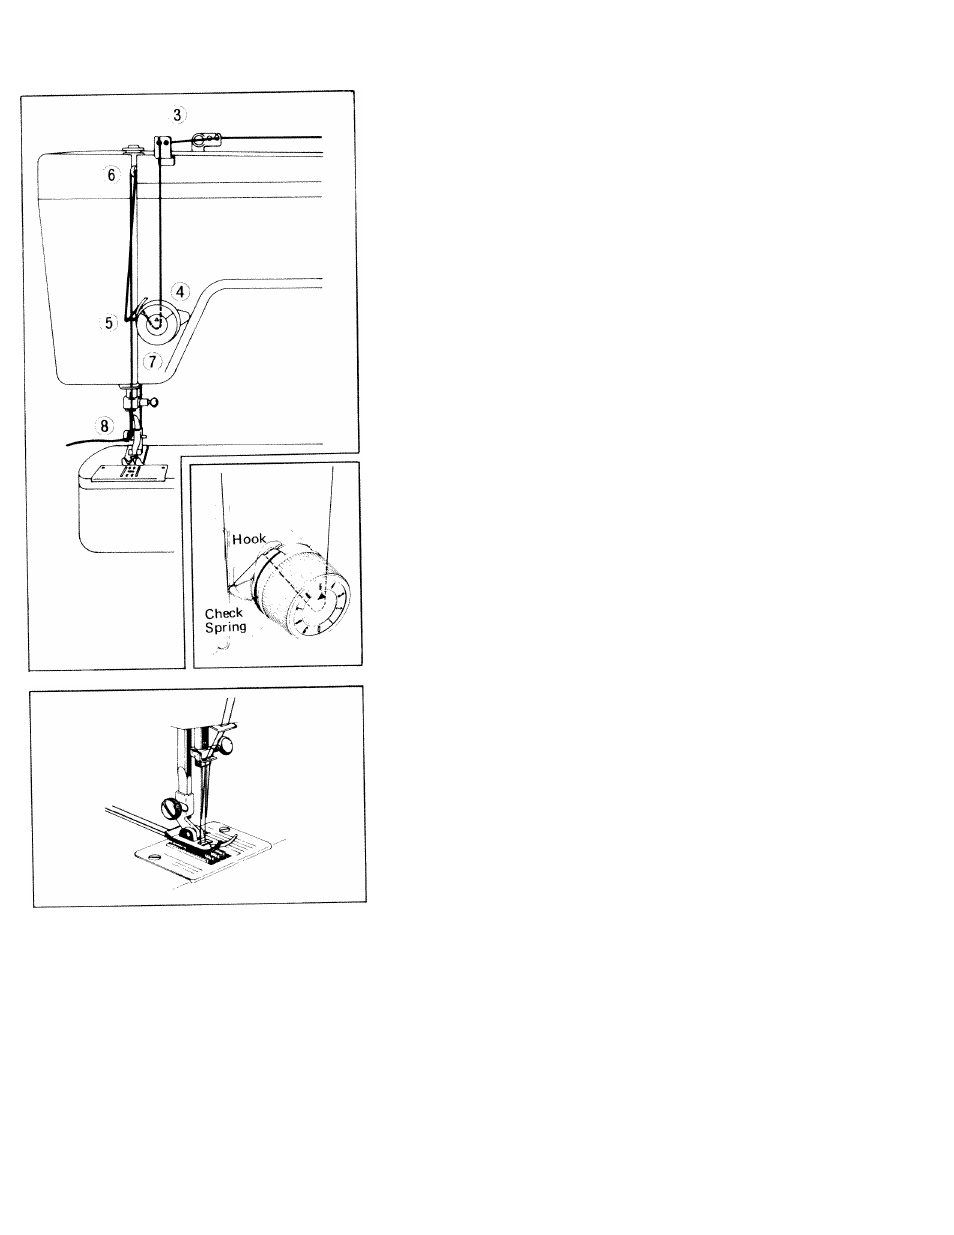
UPPER THREADING
1. Turn the hand wheel toward
you to raise the take up lever
to its highest position.
2. Place a spool of thread on the
spool pin,
3.
Lead the thread through the
top thread guides.
4. Down and between the tension
discs, from right to left.
5. Draw the thread up through the
check spring and with a slight
tug into the hook.
6. Up and through the eye of take-
up lever from right to left.
7. Lead thread down through the
thread guide at the bottom of
the threading slot, then, through
the thread guide on needle
clamp.
8.
Thread
the
needle
FROM
FRONT TO BACK, drawing it
through about 3 or 4 inches.
Flold the end of the upper
thread
loosely
and
turn
the
hand wheel toward you until
the needle goes all the way
down and comes back up. A
thread loop will form over the
upper thread which then can be
pulled out straight. Place both
thread ends under presser foot
and draw toward the back of
the
machine,
leaving
both
threads three or four inches
long.
In case of twin needle sewing, place
two spools of thread, matching or
contrasting in color, one on each
spool
pin,
lead
both
threads
through top thread guides, bring
threads down and pass one thread
between the back discs and the
other between the front discs, then
treat both thread as one until
threading each thread through each
needle eye of twin needle.
11