S. finishing touches, Top st/tciimg, She// edging – SINGER 626E6 Touch & Sew User Manual
Page 47: Scalloping, Finishing touches, Shell edging
Attention! The text in this document has been recognized automatically. To view the original document, you can use the "Original mode".
S.
FINISHING TOUCHES
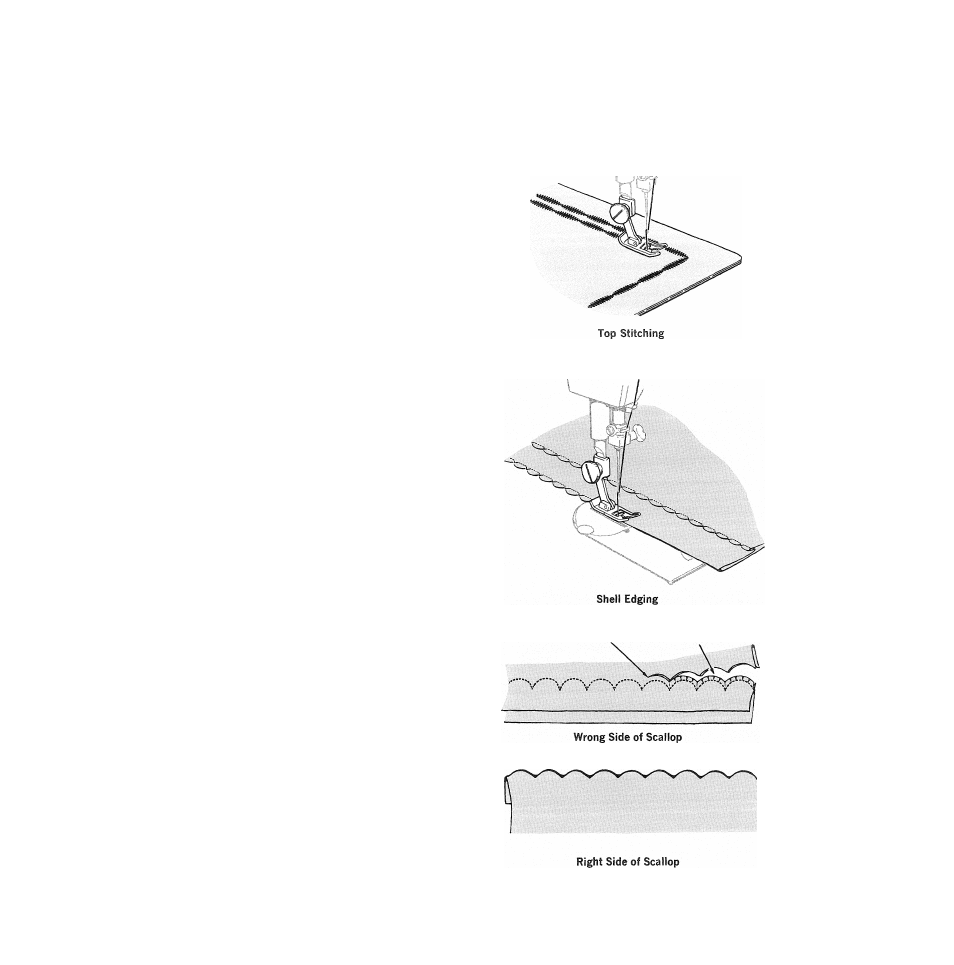
top st/tciimg
A practical, simple way to accent the lines of a dress
or coat is to place one or more rows of stitching along
collars, lapels, facing edges, pockets, sleeves, etc.
For a tailored look, use lines of straight stitching.
For decorative interest, use decorative stitching.
she// edging
On soft, fine fabrics, shell edging makes an attractive
finish for narrow hems or bias folds.
® Pattern Selector: Blindstitch
(V V V )
® Needle Position: C
® Throat Plate: Genera! Purpose
© Presser Foot: General Purpose
1. Make a test sample on your fabric to find the right
thread tension, stitch length, and stitch width.
2. Place folded hem (basted, if necessary) or bias
fold under presser foot, with hem or fold toward
the left.
3. Stitch slowly, guiding fabric by hand so that the
sideward stitches do not pierce the folded edge.
scalloping
Scalloping adds interest to blouses, dresses, lingerie,
and children’s clothes. Scallops will be perfect in form
and evenly spaced when you use the Scallop stitch.
® Pattern Selector: Scallop (/ V V ',)
® Stitch Width Selector: 3 to 5
© Needle Position: C
© Stitch Length: 10 to 15
® Throat Plate: General Purpose
© Presser Foot: General Purpose
1. Place right sides of fabric together. (Shaped or
bias edges should be interfaced.) Stitch scallops.
2. After stitching, and before turning, trim seam al
lowance to Vs inch or less.
3. With scissors, clip points of scallops and, if neces
sary to make fabric lie flat, clip along curves.
4. Turn and press.
Cut
Notch
45