Needle and bobbin threads, With a newly wound bobbin, With a previously wound bobbin – SINGER 626E6 Touch & Sew User Manual
Page 21
Attention! The text in this document has been recognized automatically. To view the original document, you can use the "Original mode".
NEEDLE AND BOBBIN THREADS
How you begin stitching depends on whether you are
using a newly wound or a previously wound bobbin.
When you have just wound a bobbin, you will have
one continuous thread leading from the needle into
the bobbin.
When you have just inserted a bobbin that was pre
viously wound, you will have two separate threads:
the upper or needle thread and the lower or bobbin
thread. Before you can start to stitch you must bring
the bobbin thread up through the throat plate needle
hole.
Instructions for both conditions are given below.
(These instructions also apply to zig-zag stitching.)
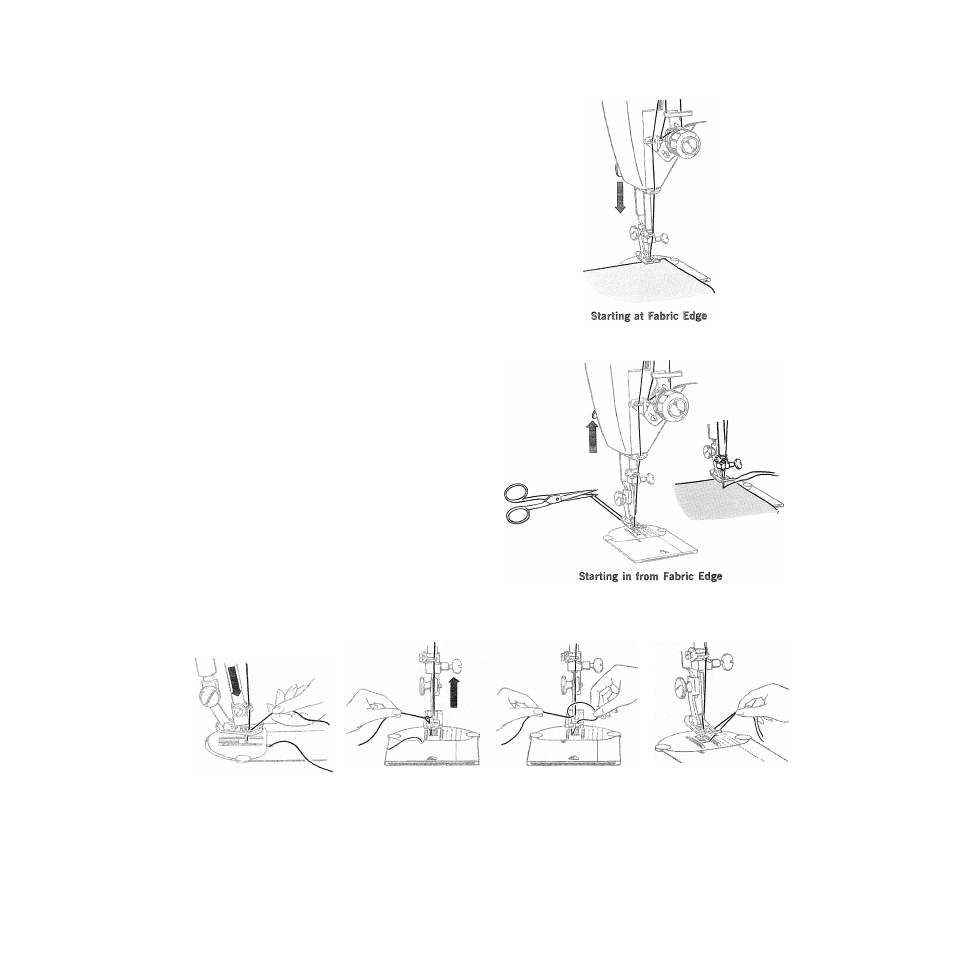
With a Newly Wound Bobbin
If you are starting to stitch at the fabric edge:
® Close Slide Plate
® Position needle in very edge of fabric
® Lower presser foot and stitch. Thread v/ill “lock”
over fabric edge.
If you are starting to stitch in from fabric edge:
® Close Slide Plate
® Pull thread back under presser foot and cut
® Position needle in from fabric edge where desired
and stitch.
NOTE: Should the bobbin run out of thread after
you have already begun a line of stitching, remove
the fabric, rewind the bobbin and follow the three
immediately preceding steps.
With a Previously Wound Bobbin
Hold
needle
thread
lightly with left hand
and turn hand wheel
slowly toward you so
that
needle
enters
throat plate.
Continue turning hand
wheel
until
needle
rises and brings up
bobbin
thread
in
a
loop.
Undo the loop with
your finger.
Place both needle and
bobbin threads under
presser foot and lay
them diagonally to the
right. Position needle in
fabric
where
desired
and stitch.
19