Basic drill press operation, Motor, Loose – Sears 113.24611 User Manual
Page 16
Attention! The text in this document has been recognized automatically. To view the original document, you can use the "Original mode".
basic drill press operation
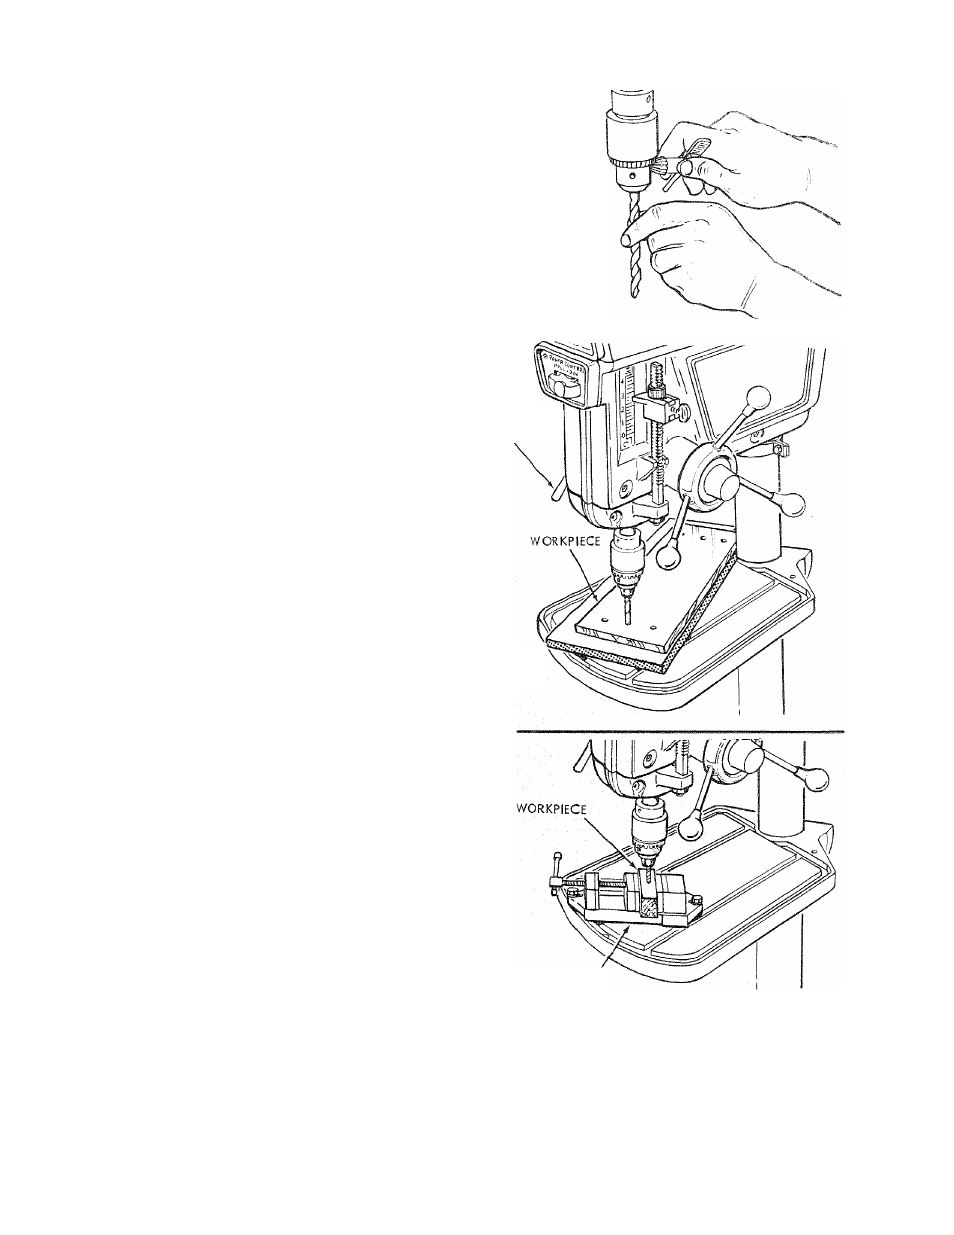
INSTALLING DRILLS
insert driil into chuck far enough to obtain maximum
GRIPPING of the CHUCK JAWS ... the jaws are appox. 1
in. long. When using a small drill do not insert it so far that
the jaws touch the flutes (spiral grooves) of the drill.
Make sure that the drill is CENTERED in the chuck before
tightening the chuck with the key.
Tighten the drill sufficiently, so that it does not SLIP while
drilling.
POSITIONING TABLE AND WORKPIECE
Lock the table to the column in a position so that the tip of
the drill is just a little above the top of the workpiece. It is
not necessary to reposition the TABLE SUPPORT
COLLAR each time you reposition the table. Always keep
the collar locked about 34 in. from the floor.
Always place a piece of BACK-UP MATERIAL (wood,
plywood ...) on the table underneath the workpiece. This
will prevent "splintering" or making a heavy burr on the
underside of the workpiece as the driil breaks through.
Position workpiece to butt against the column whenever
possible — if it is too short, clamp solidly to the Table -
this is to prevent the drill bit from grabbing the work from
your hands, which could result in personal injury. A drill
press vise must be fastened to the table.
CAUTION: To prevent the workpiece or the back-up
material from being torn from your hand while drilling,
position them against the left side of the column. Failure to
do this could result in personal injury.
CAUTION: If the workpiece or the back-up material are
not long enough to reach the column, CLAMP them to the
table. Failure to do this could result in personal injury.
QUILL LOCK
HANDLE
For small pieces that cannot be clamped to the table, use a
drill press vise (Optional accessory). The vise must be
clamped or bolted to the table.
X
BACK-UP
MATERIAL
DRILL PRESS
VISE
HOLE LOCATION
Make a DENT in the workpiece where you want the hole
.. . using a CENTER PUNCH or a SHARP NAIL.
Before turning the switch ON, bring the drill down to the
workpiece lining it up with the hole location.
FEEDING
Pull down on the feed handles with only enough effort to
allow the drill to cut.
Feeding
TOO
SLOWLY might cause the drill
to
burn . . .
Feeding
TOO
RAPIDLY might stop the
motor
. . . cause
the belt or drill to SLIP .. . tear the workpiece
LOOSE
from your hand or BREAK the drill bit.
When drilling metal use Sears Thread-cutting oil
16