Chp.8: installing the photo bj cartridge, Installing the photo bj cartridge – Canon BJC-3000 User Manual
Page 30
28
Installing the Photo BJ Cartridge
Use of the Photo BJ Cartridge is recommended when you print image data such as a photograph
from a digital camera or scanner which requires fine halftone colours.
For a print job using the Photo BJ Cartridge, be sure to install the Photo BJ Cartridge and ink tanks
in the right positions as shown in the following figures.
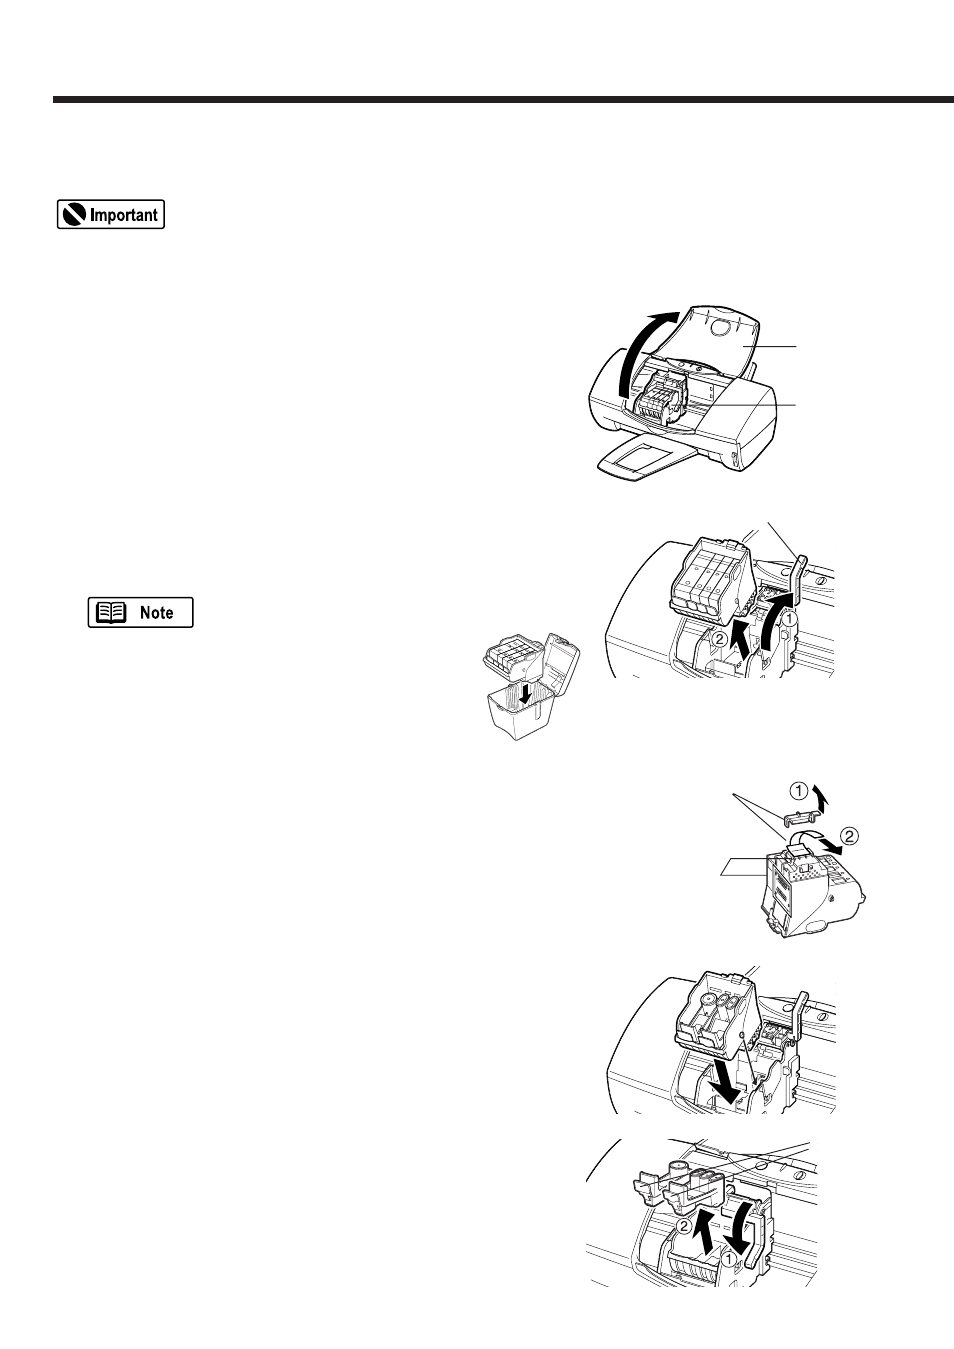
1
Make sure that the printer is switched on and
open the front cover of the printer.
The cartridge holder moves to the left.
2
Raise the blue cartridge lock lever on the car-
tridge holder(
➀
) and remove the Color BJ
Cartridge(
➁
).
After removing a BJ Cartridge, always keep
the BJ Cartridge in the BJ Cartridge container.
Otherwise the ink will dry and print jobs may
not be performed properly after the ink tank is
installed again.
3
Remove the Photo BJ Cartridge (Color BJ
Cartridge BC-34 Photo) from its package.
Remove the orange protective cap(
➀
) and protec-
tive tape(
➁
).
4
Set the Photo BJ Cartridge in the cartridge holder.
5
Lower the cartridge lock lever(
➀
) and press it
down until it locks into place, and then press in
the fix tabs(
➁
) to remove two orange plastic
inserts.
Front cover
Cartridge
holder
Blue cartridge lock lever
Remove these
two items.
Do not touch
these precision
components.
Ink T
ank
BCI-3BK
Black
Ink T
ank
BCI-3Y
Yellow
Ink T
ank
BCI-3M
Magenta
Ink T
ank
BCI-3C
Cyan
Fix tabs