Winco Mfg. O2 - Oxygen Tank Holder User Manual
Page 5
Page 5 of 5
006321
REV. B Date 09-07-11
JWC
●O
2
Holder Assembly
(Kit # 250040)
:
6980-6988-6990-6998
●Tools needed:
• Phillips-Head
Screwdriver
•
Power tools are NOT recommended
●Assembly Instructions
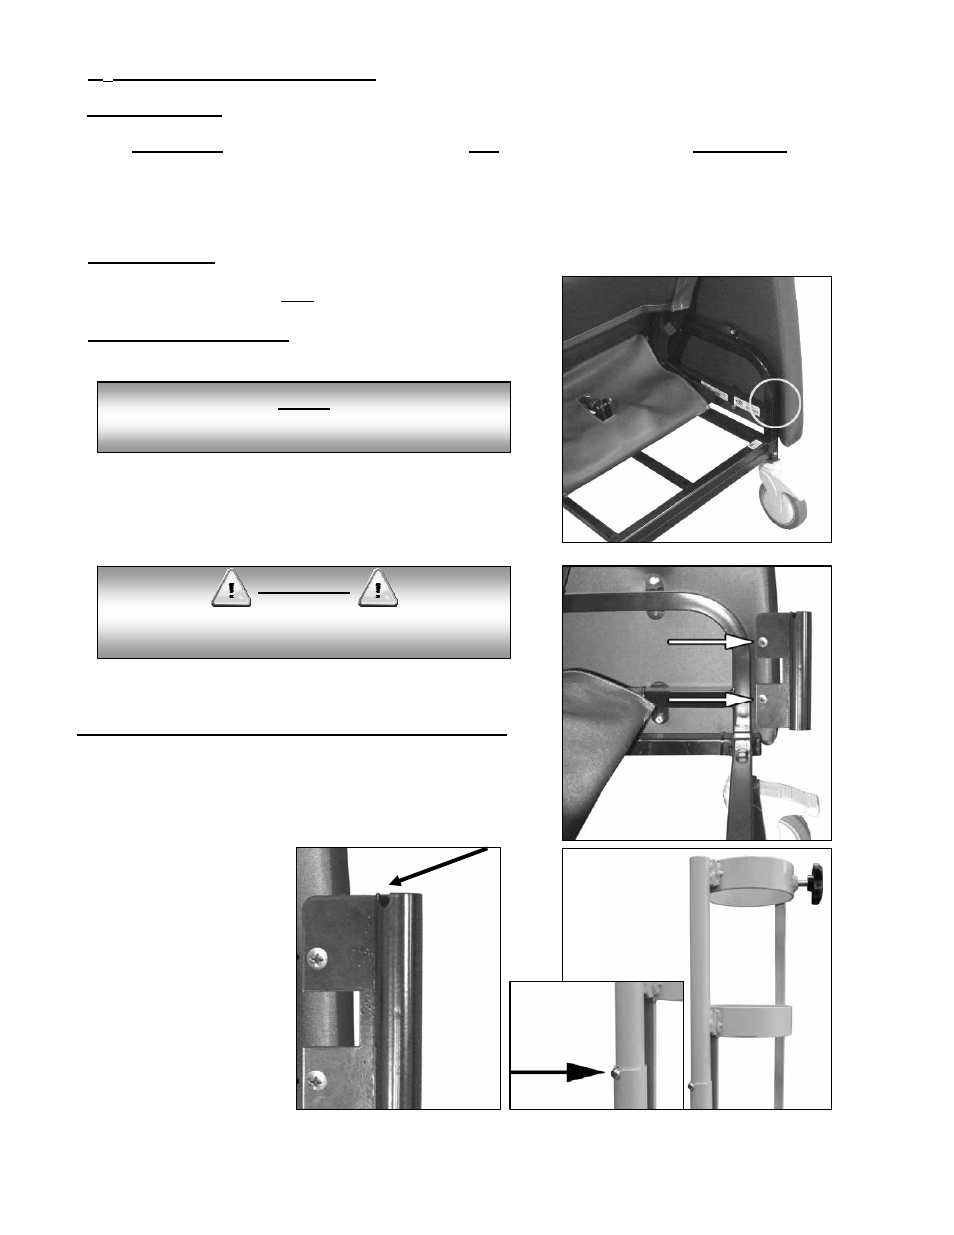
6. Locate the rear-right side of the chair.
(FIG. 1)
7. Use
(FIG.2) as reference to assist in locating the holes for the
IV bracket in the arm panel.
8. Use an awl or a Phillips-head screwdriver to pierce the vinyl
once you’ve located the bracket holes in the arm panel.
9. Line up the “O2 Mounting Bracket” with the holes in the
arm panel.
(FIG.2)
Be sure the notch in the mounting bracket is facing up.
(FIG.3)
10. Secure the IV bracket to the chair using the 2 phillips-head
screws provided. Tighten to a snug fit.
(FIG.3)
11. Insert O
2
holder into bracket until the silver snap-button
sits in the notch of the bracket.
(FIG.4)
NOTE
Left & Right is determined – as if sitting in the chair
●Parts Included:
Description:
Qty.
Part Number
WELDED, OXYGEN TANK HOLDER,
BLACK
1
250015B
O2 MOUNTING BRACKET, BLACK
1
227613B
STAR KNOB, MODIFIED, O2 HOLDER
1
201215
1/4-20 X 3/4 PHILLIPS-HEAD SCREW
2
566504
WARNING
When piercing the vinyl be sure the tool DOES NOT
pierce through the outside of the arm panel.
FIG. 1
FIG. 2
FIG. 3
FIG. 4