Winco Mfg. O2 - Oxygen Tank Holder User Manual
Page 3
Page 3 of 5
006321
REV. B Date 09-07-11
JWC
●O
2
Holder Assembly:
6550-6551-(Kit #
227615K), 6570-6571-(Kit # 227617K)
●Tools needed:
•
Phillips Head Screwdriver
•
7/16” wrench (multiple size wrench included)
•
Powered tools NOT recommended –
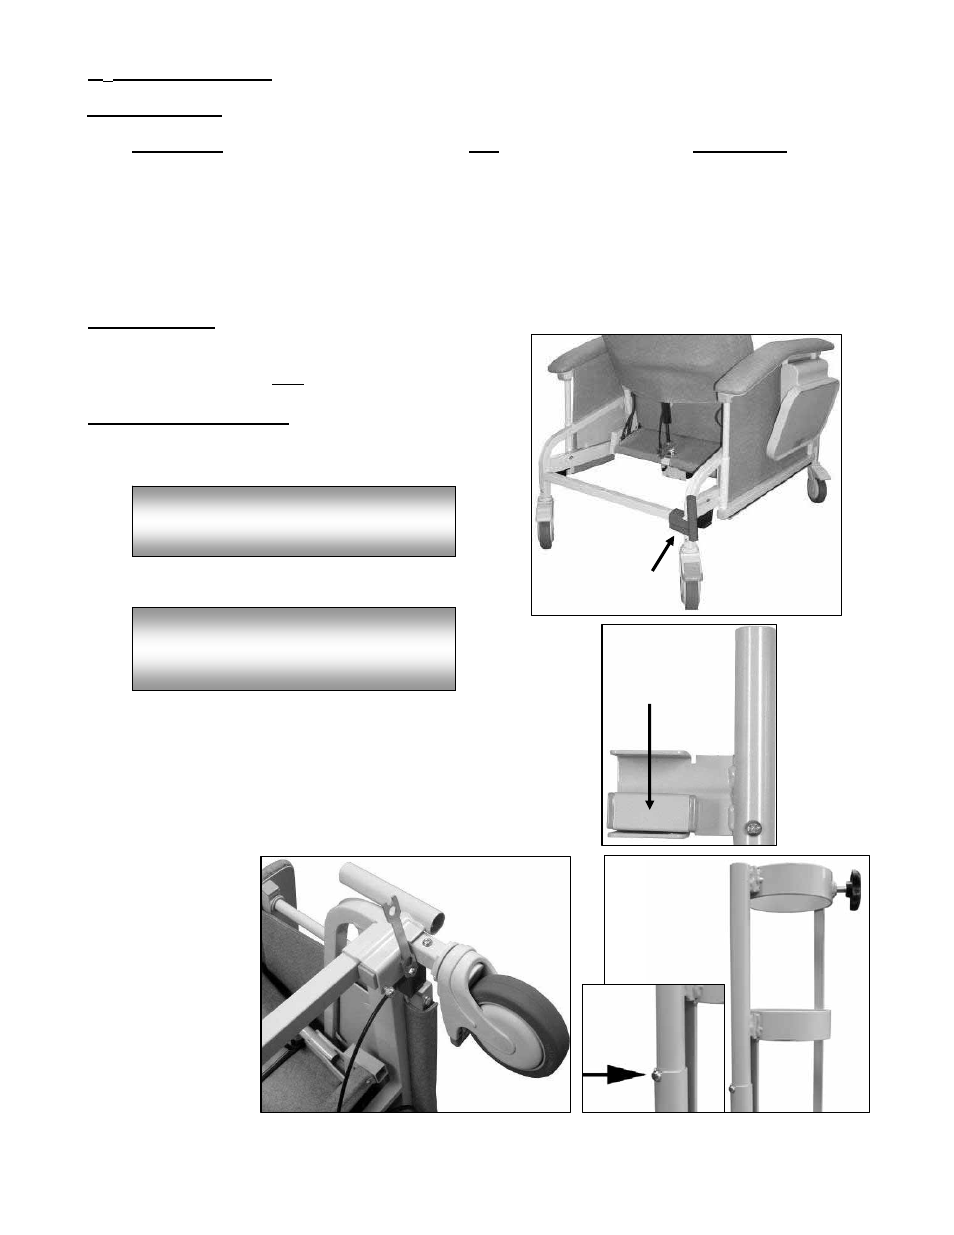
●Assembly Instructions
1. Locate the REAR RIGHT-SIDE of the chair.
(FIG.1)
2. Insert the “Spacer” into the U-Bracket”
(FIG. 2) and place onto chair frame.
3. Insert the two screws through the holes in the
“U-Bracket”.
4. Screw on the nylon lock-nuts and, using the wrench
provided, tighten the lock-nuts to the bracket.
(FIG.3)
5. Insert
O
2
holder into bracket until the silver snap-button
sits in the notch of the bracket.
(FIG.4)
●Parts Included:
Description:
Qty.
Part Number
O2 U-BRACKET
1
227615
OXYGEN
TANK
HOLDER
1
250015
IV SPACER
(655 model ONLY)
1
227607
1” GRAY SQUARE CAP
2
700700
STAR
KNOB
1
201215
1/4-20 x 2 3/4" PHILLIPS-HEAD SCREW
2
566571
1/4-20
NYLON
LOCKNUT
2
566204
FIG. 1
IMPORTANT:
The “Spacer” is for the 655 model ONLY
and should be placed as shown.
(FIG.2)
FIG. 3
NOTE:
Left & Right is determined – as if sitting
in the chair
FIG. 2
FIG. 4