Replacing the diaphragm – VACUUBRAND PC 620 NT plastic housing User Manual
Page 98
page 98 of 113
➨
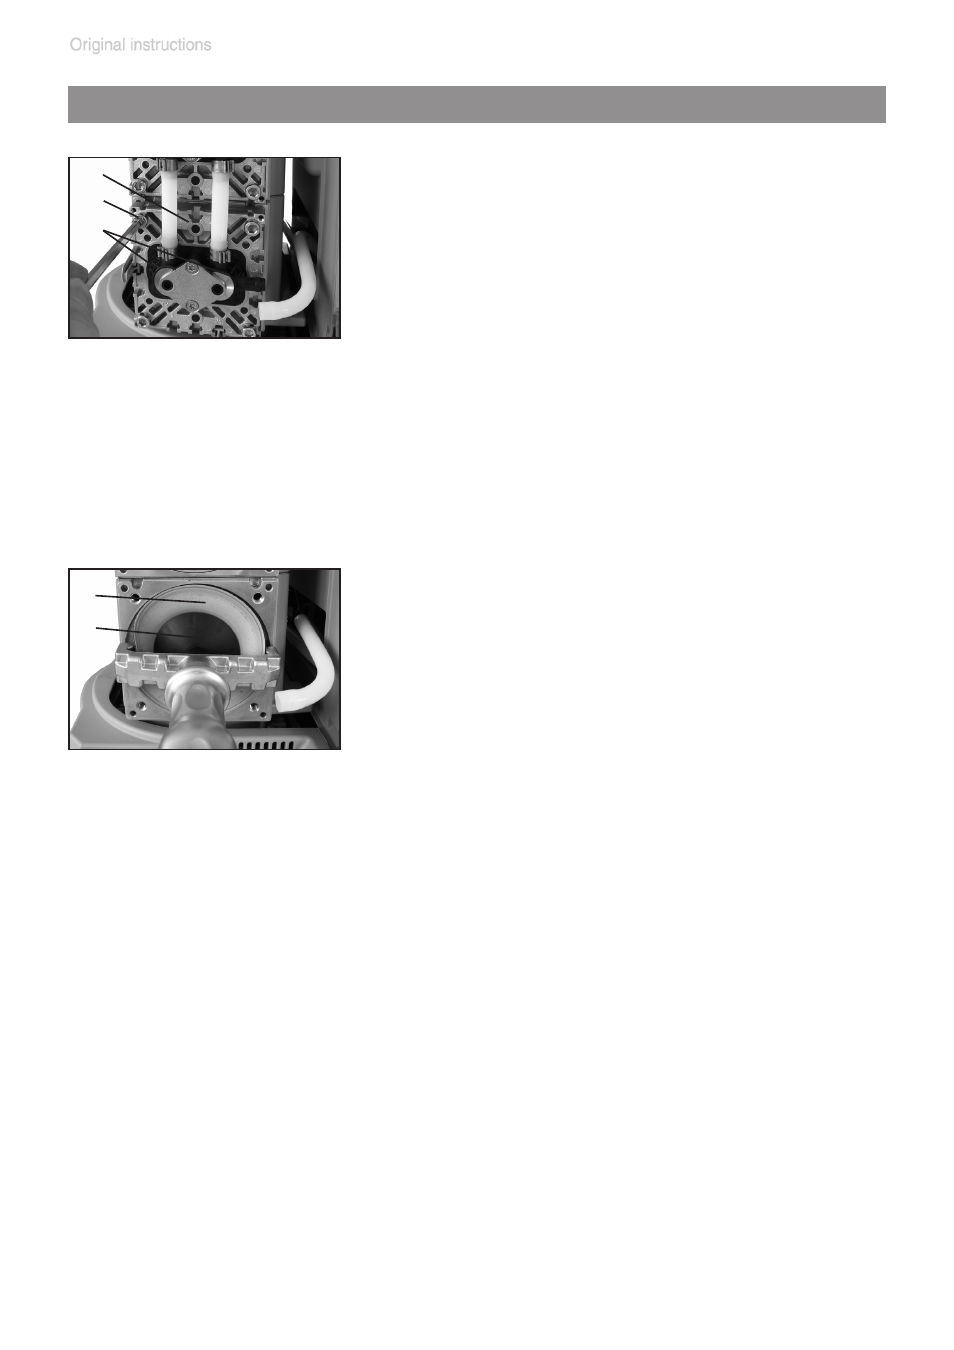
Disassemble head covers (J) to check the
diaphragm (F).
➨
Unscrew four (pump with two heads) or eight
(pump with four heads) Allen screws (H) with
a 5mm wide Allen key. Remove both head
covers (J) (pumps with two heads: only one
head cover) together with valve heads (O)
and connections.
+
It is not necessary to disassemble the valve
heads (O), the connection fasteners (Q), or
the hose connection between the adjacent
head covers (pumps with four heads).
Replacing the diaphragm
J
H
O
+
Check diaphragm (F) for damage and re-
place if necessary.
➨
Lift diaphragm carefully sidewise.
+
Never use a pointed or sharp-edged tool to
lift the diaphragm.
➨
Use the diaphragm key to grip the diaphragm
support disc (E) below the diaphragm.
➨
Unscrew diaphragm support disc (E) with diaphragm (F) and dia-
phragm clamping disc (G).
➨
Check for washers (D) between the diaphragm support disc (E) and
the connecting rod (B). Do not mix the washers from the different pump
heads, since these are set at the factory to ensure proper pump per-
formance. Make sure that the original number is reassembled at the
individual pump head.
+
Too few washers: The pump will not attain vacuum specification. Too
many washers: Diaphragm clamping disc will hit head cover, causing
noisy operation and possibly causing the pump to seize up.
+
If the old diaphragm is difficult to separate from the diaphragm support
disc, immerse assembly in naphtha or petroleum ether. Do not inhale
vapors!
F
G