Assembling the pump heads – VACUUBRAND MZ 2C NT VARIO without controller (o.C.) User Manual
Page 66
page 66 of 76
➨
Assemble the original number of washers
(H) between diaphragm support disc (G)
and connecting rod (I).
➨
Screw diaphragm clamping disc (E), dia-
phragm (F), diaphragm support disc (G)
and washers (H) to connecting rod (B).
➨
Optimum torque for the diaphragm support disc: 4.4 ft
.
lb
f
(6 Nm), it is
recommended to use a torque wrench. Attach Allen key to diaphragm
key (hexagonal bolt 6 mm wide).
Note: Never use the diaphragm key with any additional tools like tongs
or Allen keys without appropriate torque limitation.
F
E
Assembling the pump heads
➨
Place the pump in a way that the pump head to be assembled is at the
top. Support the pump appropriately.
➨
Bring the diaphragm (F) into a position in which it is in contact with the
housing (J) and centered with respect to the bore.
➨
Place the head cover (D) over the diaphragm. Check for its correct
orientation by aligning it beforehand with the housing cover which has
to be put over it later on.
+
Pay attention that the diaphragm (F) stays positioned centrally so that
it will become clamped uniformly between housing (J) and head cover
(D).
➨
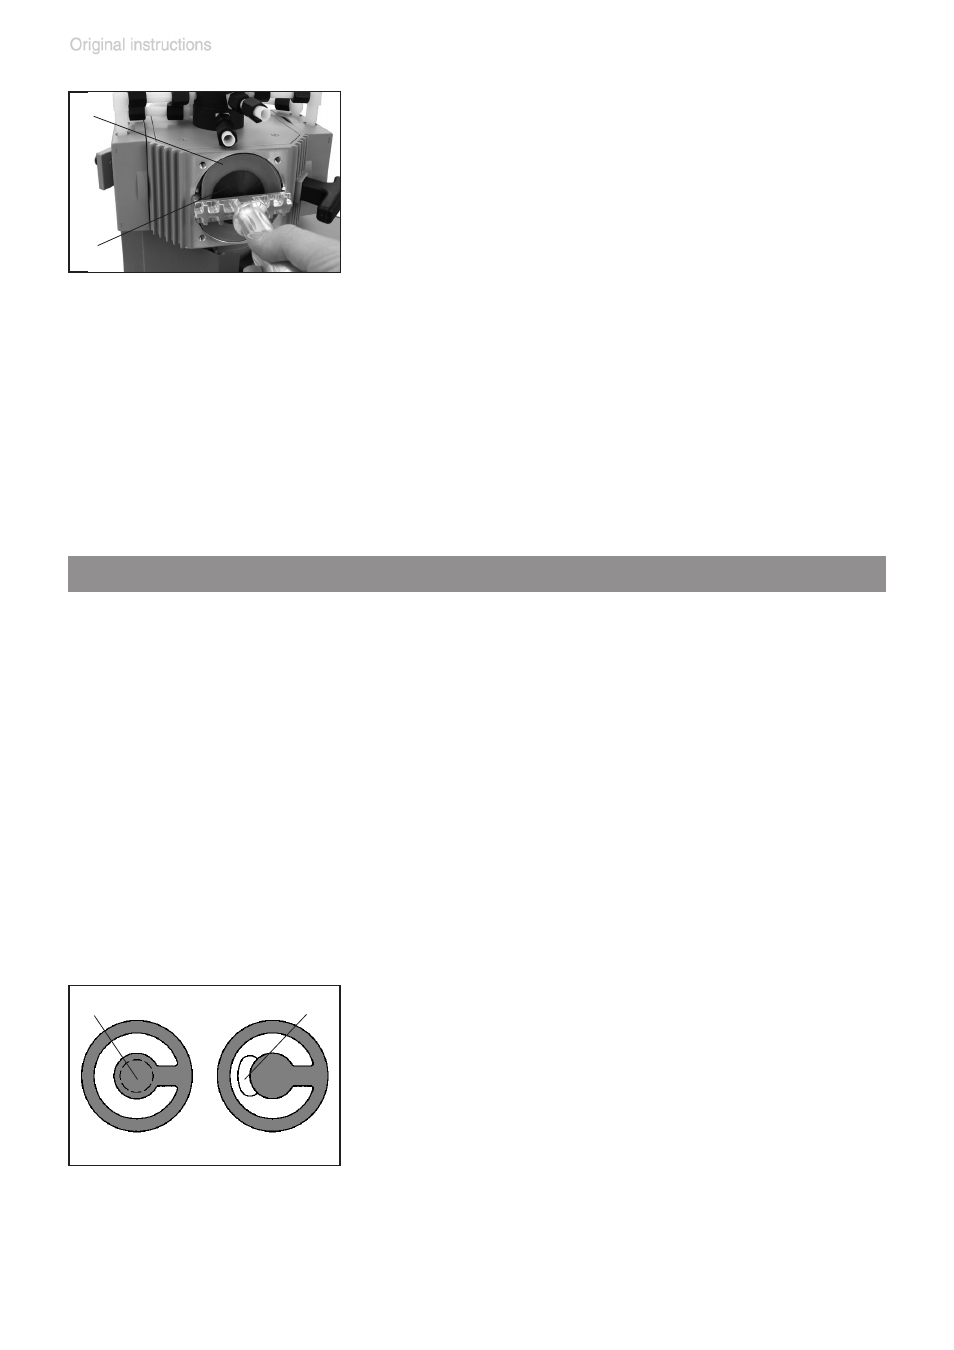
Place the valves (B) and the O-rings (C) at
their respective positions on the head cover
(D).
+
Make sure that the valves are correctly
seated. See figure for the correct position of
the valves: Valves at the outlet with round
centered opening (S) under valve; valves at
the inlet with kidney-shaped opening (T) be-
side valve.
➨
Place the housing cover (A) with housing
cover insert onto the head cover.
S
T
- MV 10C VARIO-B without controller (o.C.) ME 4C NT VARIO without controller (o.C.) MD 4C NT VARIO without controller (o.C.) MD 12C VARIO-B without controller (o.C.) PC 3012 VARIO without controller (o.C.) PC 3010 VARIO without controller (o.C.) PC 3004 VARIO without controller (o.C.) PC 3003 VARIO without controller (o.C.) PC 3002 VARIO without controller (o.C.)