VACUUBRAND MZ 2C NT VARIO without controller (o.C.) User Manual
Page 54
page 54 of 76
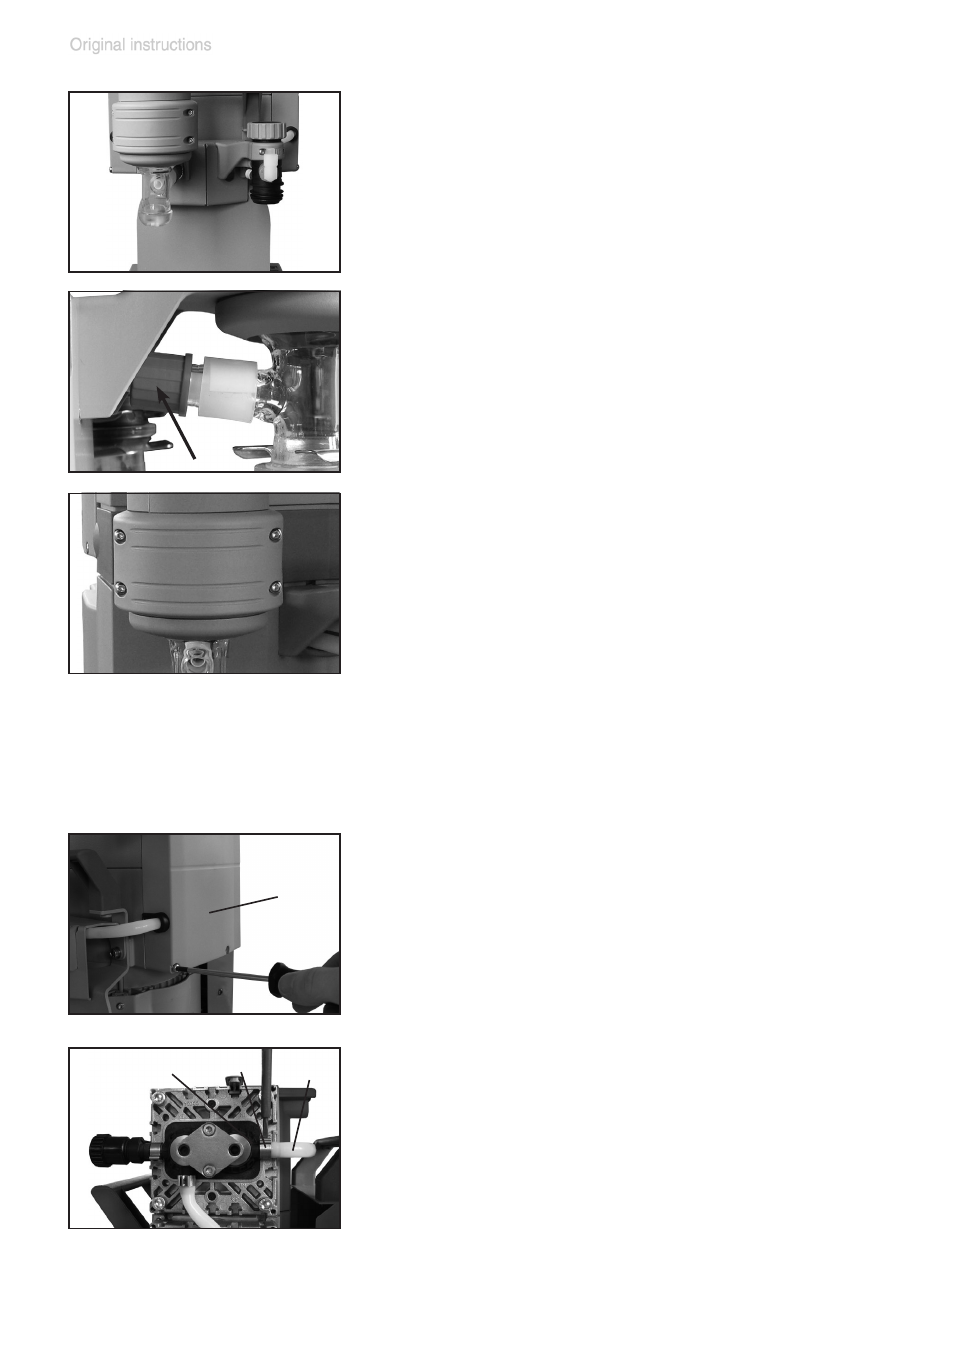
Disassemble the exhaust vapor condenser
EK:
➨
Loosen the union nut at the inlet of the ex-
haust vapor condenser.
➨
Remove the 4 screws affixing the counter
holder of the exhaust vapor condenser with
a Torx driver T10. Remove the exhaust va-
por condenser. In doing so pull the PTFE
hose out of the inlet of the exhaust vapor
condenser.
➨
For maintenance, lay the pump / pumping unit on its side with the
pump heads to be maintained at the top. Support the pump / pumping
unit appropriately.
PC 3002/3003/3004 VARIO
➨
Remove catchpots (14) at inlet and outlet
(see “Use and operation”, pg. 36).
➨
Remove the 4 screws affixing the head cov-
er cowling (W) with a Torx driver T20. Pay
attention to the washers under the screws
and remove.
➨
Pull off head cover cowling (W) carefully. Do
not tilt.
W
Detach the coupling of the connection tube (V)
to the other side of the pump at the valve head
(O).
PC 3002/3003/3004:
Detach the coupling of the connection tube (V)
to the other side of the pump as well as the
hose connection to the inlet/outlet of the vacu-
um system at the valve head (O).
V
O
U
- MV 10C VARIO-B without controller (o.C.) ME 4C NT VARIO without controller (o.C.) MD 4C NT VARIO without controller (o.C.) MD 12C VARIO-B without controller (o.C.) PC 3012 VARIO without controller (o.C.) PC 3010 VARIO without controller (o.C.) PC 3004 VARIO without controller (o.C.) PC 3003 VARIO without controller (o.C.) PC 3002 VARIO without controller (o.C.)