System installation system configuration – USL CCE-100 User Manual
Page 5
CCE-100
INSTRUCTION MANUAL
Ultra Stereo Labs, Inc.
- 8 -
CCE-100
INSTRUCTION MANUAL
Ultra Stereo Labs, Inc.
- 9 -
System Installation
System Configuration
1. Choose a location for the CCE-100. The CCE-100 may be rack mounted if the
optional rack mount adapter (USL PN: DAX-RAX), was supplied. The CCE-100
needs access to the digital cinema control network, power, and cables to drive the
chosen display. Display cables may be:
1. RS232 cable with 9 pin D connector to Rear Window ® display.
2. 75 ohm coax (such as RG-59/U) with BNC connectors to carry cap-
tioning RF to an IR panel in the auditorium.
2. Apply power and configure the system, as described below.
3. Connect the CCE-100 to the digital cinema control network and the display de-
vice (cable to Rear Window
®
display and/or cable to IR panel).
The system is configured using a web browser on a laptop computer. Connect
the laptop to the CCE-100 using a crossover Ethernet cable. A straight through
cable may be used on many laptops, but a crossover will work with all laptops. Set
the laptop IP address to 169.254.1.123 with a subnet mask of 255.255.0.0. Open
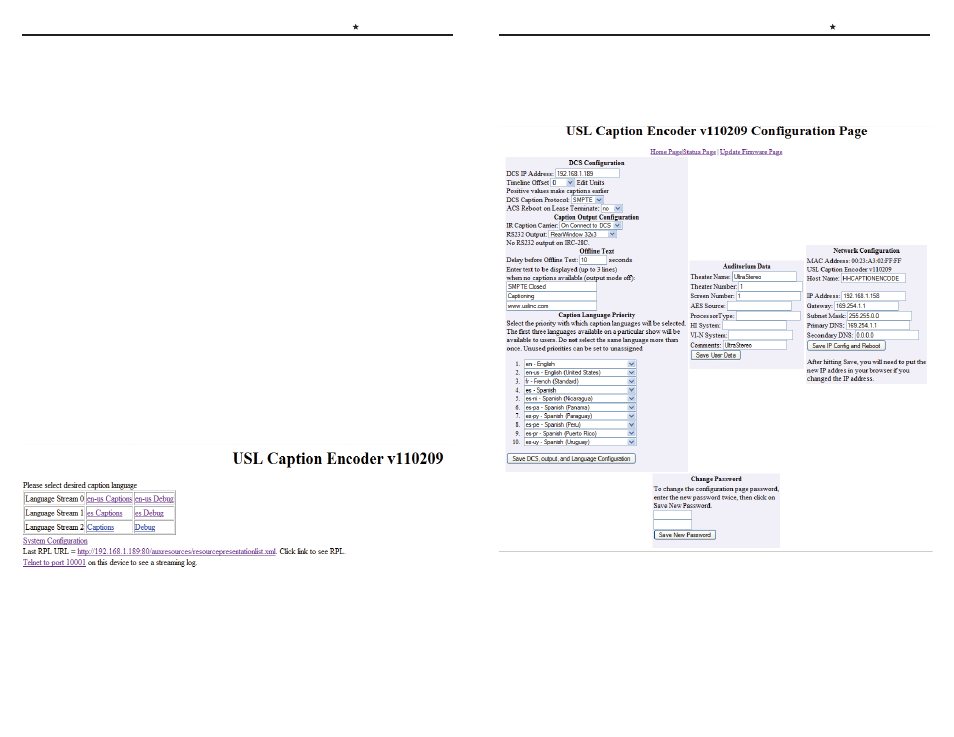
a web browser and go to http://169.254.1.1 . A page similar to that below should
appear.
Click “System Configuration” to get to the configuration screen. You will be
prompted for a username and password. The username is admin and the pass-
word is ultra. A configuration screen similar to that below should appear.