Top Flite TOPA0905 User Manual
Page 35
❏
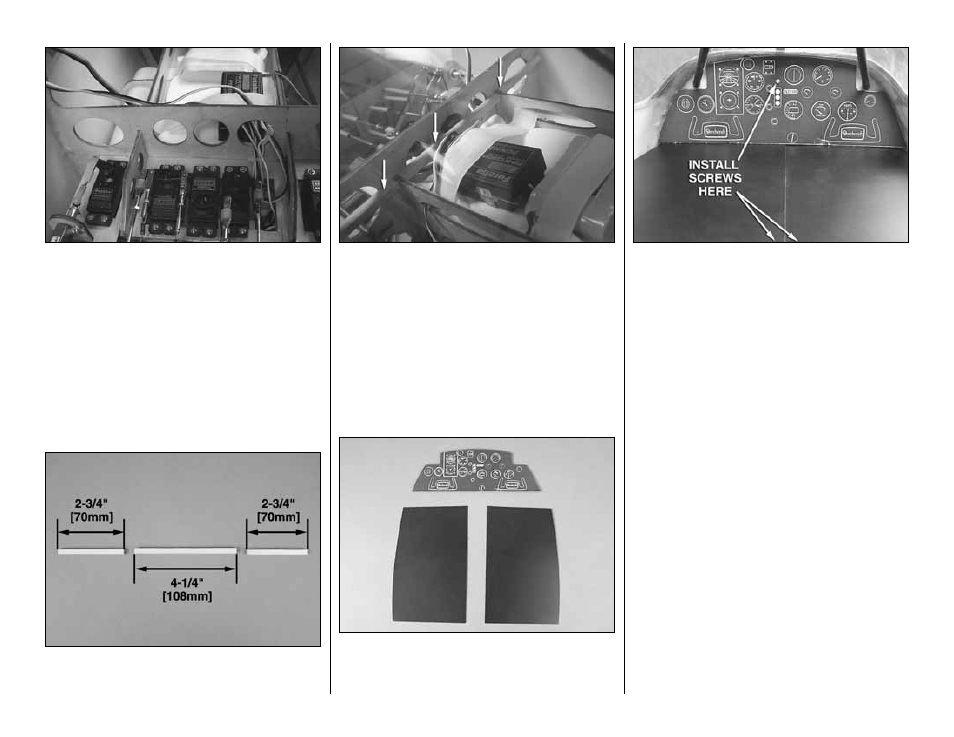
12. Install the servos to the receiver. Be sure to
plug extensions into the receiver for the flaps and
ailerons. Slide the receiver antenna into the antenna
tube shown in the picture at step 10.
❏
13. Install a switch and charge jack in the fuselage.
We installed ours on the bottom of the fuselage
to maintain the scale appearance of the plane. You
may wish to locate it in a more convenient place on
the fuselage.
❏
14. Cut the 1/4" x 14" x 10" [6mm x 6mm x 254mm]
hardwood stick into three pieces: two sticks 2-3/4"
[70mm] long and one stick 4-1/4" [108mm] long.
❏
15. Glue the sticks to the front of the former
and even with the top of the receiver/battery
compartment formers.
❏
16. Locate the cockpit floor and the plywood
instrument panel. Cut the instrument panel decal
from the decal sheet. Then, stick it to the plywood
instrument panel.
❏
17. Place the cockpit floor over the receiver and
battery resting on the hardwood sticks you just glued
in place. Using a finger drill (if you do not have a
finger drill you can make a finger drill with a small
dowel and a drill bit), drill a 1/16" [1.6mm] hole
through the cockpit floor and the hardwood stick.
Install a #2 x 3/8" screw into the hole you drilled to
secure the cockpit floor to the hardwood sticks. Drill
a 1/16" [1.6mm] hole into the instrument panel. Slide
the instrument panel into the cockpit and screw a
#2 x 3/8" [10mm] screw into the panel and the former
behind the panel. The instrument panel will hold the
front of the floor in place.
❏
18. Glue a seat back to the cockpit floor on both
the left and right side of the cockpit.
- 35 -