Top Flite TOPA0905 User Manual
Page 11
- 11 -
❏ ❏
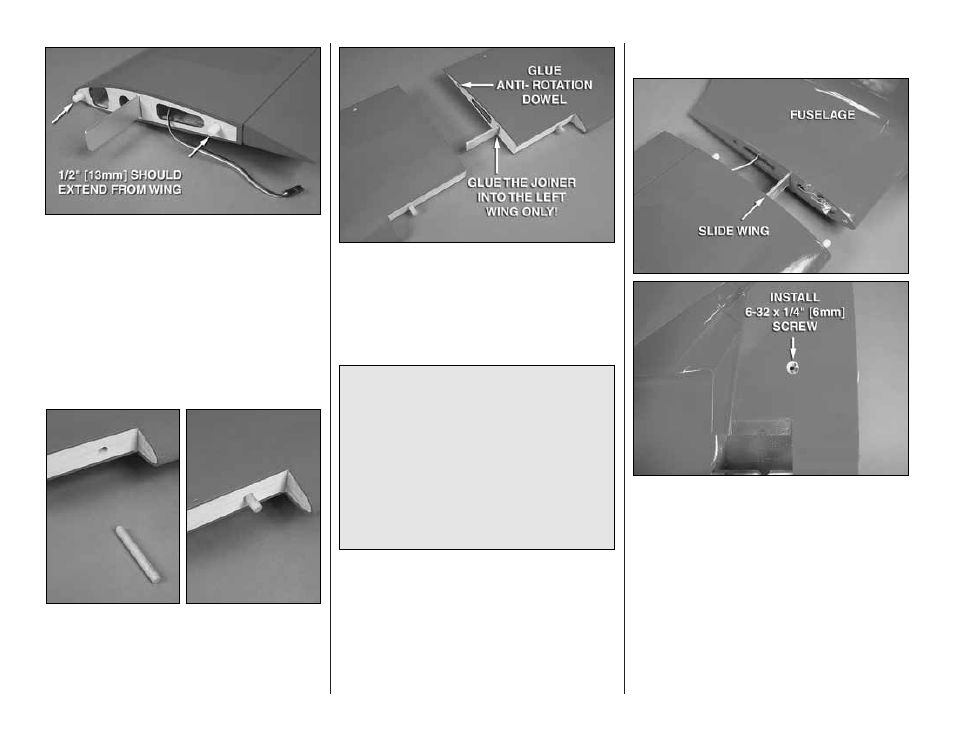
4. Using 30-minute epoxy, glue two nylon anti-
rotation dowels into the holes at the root of the wing.
Glue them in so 1/2" of the dowels extends from
the wing.
❏
5. Repeat steps 1-4 for the other wing.
❏
6. Test fit a 3/8" x 2-1/2" [10mm x 64mm] wood
dowel into the hole at the leading edge of the top
wing. Push it into the wing, making sure it catches in
the hole further inside of the wing. Once you are
satisfied with the fit, epoxy them in place. Repeat this
for the other wing panel.
❏
7. Glue the remaining wing joiner into the joiner
pocket of the top left wing using the same procedure
used for installing them in the bottom wing.
Only glue
the joiner into the left wing! Glue the remaining
nylon anti-rotation dowel in the hole in the wing root.
Attach the Wings to the Fuselage
❏
1. Slide the bottom wing panels into the sides of
the fuselage. Install a 6-32 x 1/4" [6mm] socket head
cap screw into the threaded holes on the bottom of
the fuselage. Push the wing tight to the fuselage.
Then, tighten the screw against the wing joiner.
Did you know…
The Model 17’s unusual wing
configuration—the upper wing inversely staggered
behind the lower—and unique shape resulted in a
design that maximized the pilot’s visibility while
minimizing the aircraft’s tendency to stall. The fabric-
covered fuselage was faired with wood formers and
stringers. The Staggerwing’s use of retractable
conventional landing gear, uncommon at that time,
combined with streamlining, reducing the weight of
the materials, and its use of powerful radial engines
ranging from 225 to 710 horsepower produced an
aircraft with impressive performance.