Top Flite TOPA0703 User Manual
Page 27
27
❏
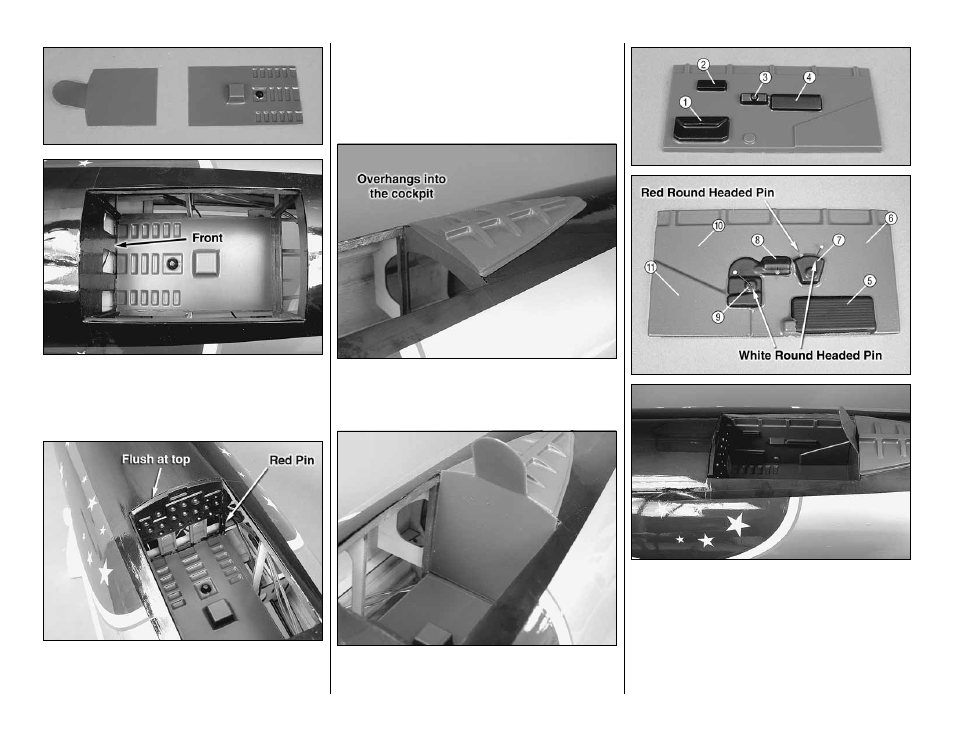
4. Trim the armor plate and the cockpit fl oor along
the edge so that they lay fl at. Use medium CA to glue
the fl oor in the bottom of the cockpit. The fl oor should
be positioned as far forward as possible.
❏
5. Trim the plastic from around the rudder pedals
on the bottom of the instrument panel. Insert one of
the red round headed pins in the lower right corner
of the instrument panel to represent a knob. Glue the
instrument panel in the front of the cockpit so that
the top of the instrument panel is fl ush with the top of
the fuselage. Canopy glue or thick CA works well for
attaching the instrument panel.
❏
6. Trim and glue the canopy track to the top of
the fuselage. Note that the front of the canopy track
overhangs into the cockpit.
❏
7. Glue the armor plate to the back of the cockpit.
❏
8. Trim the sides of the cockpit leaving
approximately 1/16" [1.6mm] lip around the edges.
The ends will need to be trimmed to fi t between the
instrument panel and the armor plate. Apply the
decals to the numbered locations on the side cockpit
panels. Install the white and red round head pins and
decals as shown. The top edge of the cockpit sides
should fi t under the stringer at the top of the cockpit.