Top Flite TOPA0703 User Manual
Page 24
24
❏
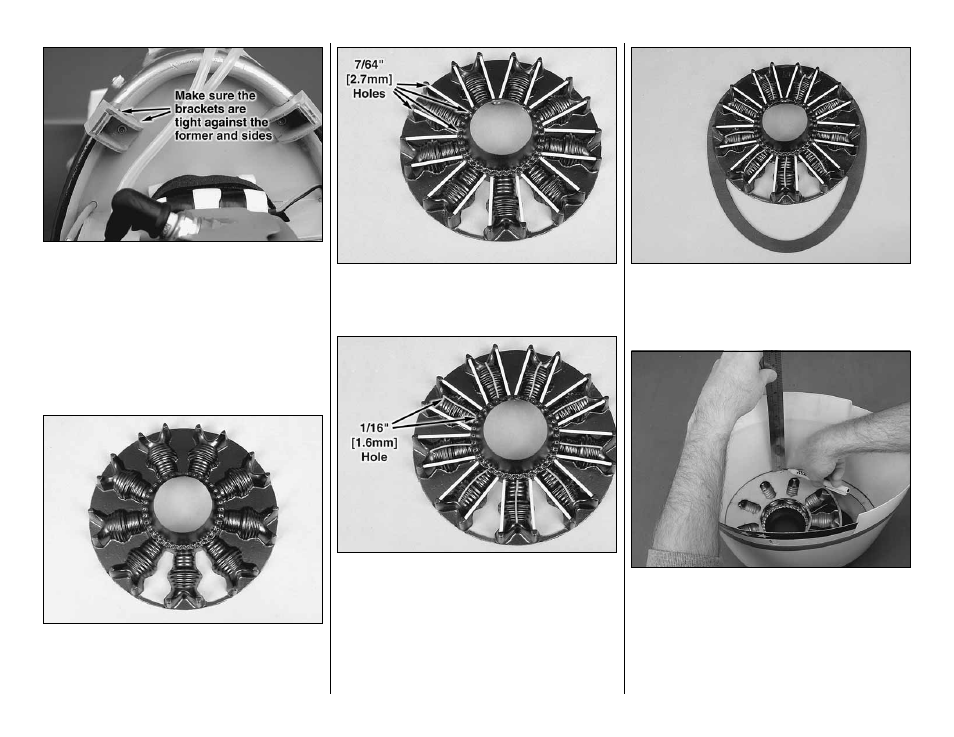
2. Position the two short cowl mounting brackets in
the two bottom slots in the front of the fuselage. Drill a
1/16" [1.6mm] hole through the forward former using
the hole in the cowl mounting bracket as a guide.
Attach the cowl mounting bracket to the forward
former using 6-minute epoxy, #2 x 3/8" [9.5mm] sheet
metal screws and #2 fl at washers.
❏
3. Install the four long cowl mounting brackets in
the remaining slots following the same procedure.
❏
4. Cut out two openings between the cylinders and
the center of the plastic radial engine. The center hole
needs to be large enough to clear the drive washer
of the gas engine.
❏
5. Drill 7/64" [2.7mm] holes in the bottom of the
rocker arms and in the crankcase as shown. Glue the
eighteen aluminum tubes in the holes.
❏
6. Drill 1/16" [1.6mm] holes in the front of the
cylinder head and the crankcase. Glue the red
sparkplug wire in the holes.
❏
7. The plywood engine frame can be painted black.
Use 6-minute epoxy to glue the plastic radial engine
to the plywood engine frame. Align the radial engine
with the embossed circle on the plywood frame.
❏
8. Test fi t the radial engine assembly in the cowl.
Position it so it is centered and equal distance from
the edge of the cowl. Mark the location on the inside
of the cowl. This will help you reposition the engine
once you have applied epoxy to the engine assembly.
Use masking tape to hold the dummy engine in
position and test fi t the cowl on the fuselage over the
gas engine.