Toa CS-64BS User Manual
Page 6
6
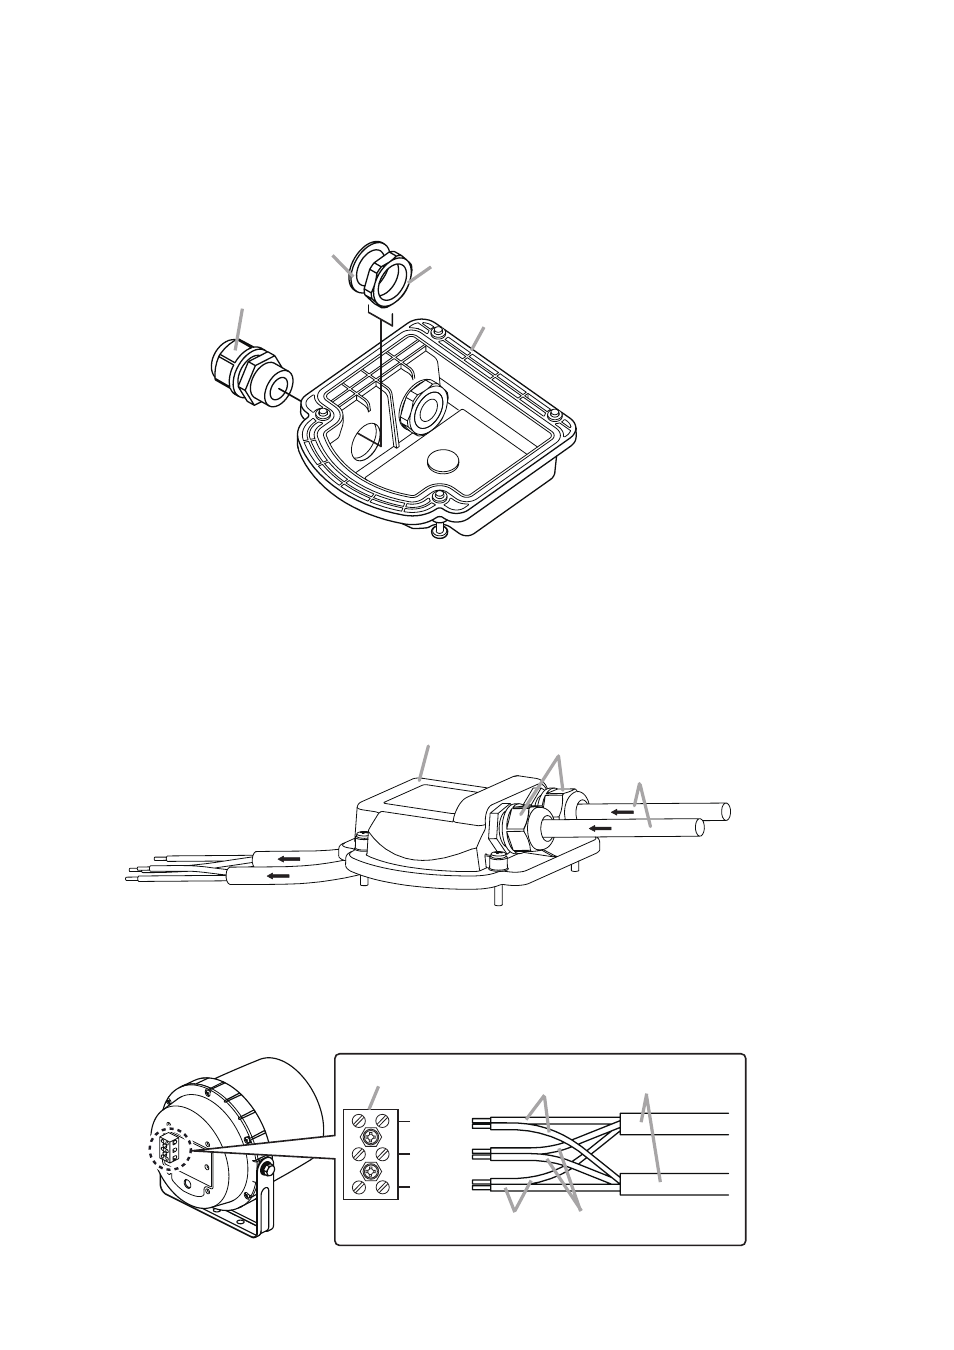
Step 3. Strip the speaker cable jacket. (Refer to page 4, Step 1.)
Step 4. Run one each of speaker cables through the cable gland.
Step 5. Connect the speaker cables with the same polarity to each terminal according to the polarity indication
at the screw terminal.
EARTH
HOT
COM
COM
HOT
EARTH
Screw terminal
Speaker cables
Terminal cover
Speaker cables
Cable glands
Cable gland
Waterproof gasket
Nut
Terminal cover
Step 2. Mount the cable gland to be added.
Notes
• Prepare the cable gland of PG 13.5 size separately.
• Ensure that the cable gland is securely tightened. If loosely tightened, water may get inside the
terminal cover.
See also other documents in the category Toa Acoustics:
- F-2000B (20 pages)
- F-2322CU2 (16 pages)
- F-2352SC (12 pages)
- F-2852CU2 (16 pages)
- FB-100 (8 pages)
- FB-120B (4 pages)
- FB-150B (4 pages)
- FG-C0651 (1 page)
- H-1 (12 pages)
- H-2 (12 pages)
- H-3 (12 pages)
- HB-1 (12 pages)
- HS-1200BT (8 pages)
- HS-120B (8 pages)
- HX-5B (16 pages)
- HX-7B (20 pages)
- HY-0871CL (2 pages)
- HY-0871WS (2 pages)
- HY-1200VB (16 pages)
- HY-60D (2 pages)
- HY-AH1 (2 pages)
- HY-BC1 (2 pages)
- HY-BH10B (1 page)
- HY-C0801 (1 page)
- HY-CL10B (1 page)
- HY-CN1B (4 pages)
- HY-CN7B (8 pages)
- HY-CW1B (1 page)
- HY-MS7B-W (8 pages)
- HY-MT7 (4 pages)
- HY-PF1B (4 pages)
- HY-PF7B (4 pages)
- HY-RR1 (2 pages)
- HY-RR2 (2 pages)
- HY-ST1 (1 page)
- HY-TB1 (2 pages)
- HY-TM7B-WP (4 pages)
- HY-TR1 (2 pages)
- HY-VM7B (12 pages)
- HY-W0801 (1 page)
- HY-WM1B (1 page)
- HY-WM2B (1 page)
- HY-WM7B (2 pages)
- PC-1867F (4 pages)
- PJ-100W (2 pages)