Wiring – Toa CS-64BS User Manual
Page 4
4
4. WIRING
The terminal cover is not mounted to the speaker unit when shipped from the factory.
Note
To complete speaker installation, be sure to attach the terminal cover after finishing cable connections.
If the unit is left without the terminal cover attached, water or moisture may get inside the speaker, causing the
unit malfunction.
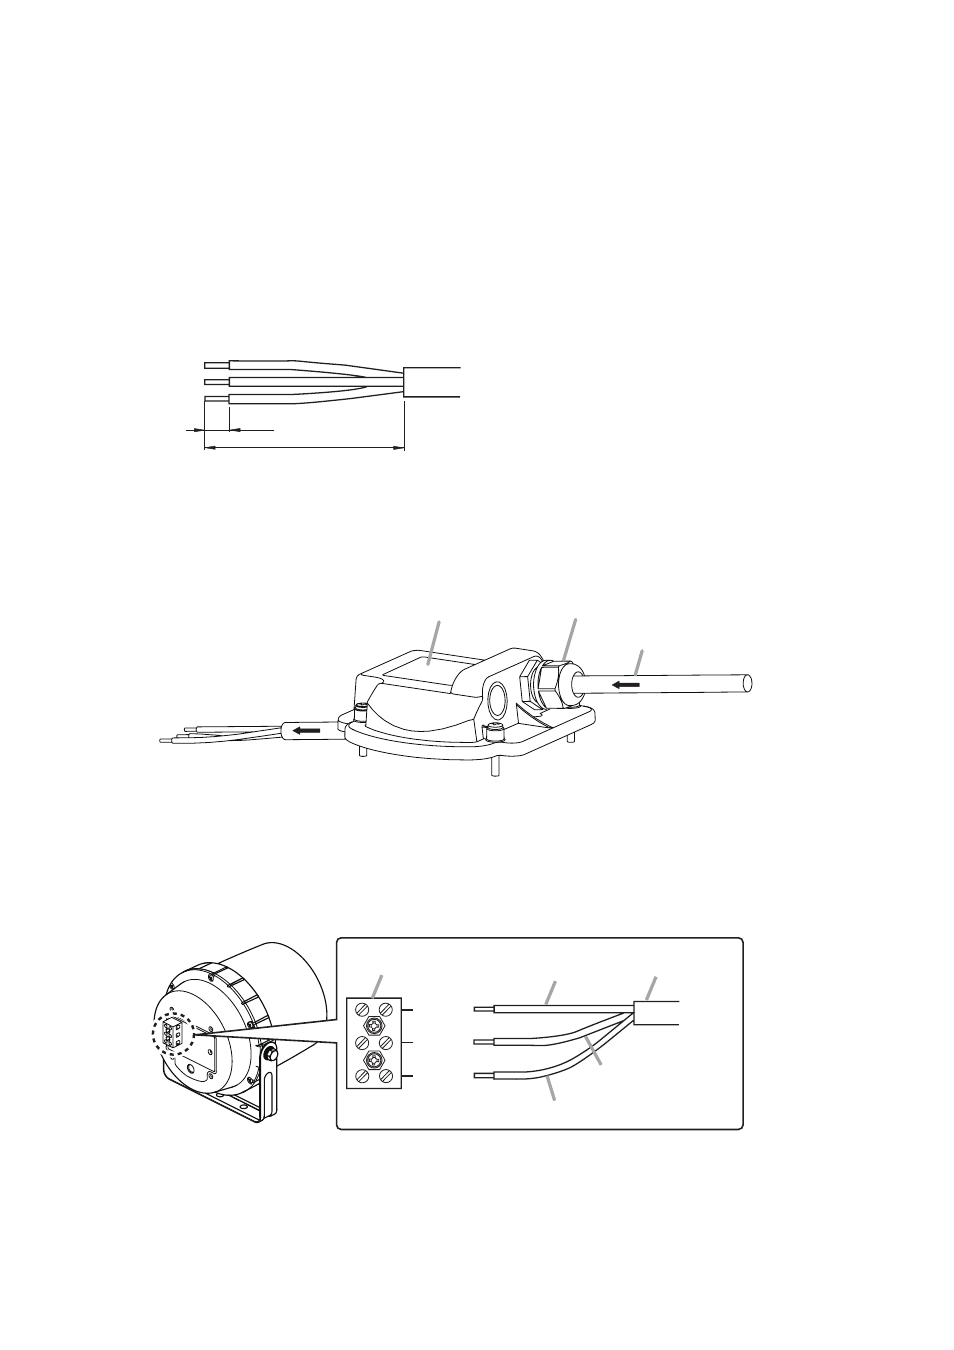
4.1. When No Bridge Connection is Required
Step 1. Strip the speaker cable jacket as shown below.
Step 3. Connect the speaker cable according to the polarity indication at the screw terminal.
Step 2. Run the speaker cable through the cable gland.
65 (2.56)
8
(0.31)
Unit: mm (in)
Terminal cover
Speaker cable
Cable gland
EARTH
HOT
COM
COM
HOT
EARTH
Screw terminal
Speaker cable
See also other documents in the category Toa Acoustics:
- F-2000B (20 pages)
- F-2322CU2 (16 pages)
- F-2352SC (12 pages)
- F-2852CU2 (16 pages)
- FB-100 (8 pages)
- FB-120B (4 pages)
- FB-150B (4 pages)
- FG-C0651 (1 page)
- H-1 (12 pages)
- H-2 (12 pages)
- H-3 (12 pages)
- HB-1 (12 pages)
- HS-1200BT (8 pages)
- HS-120B (8 pages)
- HX-5B (16 pages)
- HX-7B (20 pages)
- HY-0871CL (2 pages)
- HY-0871WS (2 pages)
- HY-1200VB (16 pages)
- HY-60D (2 pages)
- HY-AH1 (2 pages)
- HY-BC1 (2 pages)
- HY-BH10B (1 page)
- HY-C0801 (1 page)
- HY-CL10B (1 page)
- HY-CN1B (4 pages)
- HY-CN7B (8 pages)
- HY-CW1B (1 page)
- HY-MS7B-W (8 pages)
- HY-MT7 (4 pages)
- HY-PF1B (4 pages)
- HY-PF7B (4 pages)
- HY-RR1 (2 pages)
- HY-RR2 (2 pages)
- HY-ST1 (1 page)
- HY-TB1 (2 pages)
- HY-TM7B-WP (4 pages)
- HY-TR1 (2 pages)
- HY-VM7B (12 pages)
- HY-W0801 (1 page)
- HY-WM1B (1 page)
- HY-WM2B (1 page)
- HY-WM7B (2 pages)
- PC-1867F (4 pages)
- PJ-100W (2 pages)