Toa H-1 User Manual
Page 8
8
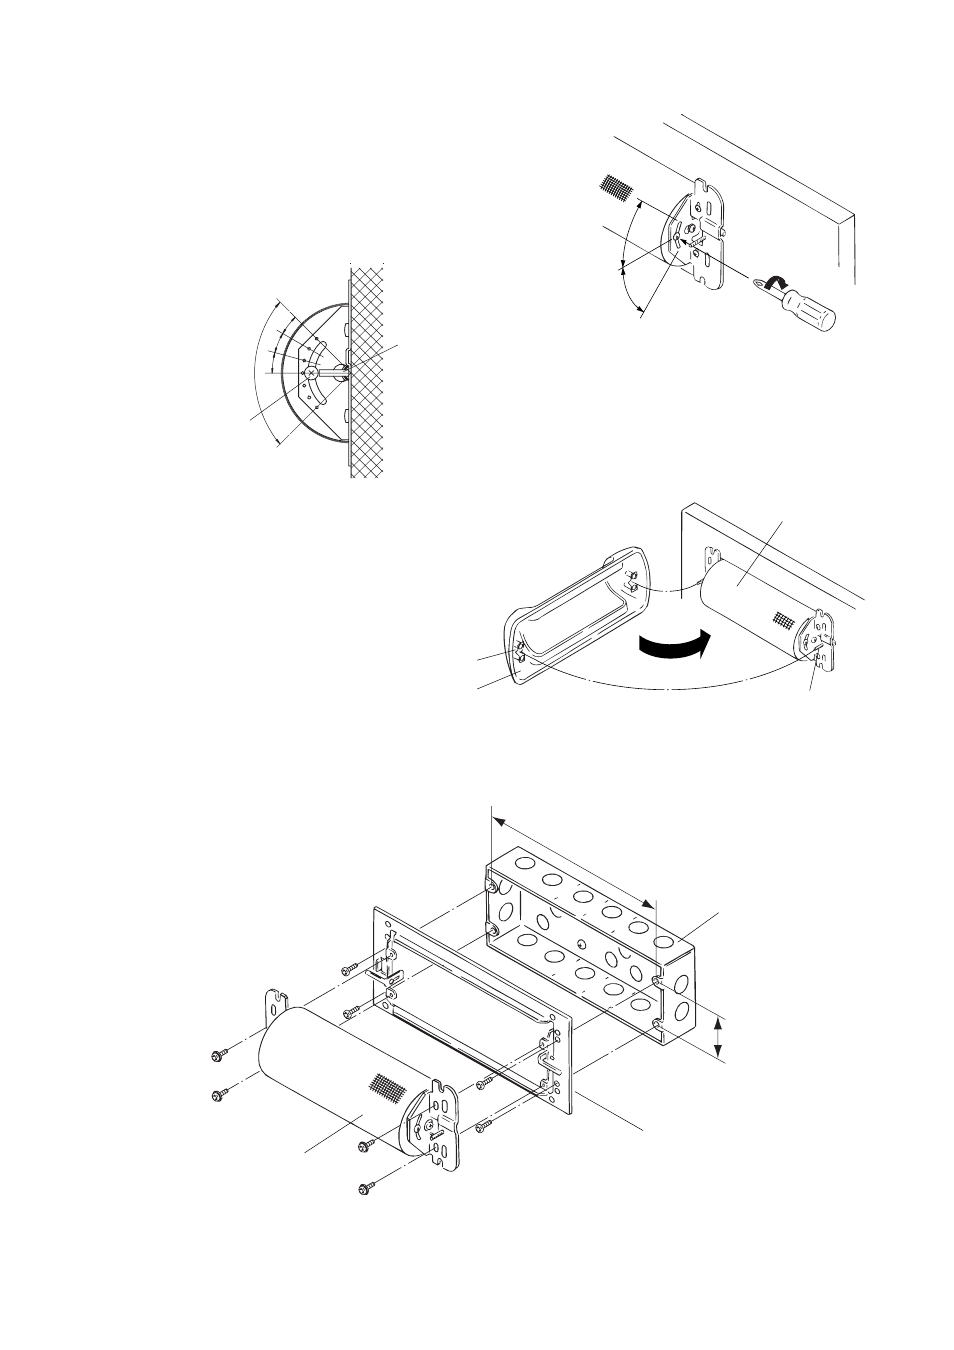
3-2. Loosen the angle adjustment screws. After adjusting
the angle, retighten the screws.
Tip
The mounting angle can be adjusted for up to ±45°.
Since the mounting bracket is marked with mounting
angles at 15° intervals, use this marking as a guide
when adjusting the angle.
3-3. Align the two securing clips on the Trim Piece with
the speaker's two stud screws, then push the Trim
Piece onto the speaker until the Trim Piece is snug to
the wall or ceiling surface.
5.2. Mounting the Speaker to an Electrical Box Using The Adapter Panel
The H-1 speaker system can be mounted to walls or ceilings using an electrical box*. Mount the Adapter
Panel to the electrical box as shown below. Further mounting procedures are the same as detailed in Steps 2
and 3.
* Distance between mounting holes (A) x (B):
254 mm (10") x 66.7 mm (2
5
/
8
") or
255.6 mm (10
1
/
10
") x 55.6 mm (2
3
/
16
")
45°
45°
90
15
15
15
Stud screw
Angle adjustment screw
(A)
(B)
Electrical box
Adapter Panel
Trim Piece
Stud screw
Securing clip
H-1 speaker
H-1 speaker
Memo
Electrical box mounting screws are attached to the H-1 speaker.