Toa H-1 User Manual
Page 6
6
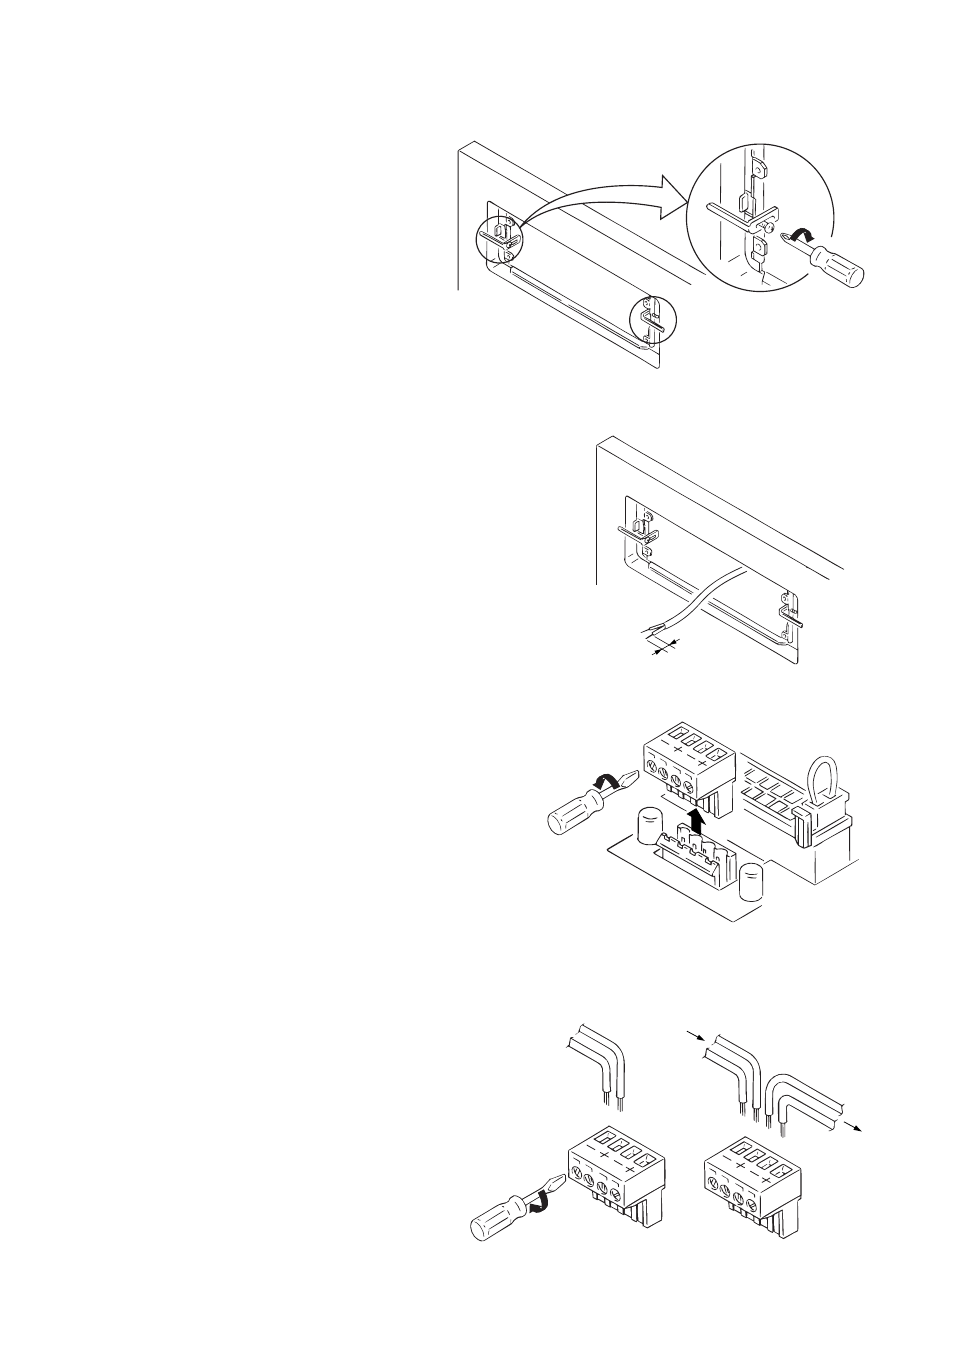
1-4. Clamp the wall or ceiling panel using the two board
clamps, and secure with the clamp screws.
Step 2. Wiring and impedance changes
2-1. Pull the cables out of the mounting hole in the wall or
ceiling, then strip the insulation back about 5mm from
the cable ends.
Note
Usable cable: Solid cable or stranded cable (0.2 mm
2
- 2.5 mm
2
) (Corresponding to AWG No.
24 - 14)
2-2. Remove the detachable input connector from the
speaker, then loosen the connector screws with a
small slot screwdriver.
2-3. Insert the stripped cable ends into the input
connector, and tighten the connector screws.
Note
When not bridging connections, be sure to also
tighten the screws of the terminals not in use to avoid
vibration or rattling noise.
About 5 mm
•
When not bridging
connections
•
When bridging
connections
From amplifier
To next
speaker
- F-2000B (20 pages)
- F-2322CU2 (16 pages)
- F-2352SC (12 pages)
- F-2852CU2 (16 pages)
- FB-100 (8 pages)
- FB-120B (4 pages)
- FB-150B (4 pages)
- FG-C0651 (1 page)
- H-2 (12 pages)
- H-3 (12 pages)
- HB-1 (12 pages)
- HS-1200BT (8 pages)
- HS-120B (8 pages)
- HX-5B (16 pages)
- HX-7B (20 pages)
- HY-0871CL (2 pages)
- HY-0871WS (2 pages)
- HY-1200VB (16 pages)
- HY-60D (2 pages)
- HY-AH1 (2 pages)
- HY-BC1 (2 pages)
- HY-BH10B (1 page)
- HY-C0801 (1 page)
- HY-CL10B (1 page)
- HY-CN1B (4 pages)
- HY-CN7B (8 pages)
- HY-CW1B (1 page)
- HY-MS7B-W (8 pages)
- HY-MT7 (4 pages)
- HY-PF1B (4 pages)
- HY-PF7B (4 pages)
- HY-RR1 (2 pages)
- HY-RR2 (2 pages)
- HY-ST1 (1 page)
- HY-TB1 (2 pages)
- HY-TM7B-WP (4 pages)
- HY-TR1 (2 pages)
- HY-VM7B (12 pages)
- HY-W0801 (1 page)
- HY-WM1B (1 page)
- HY-WM2B (1 page)
- HY-WM7B (2 pages)
- PC-1867F (4 pages)
- PJ-100W (2 pages)