Toa SV-200MA User Manual
Page 44
44
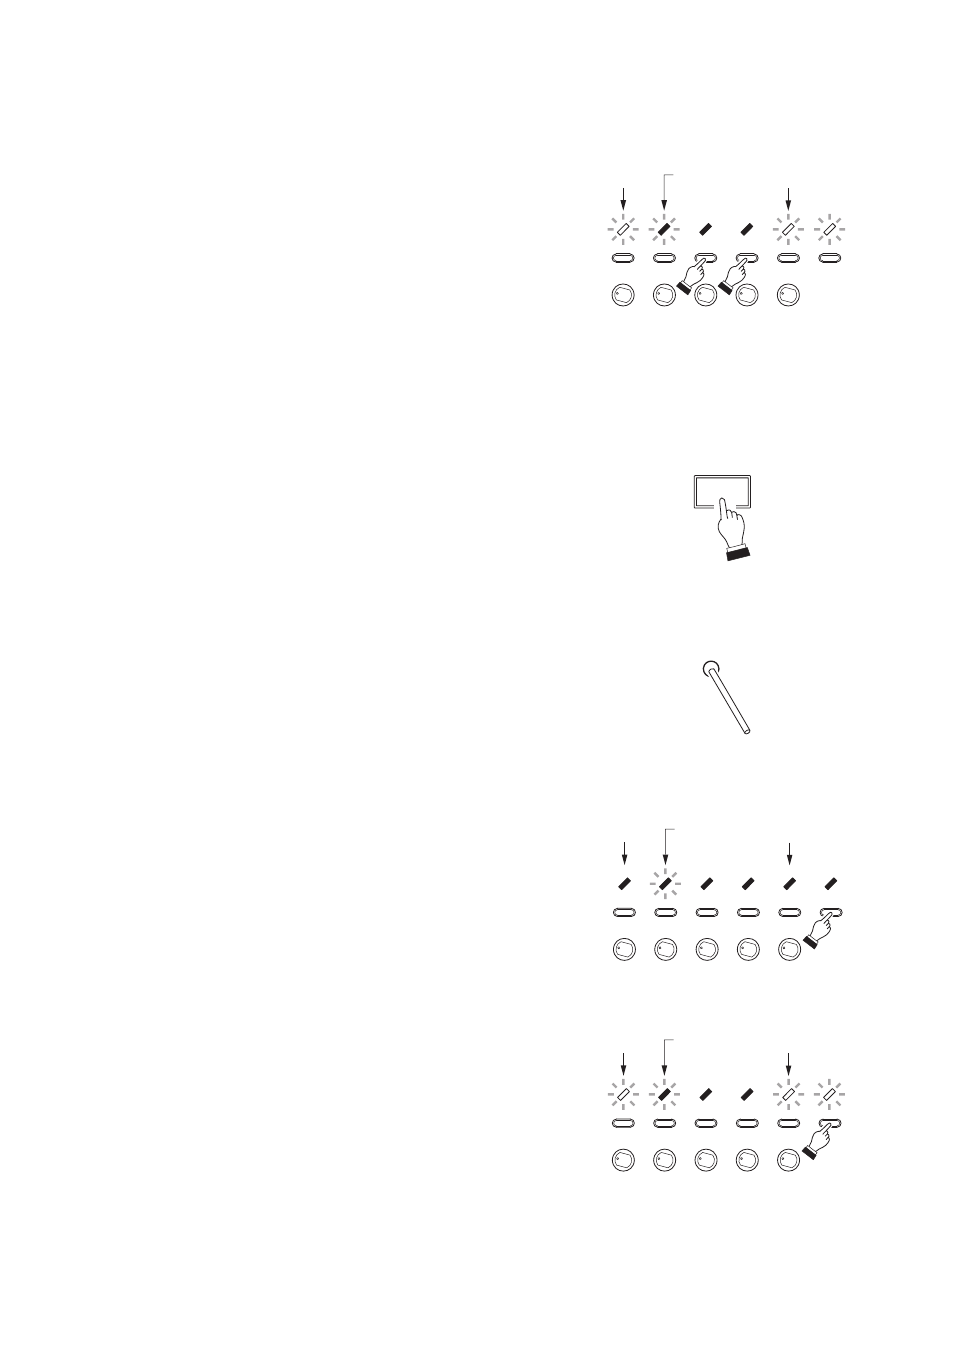
Step 4. Zone number setting (Example: Zones 2, 3, and 4)
Press the ZONE 3 and ZONE 4 keys to select the corresponding zones. (As a result, The Zones 2, 3,
and 4 are selected.)
• Indicators for ZONE 3 and ZONE 4 will light.
(This represents that Zones 3 and 4 were selected.)
• Indicators for ZONE 1 and ZONE 5 will flash.
(This represents that Zones 1 and 5 are not selected.)
• The ZONE 2 indicator remains "slow flashing*." (This
represents that Group 2 has already been selected,
and that Zone 2 is currently selected as default
setting.)
Note: For "All zones" settings in this step, refer to the section "All zones setting and its cancellation"
below.
Step 5. Programming of the zone number setting
Press the POWER switch.
The Zones 2, 3, and 4 will then be programmed,
automatically returning the procedure to Step 2.
According to the instructions in Step 2, set the next
zone group. (Repeat Steps 2 through 5.)
Step 6. Group setting completion
After completing all group settings, press the Reset key
using a pointed object.
This completes the setting mode, returning the unit to
broadcast standby mode.
* See p. 45 Indicator status.
[All zones setting and its cancellation]
Pressing the ALL key selects all zones and places the unit in the
external attenuator bypass mode. The ALL indicator and the
indicators for ZONE 1 and ZONE 3 – ZONE 5 will light, while the
ZONE 2 indicator will slowly flash.
When the ALL indicator is steadily on, if the ALL key is pressed,
the selection of all zones will be cancelled. Then, the setting
returns to the situation before the "ALL zones" was set.
ZONE 1
ZONE 2
ZONE 3
ZONE 4
ZONE 5
ALL
Zone 1
Group 2
(Zone 2)
Zone 5
ZONE 1
ZONE 2
ZONE 3
ZONE 4
ZONE 5
ALL
Zone 1
Group 2
(Zone 2)
Zone 5
ZONE 1
ZONE 2
ZONE 3
ZONE 4
ZONE 5
ALL
Zone 1
Group 2
(Zone 2)
Zone 5
POWER
Reset