StarTech.com SATDUP11IMG Manual User Manual
Page 11
Instruction Manual
8
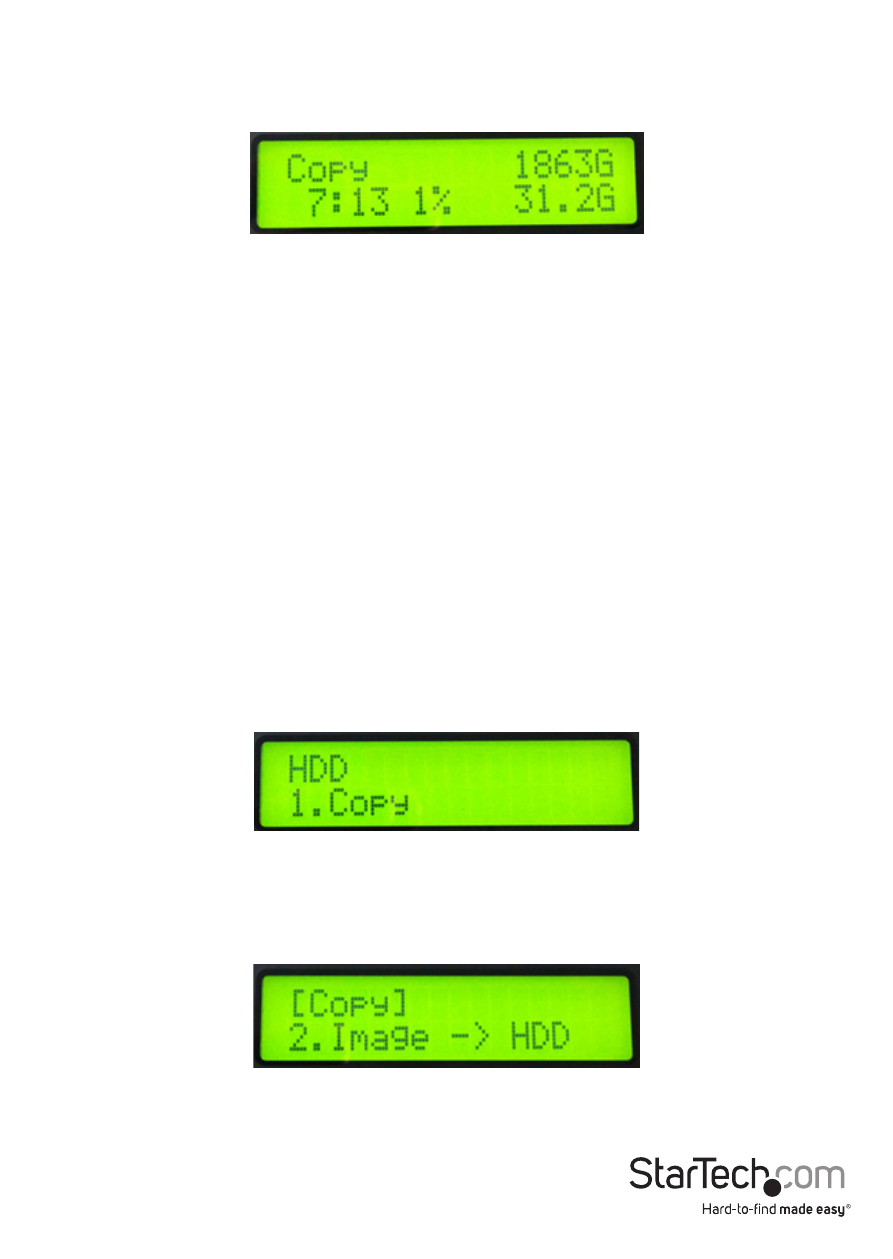
5. Once the drives have been analyzed (and if necessary, formatted the SATDUP11IMG
will begin to copy your SSD/HDD image to the Image Drive.
6. The image will be completely copied when the % indicator on the Display Screen
reaches 100%. The image drive now contains the drive image (and if working with a
non-formatted drive, an image drive has also been created.)
1.2 Image -> HDD
The Image to HDD enables you to restore an HDD Image from an Image Library Drive.
WARNING! The drive attached to the Target port will be overwritten, deleting
all data currently stored on the drive.
Note: The target drive must be equal to or larger than the source drive Image.
If the target drive is larger than the source drive image, any additional space
will remain unformatted.
1. Using the UP/DOWN Navigation buttons and the Display Screen, locate
1.Copy from the on screen menu, and press the OK button, to access the [Copy]
sub menu.
2. Using the UP/DOWN Navigation buttons and the Display Screen, locate
2.Image-> HDD, on the [Copy] sub menu, and press the OK button.