Install the rotator, Clean the oven, Install the power cord – Shellab SHO1-2 User Manual
Page 9
Installation
9
Install the rotator
The rotator (also called rotisserie, Sheldon part number 9670511; see Figure 5) comes
with your 1013 oven. To install the rotator into the oven:
1. Set the AC power switch to OFF.
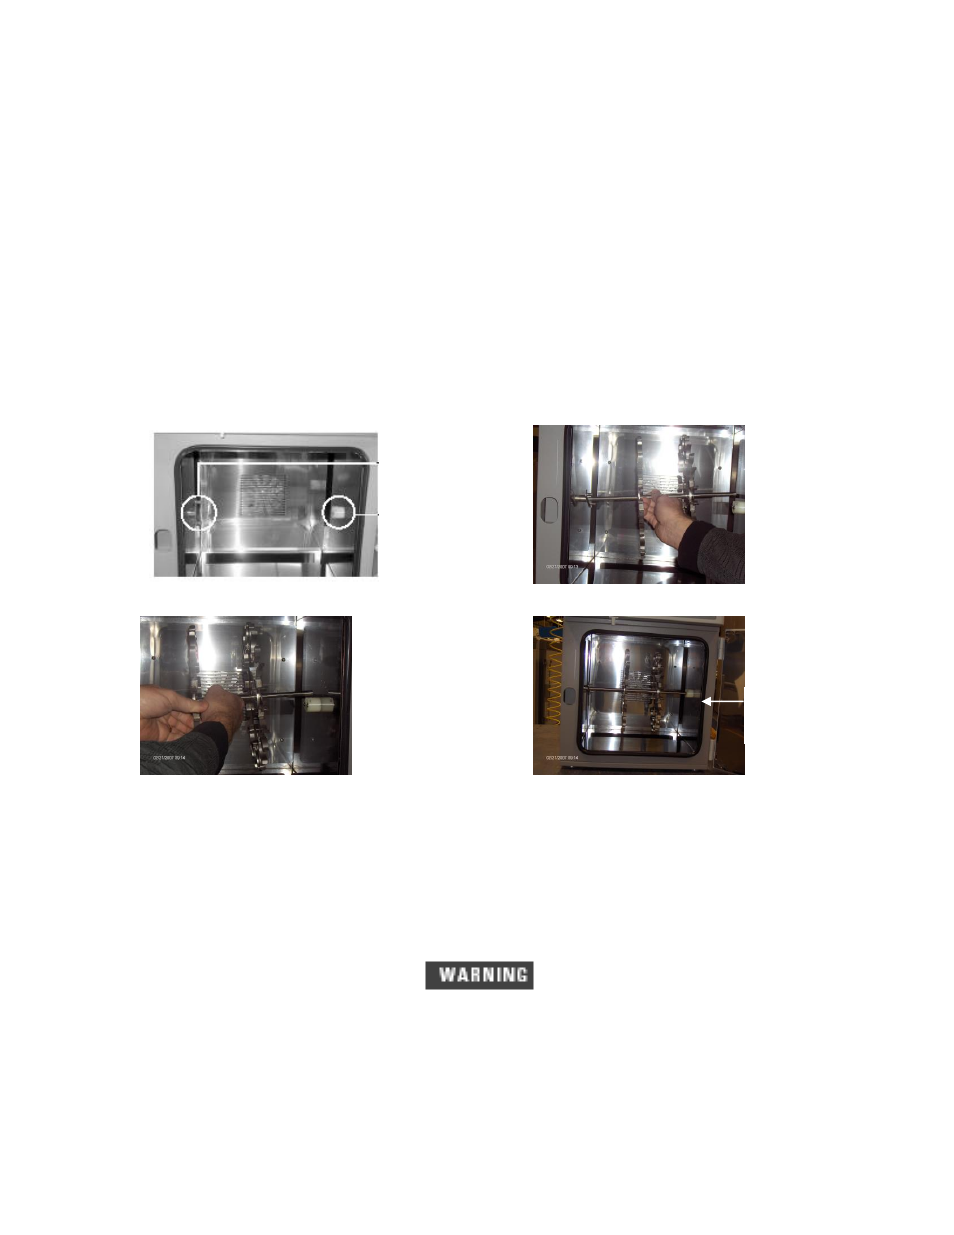
2. Open the oven. Locate the rotator drive shaft coupling on the left side oven wall
and the rotator shaft support bushing on the right side oven wall. See Figure 2.
3. Move the rotator into the oven and insert the two pins on the rotator drive shaft
coupling into the two holes on the rotator coupling. See Figure 3.
4. While holding the rotator to keep the drive coupling attached, lower the rotator
shaft into the slot in the rotator shaft support bushing. See Figure 4.
5. Complete rotator installation by inserting the brass locking pin through the two
holes in the shaft support bushing. See Figure 5.
Figure 2 Rotator shaft attachment locations
Figure 3 Attaching the rotator to the drive shaft coupling
Figure 4 Inserting the rotator shaft into the rotator shaft
support bushing
Figure 5 Rotator correctly installed
Clean the oven
Before first use, clean the oven as described in “Cleaning” on page 14.
Install the power cord
The correct power cord that is appropriate for your country will ship with the unit.
Use of an inappropriate power cord may damage your oven or pose a safety hazard.
Holes for brass locking pin
Rotator drive shaft
coupling with two pins
Rotator shaft support
bushing