Sealand duckbill valve installation instructions, Bowl seal kit installation instructions – SeaLand Vacuum Test Gauge User Manual
Page 2
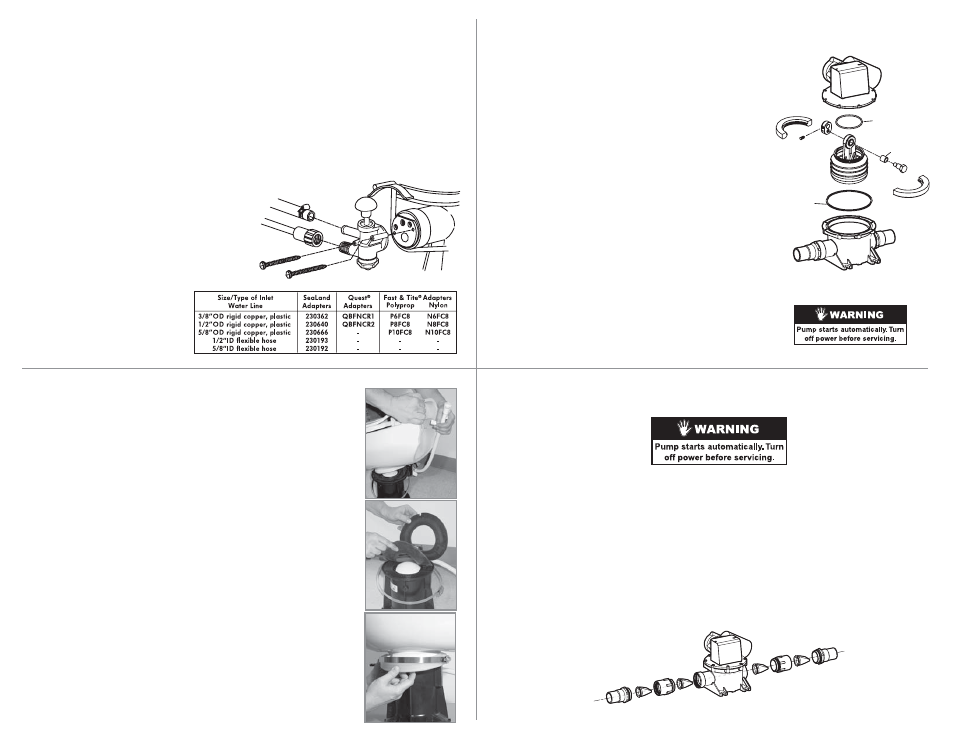
Water Valve Installation Instructions
Vacuum/Discharge Pump Repair Kit Instructions
PUMP BODY
Large
rubber seal
Plastic
bushing
Rubber
O-ring
SeaLand Duckbill Valve Installation Instructions
1. Flush a substantial amount of soapy water through the pump.
2. Turn off electrical power to pump.
3. Remove both suction (inlet) and discharge (outlet) hoses from the pump.
4. Remove both valve nipples and valve adapters from suction (inlet) and discharge (outlet)
sides of the pump.
5. Replace old duckbill valves (two required for each side). See S-Series Pump Diagram for
correct valve orientation.
6. Tighten valve nipples and adapters one-half turn beyond hand-tight. NOTE: Overtightening
will cause valve distortion and early failure.
7. Install both suction and discharge hoses and secure with hose clamps.
8. Turn on electrical power and flush water through system to prime pump. Check system for
leaks.
S-SERIES VACUUM PUMP
1. Flush a substantial amount of soapy water through the pump.
2. Turn off electrical power to pump.
3. Remove pump cover (2 phillips head screws).
4. Remove motor bracket from pump (4 - 5/16" hex
head bolts).
5. Remove brass shoulder bolt (1 - 3/4" hex head bolt).
6. Remove pump top closure bolts (8 - 5/16" hex head
bolts).
7. Remove top closure.
8. Remove large rubber seal from the pump body.
Clean seal groove.
9. Remove rubber O-ring from bellows. Clean O-ring
seat.
10. Replace O-ring and seal, and lubricate them with
liquid soap.
11. Replace plastic bellows bushing. Lubricate inside of
bushing with grease after inserting in the connecting rod
hole.
12. Carefully press top closure back in place. Be sure to not pinch
the rubber O-ring.
13. Reassemble pump by reversing the procedure above.
14. Operate pump and check for water leaks.
TO REMOVE OLD SEALS
1. Turn off water supply.
2. Press flush pedal and drain water from toilet bowl.
3. Remove pedestal cover (if applicable).
4. Loosen stainless steel band and remove plastic half clamps that hold china
bowl and plastic base together. CAUTION: Do not let china bowl fall off
base.
5. Tilt china bowl forward, grasp vacuum breaker attached to back of toilet,
and pull it out of toilet. Set toilet bowl aside.
6. Remove old seals. Inspect flush ball for nicks, scratches or mineral build-up.
Clean or replace as necessary.
TO INSTALL NEW SEALS
1. Place thin seal on flush ball with THIS SIDE UP showing. Align notch on edge
of seal with pin on edge of base.
2. Place thick bowl seal on top of ball seal with notch on edge aligned with pin
on base. Align overflow holes on both seals only on toilets with overflow holes
in toilet bowl.
3. Put china bowl back on base, aligning notch with pin on base, and centering
the bowl outlet over the flush ball. Reattach vacuum breaker to back of toilet,
pushing it all the way into the rubber gasket.
4. Reinstall plastic half clamps under loosened steel band, making sure tabs
interlock on front of toilet. There will be a small gap at the rear of the toilet.
5. Tighten stainless steel band clamp to about 65 in.-lbs. of torque.
6. Turn on water supply.
7. Reinstall pedestal cover
(if applicable).
Bowl Seal Kit Installation Instructions
TO REMOVE OLD VALVE
1. Turn off water supply.
2. Remove pedal and pedestal covers (if applicable to toilet model).
3. Remove supply line and outlet hose from water valve.
4. Unscrew both hex screws from sides of water valve.
TO INSTALL NEW VALVE
1. Lubricate plastic mushroom cap with petroleum jelly or silicone grease.
2. The new valve has a 1/2-inch MPT inlet. An adapter (purchased separately) will be required to connect a
flared-end water supply line (see adapter chart below).
3. Cut off flared end of incoming water supply line with tubing cutter or hacksaw. Remove the flare nut.
4. Square the end of the water supply line and de-burr the outside and inside edges.
5. Install adapter to water supply line ("grabber"-type shown).
Make certain adapter is attached securely.
6. Install new water valve to toilet base with two hex screws.
Do not overtighten screws. Pedal should move up and
down very freely. If pedal does not move freely,
loosen screws until it does.
7. Attach water supply line to water valve.
Tighten 1/4 to 1/2 turn beyond hand-tight.
8. Attach outlet hose to water valve, securing it with
hose clamp. Make sure hose clamp does not
interfere with operation of flush lever or water valve.
9. Reinstall pedestal and pedal covers.
DO NOT OVERTIGHTEN SCREWS.
Outlet Hose
(to bowl)
Water Supply Line