SeaLand MasterFlush electronic-flush toilets User Manual
Dometic touchpad installation, For vacuflush, And masterflush
Dometic Touchpad Installation
for VacuFlush
®
and MasterFlush
®
electronic-flush toilets
® Registered; ™ Trademark of Dometic Corporation
© Dometic Corporation
600346526 02 11/12
2 in.
(51 mm)
0.10 in.
(2 mm)
dia.
1.375 in.
(35 mm)
2.625 in. (67 mm)
3.25 in. (83 mm)
1 in. (25 mm)
2 in. (51 mm) clearance
behind wall surface required
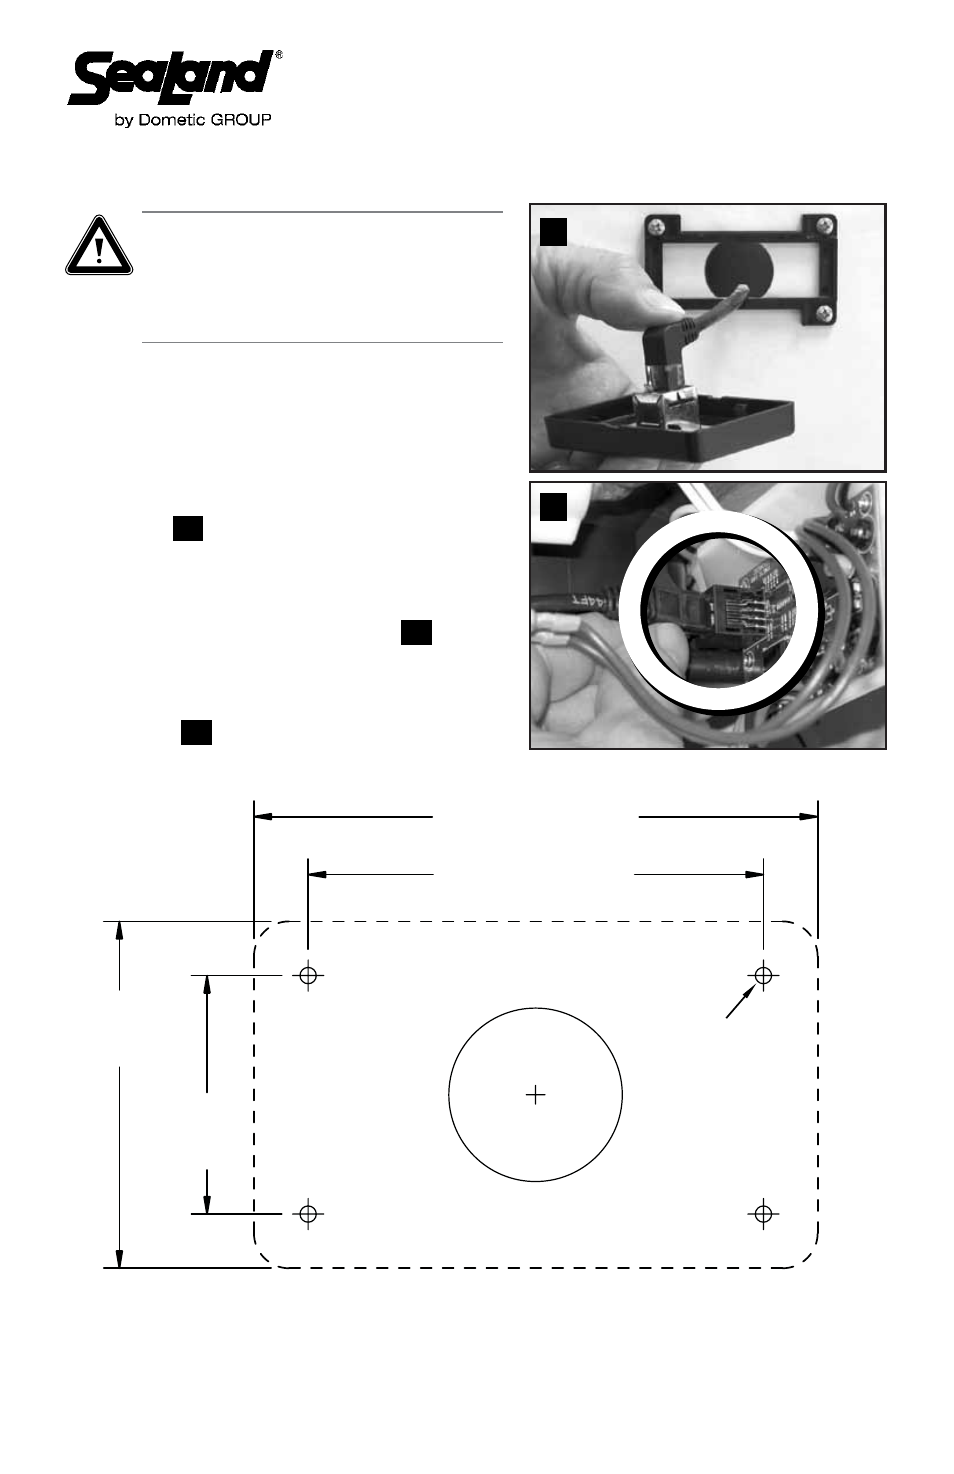
1. Plan touchpad location so wiring cable can
reach toilet base circuit board. Be sure cable
cannot get wet.
2. Using template (below), mark center access
and fastener holes. Drill 1 in. (25 mm) center
access hole, then fasten touchpad bracket to
wall (fig.
1
).
3. Route touchpad cable through wall access
hole to floor access hole at toilet base.
4. Attach cable to back of touchpad, then snap
the touchpad onto the bracket (fig.
1
).
5. WITH ELECTRICAL POWER OFF, connect
wiring cable from the touchpad to the RJ45
connector on the circuit board of the toilet
base (fig.
2
).
2
1
Caution!
If replacing a different style electronic
flush switch, WITH ELECTRICAL POWER
OFF, be sure to disconnect wiring from old
switch before installing new touchpad.