Reznor R6GN Option - Installation - Economizer User Manual
Page 2
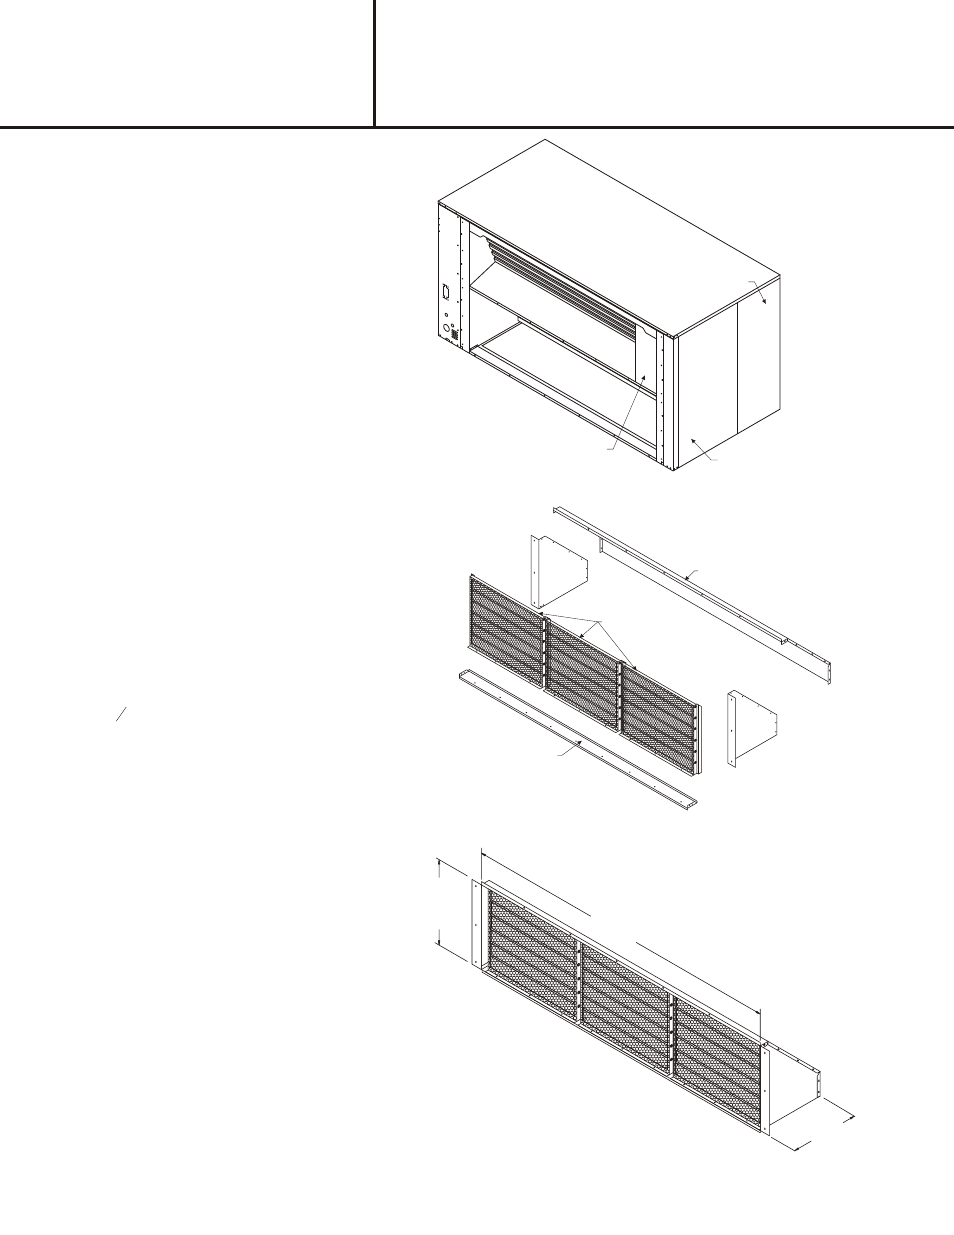
Step 6:
Take the economizer damper and slide into the
opening. Damper must slide over bottom return
duct opening as shown in Figure 4.
Step 7:
Once damper is set in place. Secure damper to unit
with 1 ¼" watertight screws from Step 3.
Step 8:
Install the discharge air sensor in the blower
compartment. Mounting holes are located on
blower discharge side panel. Connect two purple
wires located below the mounting holes marked
"mix air sensor". Replace blower access removed
in Step 3.
Step 9:
To assemble the Barometric Relief Hood the
following will be needed.
39 ea. - Type A #10 - 16 x ½ Screws
15 ft. -
1
8
x ½ Gasket
Follow these steps:
A. Take (1 and 2) put the flange of (1) to the inside
of (2) and screw in place.
B. Take (3) and screw in place like step A.
C. Take (4) and place flanges over (2 and 3) and
secure.
D. Take (5) and slide inside of (2 and 3) and
secure (blade opening into hood).
E. Place gasket on flanges on (1,2, 3 and 4) that
attach to the face of the economizer when
installed.
Step 10:
Install barometric relief hood over lower return
opening on unit using screws provided as shown in
Figure 9.
IN STAL LA TION
IN STRUC TION
Fig ure 4
CONTROL ACCESS
ECONOMIZER CONTROL
BLOWER ACCESS
INSTALLATION INSTRUCTIONS FOR
555621
ECONOMIZERS USED WITH R4GM 150/180 UNITS
Fig ure 5
Fig ure 6
(2)
(3)
20
69 ¾
15 ½
(1)
(4)
(5)