Reznor RV 325 Option - Installation - Heater Stand Assembly User Manual
Page 4
Form I-OIL-HS, Page 4
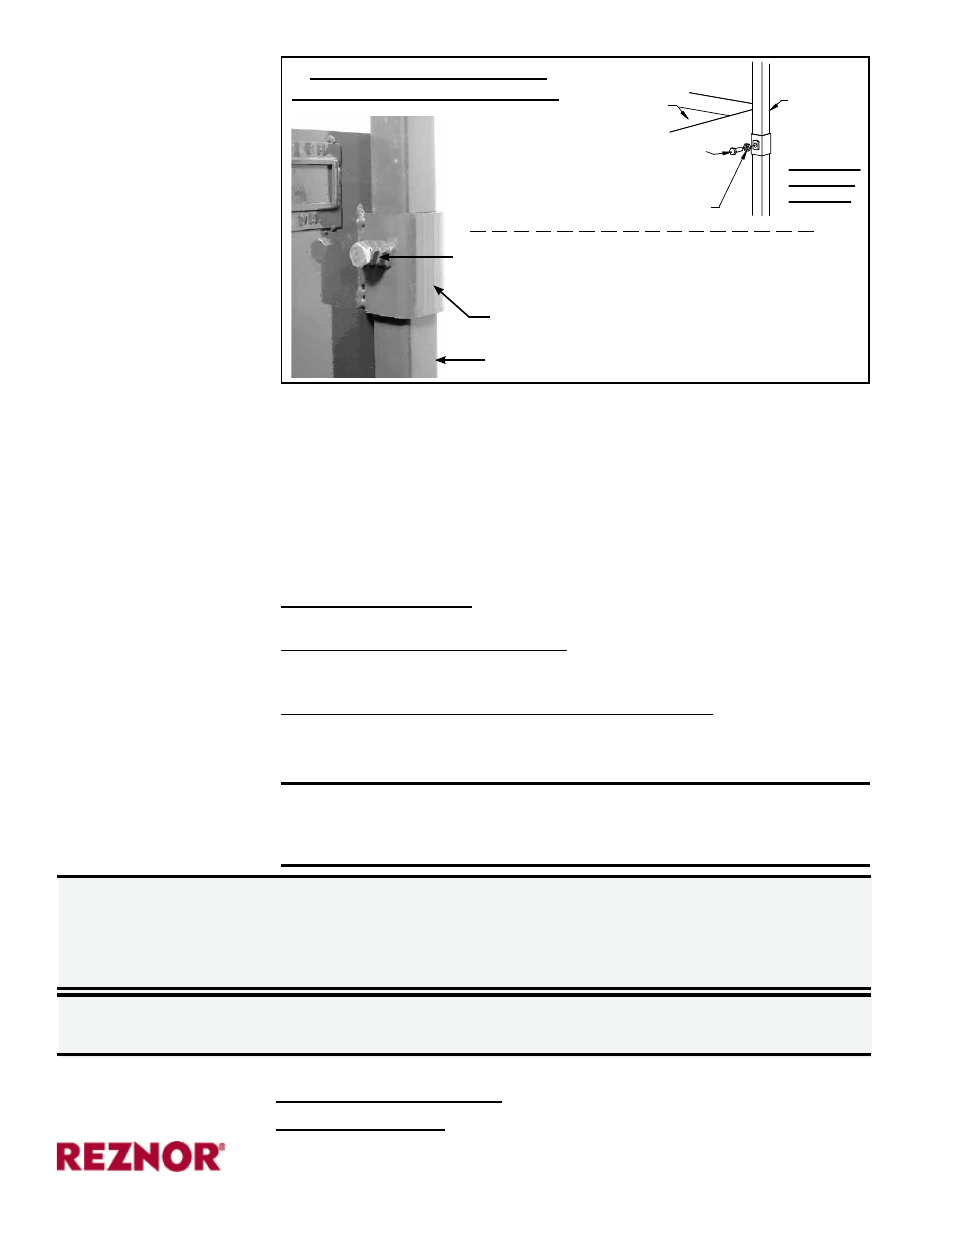
At each
Stand
Corner
Post -
All Models
and Sizes
of Heater
Model OT250
Oil Tank
(4) P/N 121596,
1/2-13x1-1/2” lg
Hex Head Cap Screw
(4) P/N 45550,
1/2-13 Jam Nut
Stand Corner Post
Upper Tank Sleeve
Assembled Setscrew - Install following the
instructions in Step 4, page 3.
To stabilize the stand, install
setscrews in upper tank sleeves.
Used Oil Models RA & RV: www.ReznorHeaters.com; 855-584-3172
No. 2 Oil Model OH: www.RezSpec.com; 800-695-1901
©2014 Reznor, LLC. All rights reserved.
Trademark Note: Reznor
®
is registered in at least the United States.
0514 Form I-OIL-HS (Version A.2)
Instructions
(cont’d)
DANGER: Do not use this heater stand structure to support any weight in addition to
one heater
(USE ONLY with one Reznor
®
Model RA110, RA140, RA150, RA235,
RA250, RV225, RV325, OH95, OH140 or OH190). Maximum weight limit is 500 lbs.
DO NOT use heater stand with models or sizes of heaters not listed.
DANGER: Do not sit on, climb, or hang from any part of the heater stand. Do
not lean a ladder against the heater stand structure or the heater.
5. Install Setscrews in
Upper Tank Sleeves
Following the instructions
in Step 4, install
the remaining four
assembled setscrews at
the upper tank sleeves.
6. Assembly of the heater stand is complete. Before setting the heater on the
stand, verify the following:
Are all bolted connections and setscrews tightened sufficiently?
Is the tank/stand assembly level and stable?
Will there be adequate clearances to combustibles? (Refer to the heater
rating plate or installation manual.)
Will there be any structural interferences with the heater in place?
7. After the heater is set on the stand and before proceeding with the
installation, attach angle stops to the heater cabinet.
If installing a Model RV, attach the angle stops to the bottom of the heater.
(See the illustration in Step 4, page 3, that appllies to Model RV.)
If installing a Model RA 150 or 250, center the heater front to back on the
stand and attach the angle stops to the sides of the heater. (See the illustration
in Step 4, page 3, that applies to Model RA 150 and 250.)
If installing a Model OH 95, 140, 190 or RA 110, 140, 235, the unit fits between
the rails and does not require that the stops be attached to the heater. How-
ever, the screws are included and may be used to attach the angle stops to the
sides of the heater
WARNING: For your safety, verify that all applicable proce-
dures in Steps 1-7 have been completed before continuing
with the heater installation.
- RV 225 Option - Installation - Heater Stand Assembly RA 250 Option - Installation - Heater Stand Assembly RA 235 Option - Installation - Heater Stand Assembly RA 150 Option - Installation - Heater Stand Assembly RA 140 Option - Installation - Heater Stand Assembly RA 110 Option - Installation - Heater Stand Assembly OH 190 Option - Installation - Heater Stand Assembly OH 140 Option - Installation - Heater Stand Assembly OH 95 Option - Installation - Heater Stand Assembly OT-250 Option - Installation - Heater Stand Assembly