Reznor B Option - Installation - Polytube Adapter Instructions - Floor Mount User Manual
Page 3
Form I-B-PF, Mfg #101694 Rev 4, Page 3
4. Install Adapter Discharge Panel and Legs
(See Figure 6)
Slide the discharge panel over the front of the "box" formed by the
sides, top, and bottom adapter panels. Attach at all of the holes across
the top and the bottom. On the sides, attach at all of the holes except
the bottom one on each side.
Attach the adapter legs to the sides of the discharge panel at each bot-
tom corner. Use the adjustable slot on the legs.
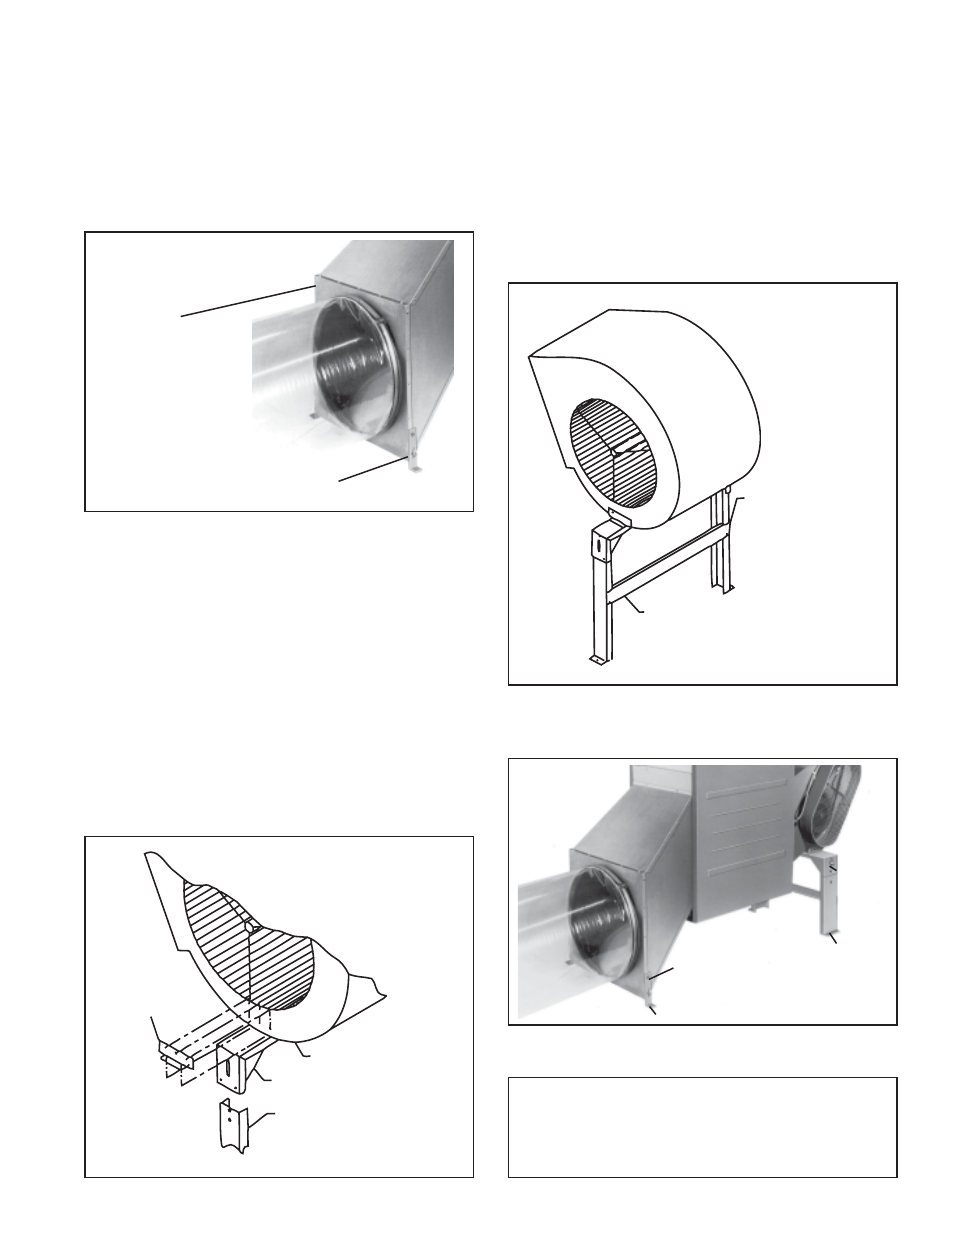
5. Install Blower Legs (See Figure 7)
1) Assemble the Support Angles ("L" shaped brackets) and the Blower
Support
Determine where to attach the brackets by centering the blower on the
blower support. (Holes are provided for all sizes.) Position the support
angles so that they will be flat against the sides of the blower housing.
Attach the angles to the support.
2) Attach the Assembled Blower Support
The blower support should be attached horizontally across the lowest
point of the blower housing. Using a level, determine the correct place-
ment. Mark and drill 1/8" diameter holes in the blower housing sides
and attach the angle supports.
3) Attach the Legs
Using the slotted hole only, attach the legs to the blower support. Use
the two nuts and bolts in the hardware bag.
Figure 7 -
Assemble Blower
Support and
Attach to the
Blower Housing
Support
Angle
Leg
Blower Support
Blower Housing
INSTALLATION NOTE: o not install the cross brace on
the legs until after the heater is in the position where it is
being installed.
6. Level and Mount the Heater (See Figure 8)
Position the heater at the place of installation. IMPORTANT: Heater
must be placed on a solid surface such as concrete or asphalt. With a
level, check the heater in all directions (front to rear and side to side).
Level by adjusting the bolts in the slots in the blower legs and the
screws in the slots in the adapter legs.
After the heater is level, attach the cross brace to the blower leg with
the pre-punched holes. Position the cross brace on the second leg and
mark the holes. Drill 5/32" diameter holes and attach the cross brace.
Verify again to be sure that the heater is level. Insert the locking screws
in the blower legs. Drill 1/8" diameter holes in the adapter side and
insert locking screws in the adapter legs.
Using the floor flanges on all four of the legs, attach the heater to the
floor.
Cross
Brace
Figure 8 - Attach
Cross Brace
After Heater is
in its Installation
Location
Figure 6 -
Install
Discharge
Panel and Legs
Adjustable Slot
Discharge
Panel
Locking
Screw
Floor Flange
Locking
Screw
Figure 9
WARNING: Whether finalizing installation
now or at some future time, be sure to install
locking screws in both the blower legs and the
adapter legs. The heater must be on a solid
surface and remain level.
Attach cross brace
to pre-punched
holes in one leg;
mark and drill
holes in the second
leg. Attach cross
brace.
Floor
Flange