Set up timecode with the 4k broadcast module, Set up timecode with the 4k broadcast module 14, Red 4k broadcast module operation guide – RED 4K BROADCAST MODULE User Manual
Page 14
COPYRIGHT © 2014 RED.COM, INC
RED 4K BROADCAST MODULE OPERATION GUIDE
955-0072, REV-D | 14
SET uP TIMEcodE WITH THE 4K BroAdcAST ModuLE
The 4K Broadcast Module has BNC TC (timecode) and SYNC ports that support incoming timecode signals.
This section describes how to set up the camera to receive timecode signals from an external timecode
generator via the 4K Broadcast Module.
NoTE: When a 4K Broadcast Module is installed, you can still receive timecode via the SYNC port on the BRAIN.
For more information, see the
, available at
.
1. Set up the 4K Broadcast Module. For more information, go to
“Set Up 4K Quad 3G/HD-SDI” on page 12
.
2. Connect the 4K Broadcast Module to a timecode generator:
A. Ensure that the timecode generator is off.
B. Use a 75 Ω coaxial cable to connect the Tc port on the 4K Broadcast Module to the TIMEcodE port (or
equivalent timecode output port) on the compatible timecode generator.
C. On the timecode generator, set the frames per second to the sensor frame rate you will be using for
the project.
NoTE: Ensure that the frame rate matches the camera’s Sensor Frame Rate and Project Time Base.
D. Turn on the timecode generator.
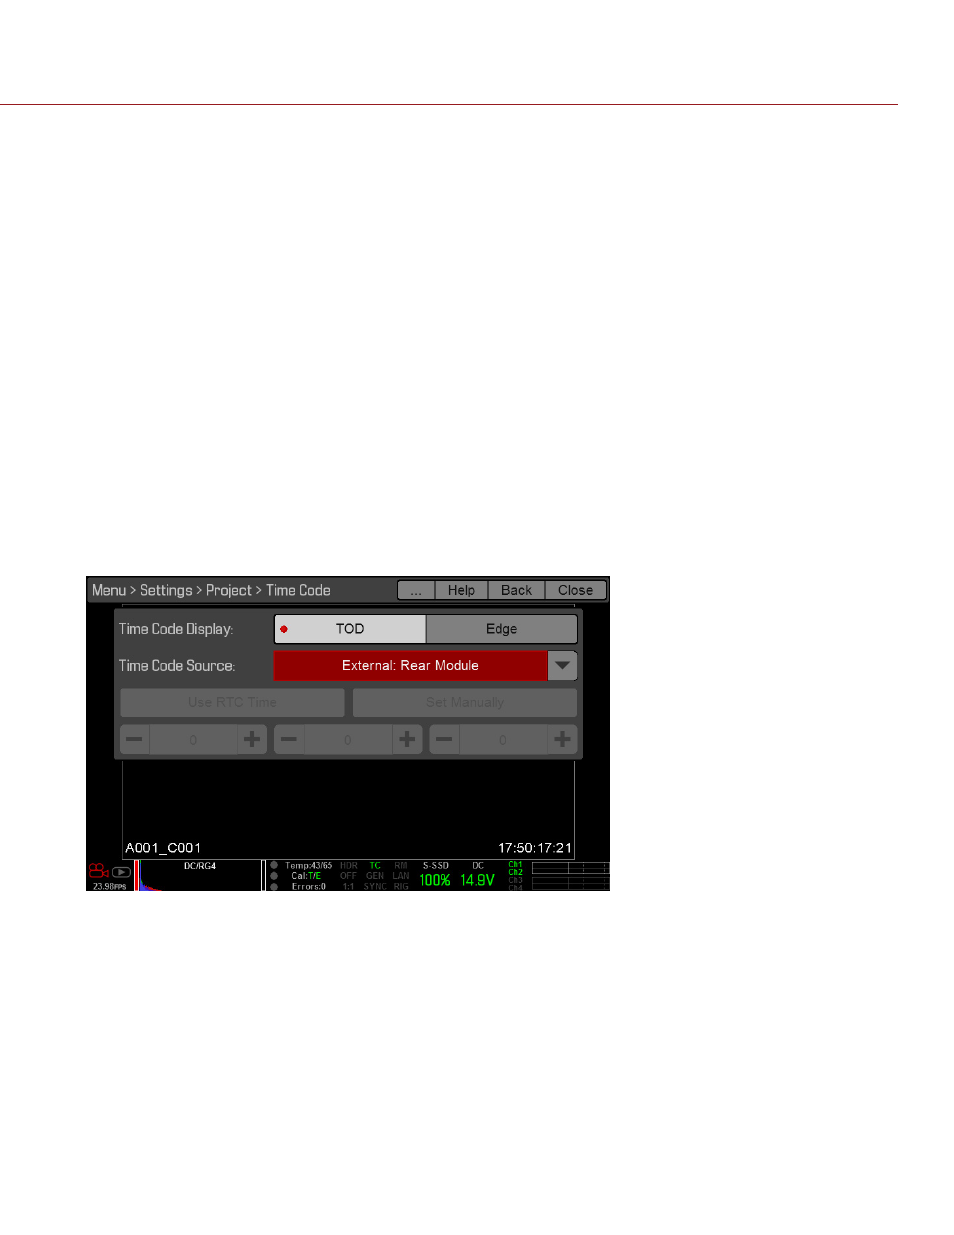
3. Set up the timecode source in the camera:
A. Go to Menu > Settings > Project > Timecode.
B. Select External: rear Module from the Time code Source drop-down menu.
The TC indicator in the Lower Status Row illuminates green.
√