Installing the heater, Direct mount, Optional mounting plate – Proheat A4 User Manual
Page 14
PROHEAT AIR A2/A4 INSTALLATION MANUAL
2-4
INSTALLING THE HEATER
Direct Mount
1.
Move or remove any hardware to gain access to mounting location.
2.
Using the appropriate mounting template (supplied at rear of installation
manual) mark the location of the mounting, exhaust, air intake and fuel holes.
3.
Using a drill bit and hole saw, drill 6 holes in the floor paying particular
attention to the underside of the vehicle.
4.
File down any sharp edges and test fit the heater. Trim any excess as
required to ensure the heater fits without binding and the heater gasket
sits flat on the floor to create a tight seal.
5.
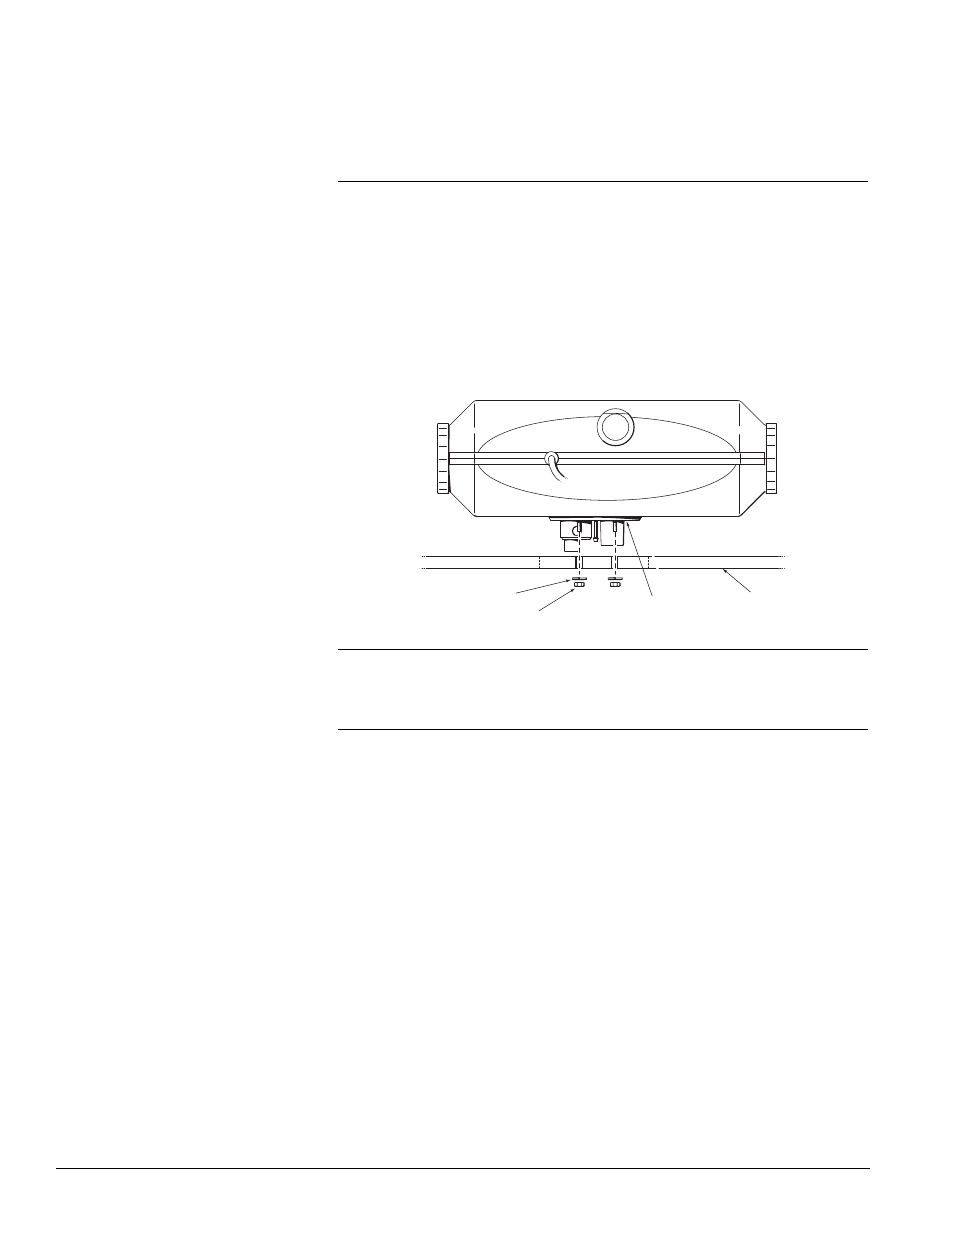
Install the heater and secure with the supplied hardware (refer to figure 6).
2.4.1
2.4.2
2.4
Optional Mounting Plate
This option is recommended for applications where direct mounting of the
heater is not possible such as:
NUT (4)
SILICON GASKET
FLANGE
SPRING WASHER (4)
CAB FLOOR
Figure 6. Heater Mounted Directly to Cab Floor.
• Uneven floors
• Composite or other heat sensitive
flooring material
• Extra thick flooring material
• Additional insulation under
the vehicle
1.
Move or remove any hardware to gain access to mounting location.
2.
Using the mounting plate as a guide, mark the location of the areas to
be drilled.
3.
Using a 3” hole saw for A2 or a 3.5” hole saw for A4, cut a hole in the
floor paying particular attention to the underside of the vehicle to ensure
you are not cutting through anything but the floor.
4.
Drill four holes for the plate mounting hardware if not using self tapping screws.
5.
Secure the heater to the mounting plate using the supplied hardware
(refer to figure 7).
6.
File down any sharp edges and test fit the heater. Trim any excess
material as required to ensure the heater fits without binding and the
mounting plate gasket creates a tight seal.
7.
Apply sealant to any exposed metal edges to prevent corrosion.
8.
Fasten the mounting plate to the floor using #12 self tapping screws x
1.5" (40 mm) (minimum) or 1/4" (6 mm) machine screw and nut.