Assembly, English-4, Hardware shown actual size screw (6) qty – Coleman 5071 Series User Manual
Page 5: Assembly is inverted in this view
HAND TOOLS REQUIRED (not provided):
• Phillips Screwdriver
• Small Adjustable Wrench
Assembly
Fig. 3
English-4
Fig. 5
■ Turn the shelf and legs upright. Position the
frame on the legs. Attach any two legs to the
frame using two screws and two hex nuts per
leg (Fig. 4 and 5).
NOTE: Do not completely tighten these fasteners
until later. This will allow easier alignment
during assembly of the control panel.
NOTE: The third leg will be fastened later when
the control panel is assembled to the frame.
Hardware shown actual size
Screw (6) Qty.
■ Assemble three legs to the shelf. The shelf is
threaded to receive the screws (Fig. 2). Invert
the shelf and attach each leg with two screws.
Notice that for this step, the legs are positioned
with the large end downward (Fig. 3). Hand
tighten the six screws.
Fig. 2
Hardware shown actual size
Screw (4) Qty.
Hex Nut (4) Qty.
Fig. 4
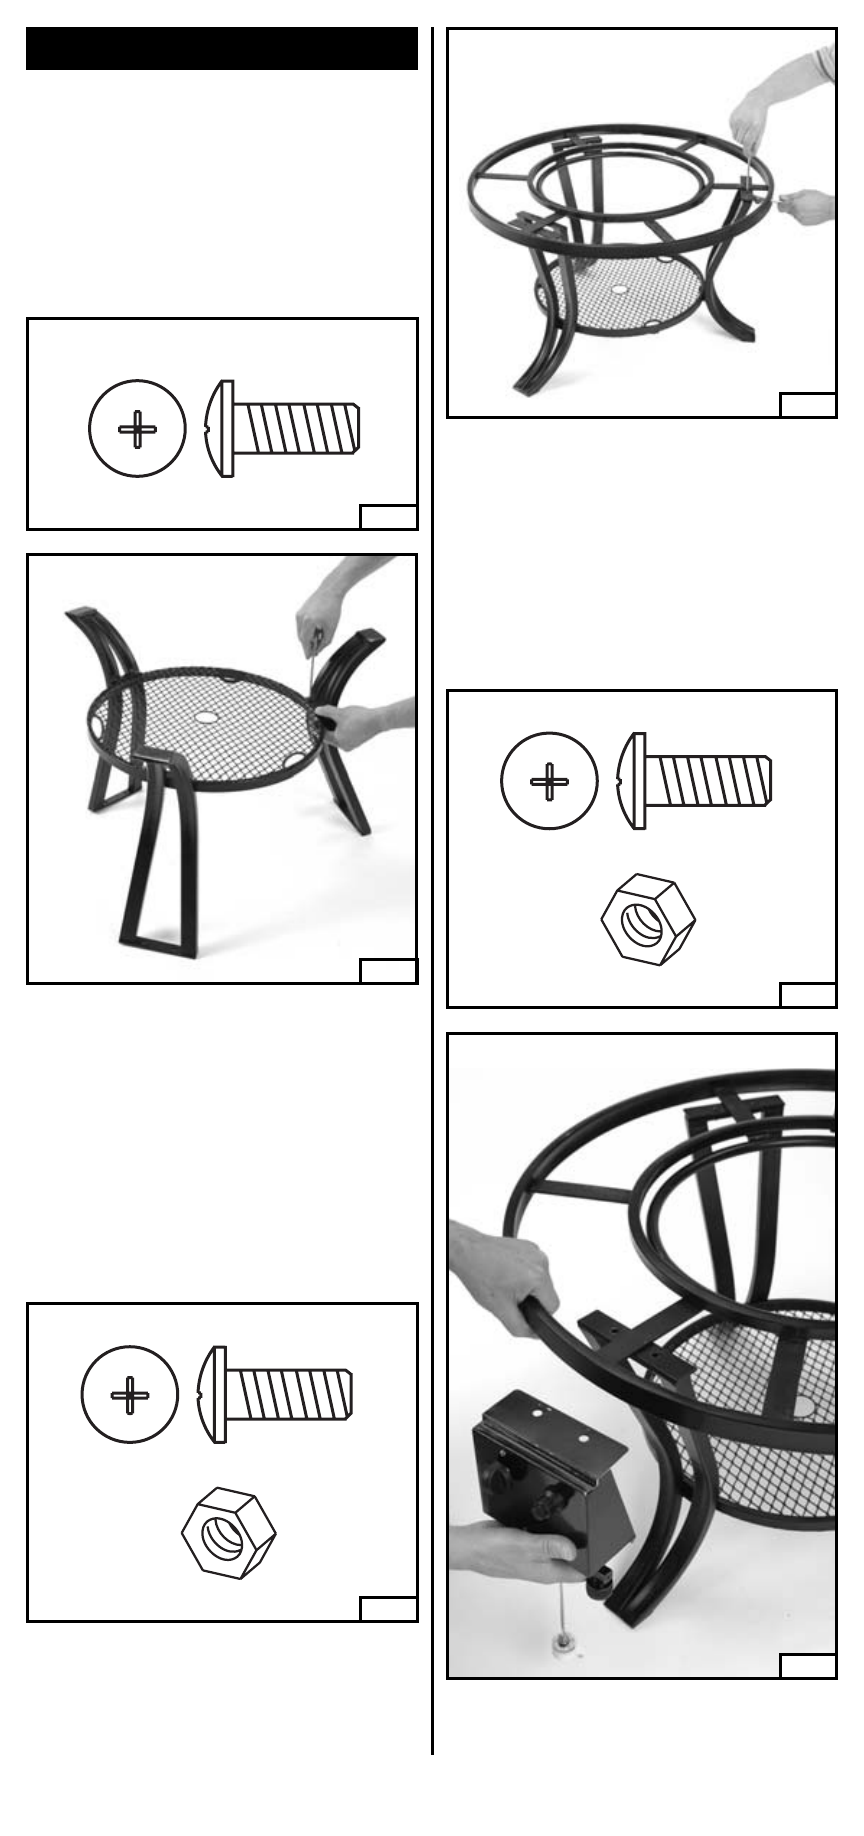
■ Assemble the Control Panel by slipping the
flange between the frame and the third leg.
Grasp the frame and raise slightly to create
clearance for the flange. Fasten with two
screws and two hex nuts (Fig. 6, 7 and 8).
NOTE: Do not completely tighten these fasteners
until later. This will allow easier alignment while
securing the bottom of the control panel with
screws.
Fig. 7
Hardware shown actual size
Screw (2) Qty.
Hex Nut (2) Qty.
Fig. 6
Assembly
is inverted
in this view