OmniSistem Sky Scan User Manual
Page 9
Sky-Scan is a single axis scanner that scans at high speed on the X or horizontal axis only. For maximum
effect when using a single Sky-Scan place the Sky-Scan head in Ports 1-5 which are 100% ports.
When using 2 or more you should place the scanner heads on a 100% and a 50% port to enable use of both
scanners at once.
1. Place Sky Scan Head in the Beam Module Mounting Hole of your choice.
2. Attach the Sky Scan Head via the provided D-Sub 9 Serial Cable to the Interface units D-Sub 9 Pin
connector Labeled Laser Head.
3. Provide Power to the unit by plugging in the supplied AC Adapter.
4. Assign Dip Switch Settings dependant upon what mode you desire to operate under. (See Above)
5. Provide a laser beam into the Scanner Head by sending a laser beam from the projector into the
port with the Sky-Scan Head.
6. Proceed to control the Sky-Scan in your mode of operation.
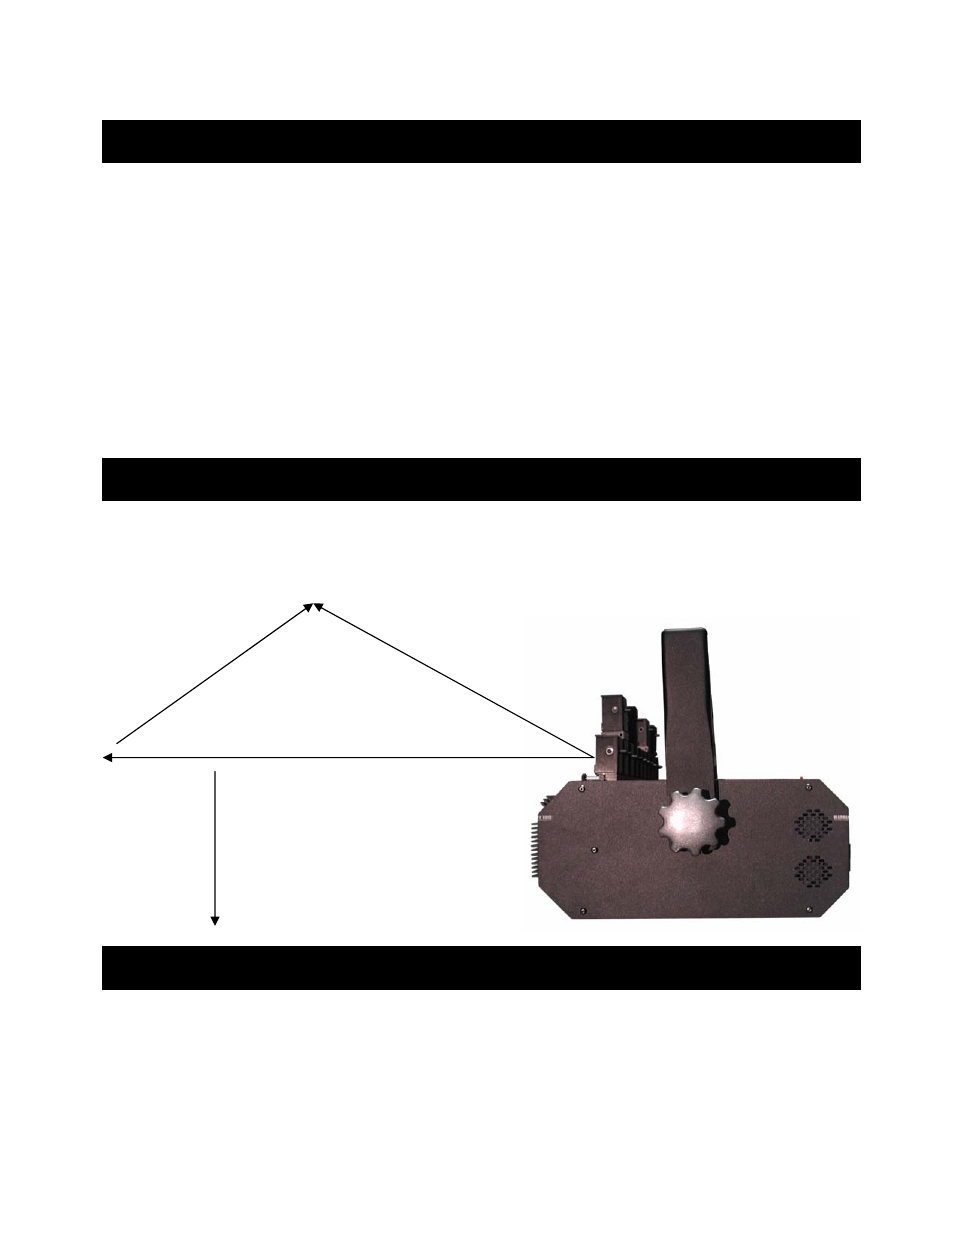
Sky-Scan has a physical limitation of horizontal with Y axis mechanical adjustment only for raising the sky
vertically. This feature was designed to provide 100% assurances that unless deliberate the Sky-Scan could
not accidentally project into the audience. Hence the first effect you should target is your graphics if using a
Q-Scan or the Sky-Scan when the Q-Scan or graphics system is not being used.
Because the Sky-Scan Mirror is traveling at high speeds it will collect dirt and fog-juice particles. You will
know when your Sky-Scan Mirror should be cleaned by the degree of brightness of your effect and if
secondary images such as smudges or scatter occur.
Set-up – Sky-Scan
8.0
Aiming – Sky-Scan
9.0
Maintenance
–
Sky-Scan
10.0
3-Meters
from Floor
Range of
Vertical
Movement