Step 5 - install esc – Novak Conv. Kit Vehicle Sheet- Losi 8ight (55-5019D-1) User Manual
Page 2
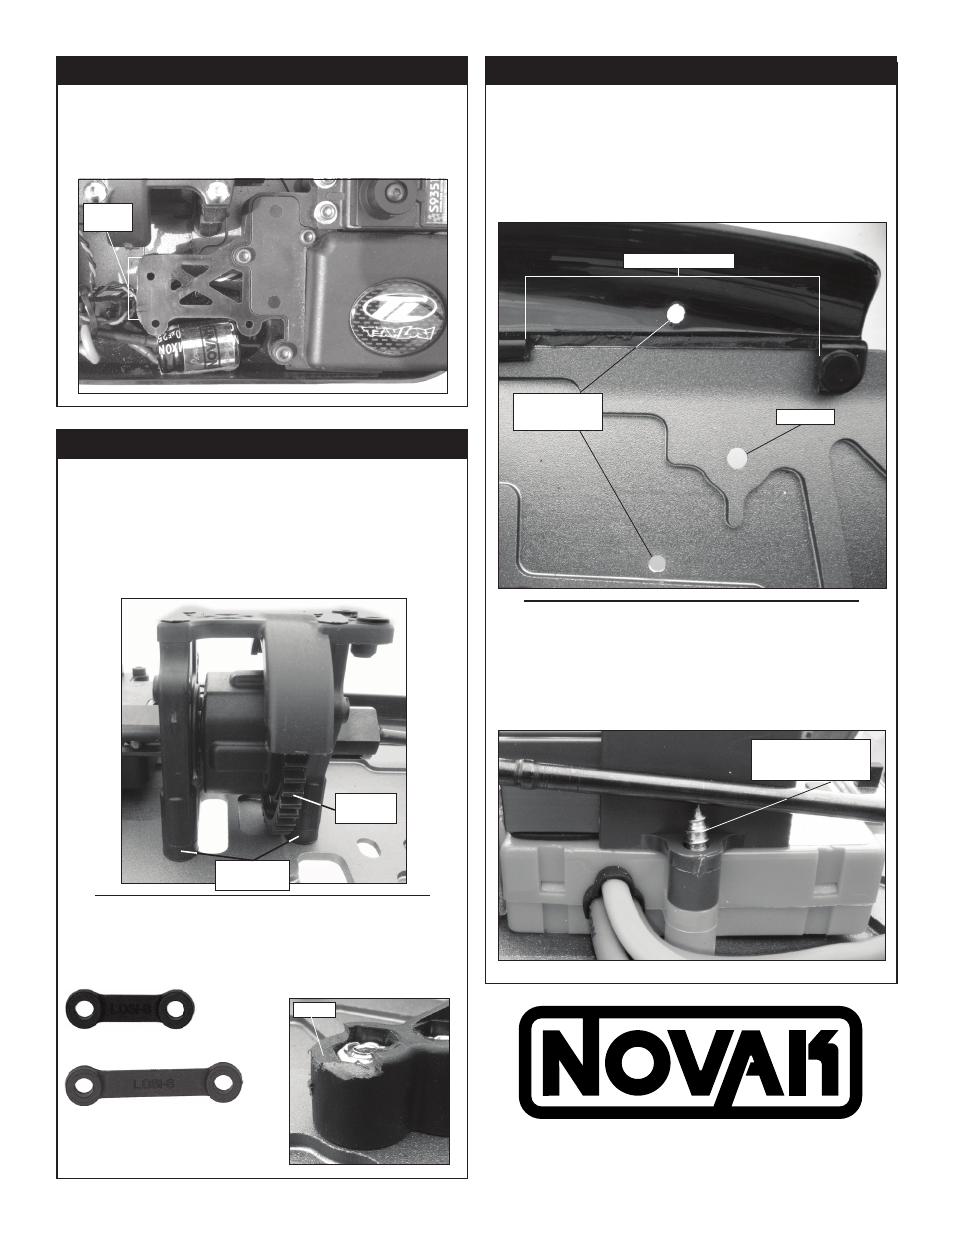
figure 21:
ESC Mounting in Losi 8ight Vehicle.
Using the two #6x1” Phillips FH Self-Tapping screws (see Figure
13 on main instructions), install the Novak HV ESC.
Note: Be sure there is adequate ventilation over the
eSC’s heat sink.
figure 20:
Stone Guard Modification in Losi 8ight Vehicle.
Remove plastic from stone guard edge as shown below to clear
Novak HV ESC (refer to Figure 14 for ESC position).
Two 3.6mm (or 9/64”) holes must be drilled and counter sunk into
the chassis and stone guard to mount ESC as shown below. Mount
the ESC as close to the drive shaft as possible.
Check for clearance. Screw
tip should not scrape drive
shaft. Trim if necessary.
Trim Here
figure 16:
Installing Steering Servo in Losi 8ight
Leave the radio tray intact and cut the tray as shown in the
below picture.
figure 17:
Installing Brushless Motor Assembly in Losi 8ight
Rotate the center differential 180
o
and remount it using the two
included Novak Losi-8 plastic spacers (Figure 18). The spacers
allow the differential to be mounted so that the spur gear will
clear chassis. If you don’t want to space up the differential, you
can Dremel out a slot in the chassis to clear the spur gear.
STEP 2 - INSTALL STEERING SERVO
STEP 4 - INSTALL BRUSHLESS MOTOR
(CONTINUED)
STEP 5 - INSTALL ESC
Qualit y Racing Electronics since 1978
Cut out section to fit ESC
Original Hole
Two 3.6mm (or 9/64”)
counter sunk holes to
mount ESC
figure 18:
Novak Losi-8
Plastic Spacers
Losi-8 Spacer-Short (1)
Losi-8 Spacer-Long (1)
Spur gear to
rear of car
Novak
Losi-8 spacers
figure 19:
Losi 8ight Rear Chassis Brace
Trim the front part of the rear chassis
brace to clear motor.
P6
NOVAK ELECTRONICS, INC.
www.teamnovak.com
©2008 Novak Electronics, Inc. • All Rights Reserved • No part of these instructions
may be reproduced without the written permission of Novak Electronics, Inc.
Cut tray
here