Attach the cable-management bracket, Four-post rack installation, Cable-management bracket – Cisco 7301 User Manual
Page 8: M4 x 20-mm screw
8
Attach the Cable-Management Bracket
Figure 6
Attaching the Cable-Management Bracket
Step 1
Align the cable-management bracket (1) to the rack-mount bracket on the left side of the Cisco 7301 router.
Step 2
Using a Phillips screwdriver and the M4 x 20-mm screw (2), thread and tighten the screw to the cable-management
bracket.
Go to the “Four-Post Rack Installation” section on page 8 or the “Two-Post Rack Installation” section on page 9.
Four-Post Rack Installation
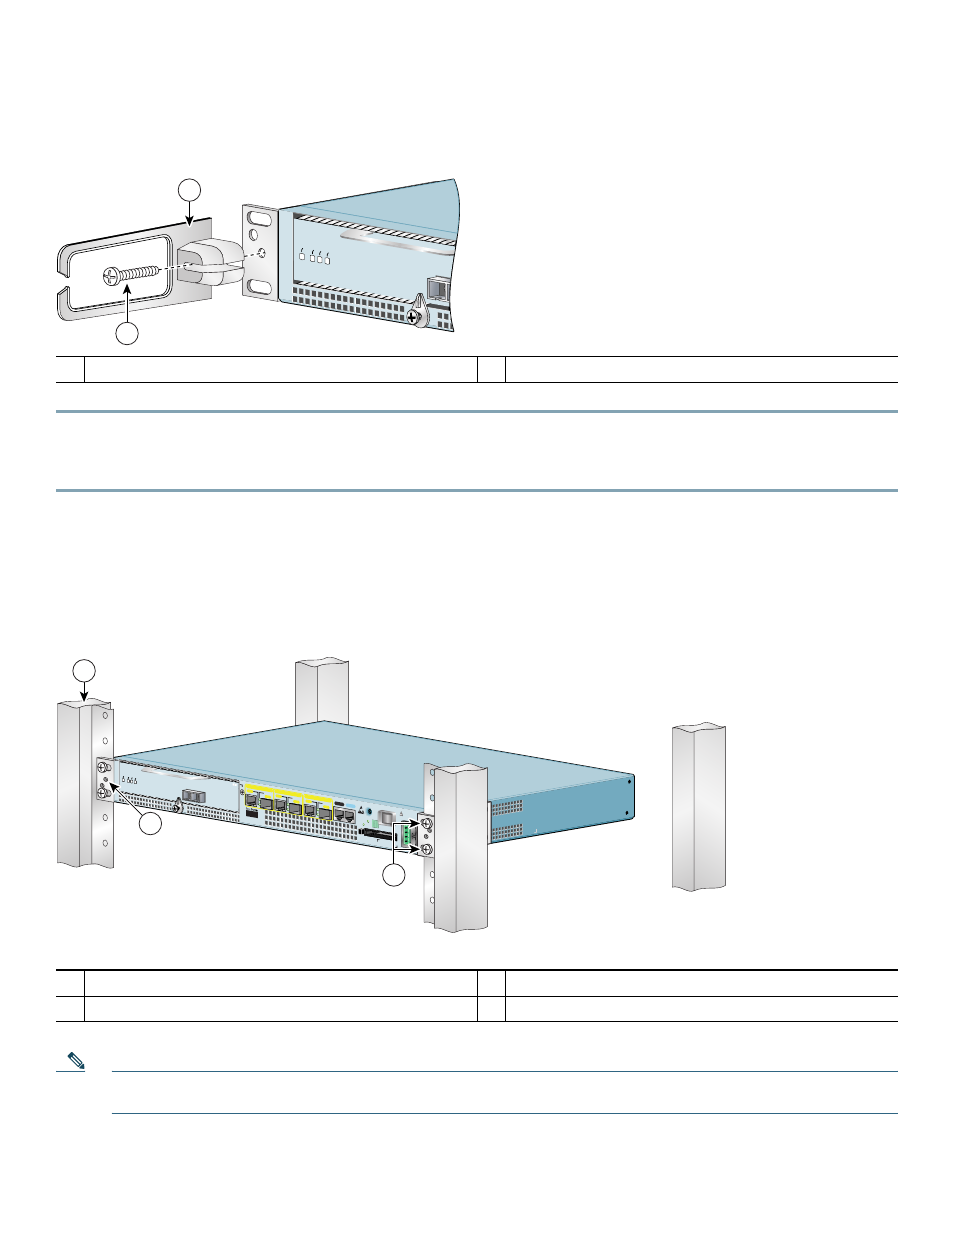
Figure 7
Installing the Cisco 7301 Router in a Four-Post Rack
Note
Inner clearance (the width between the inner sides of the two posts or rails) must be at least 17.3 inches (43.9 cm) The
height of the chassis is 1.73 inches (4.39 cm). Airflow through the chassis is from front to back.
1
Cable-management bracket
2
M4 x 20-mm screw
1
Four-post rack
3
Four 12-24 x 0.5-inch screws
2
Screw hole for cable-management bracket
ENABLED
RX CELLSRX CARRIER
RX ALARM
80278
1
2
ALARM
RJ45 EN
LINK
TX
RX
GBIC
GIGABIT ETHERNET 0/2
RJ45 EN
LINK
TX
RX
GBIC
GIGABIT ETHERNET 0/0
RJ45 EN
LINK
TX
RX
GBIC
GIGABIT ETHERNET 0/1
CISCO 7301
SLOT 1
CONSOLE
AUX
COMPACT
FLASH
STATUS
100-240V
, 2A, 50/60 Hz
24V=9A, 48 - 60V
=5A
B
A
ENABLED
RX CELLSRX C
AR
RIER
RX ALARM
ATM
80908
1
2
3