Connecting the dvd-rom drive to a dc power lead, Connecting the audio cable, Secure the dvd-rom drive – Philips PCA532K User Manual
Page 11: Realmagic hollywood plus dvd/mpeg-2 playback card
Attention! The text in this document has been recognized automatically. To view the original document, you can use the "Original mode".
If necessary, gently rearrange the cables inside the casing to ensure that the connector reaches
your DVD-ROM drive when it is fitted. Don’t worry if you have to unplug the cable from
your hard disk drive. Just note which way it attaches and reattach it the same way when you
have finished. The DVD-ROM drive or the hard-disk drive can use either plug on the IDE
cable, so don’t worry if you have to change their positions.
Connecting the DVD-ROM drive to a DC Power Lead
There should be a small DC power lead inside your computer, ready to connect to the back
of the drive. If no power lead is available, consult your computer dealer or support service.
You may need a power splitter cable - a Y-shaped cable which provides two power outputs
from one input.
There is only one way to fit the connector into the power socket on the back of the drive.
One side of the plug has chamfered edges - make sure the plug fits into the socket correctly.
Carefully push the plug all the way into the socket.
Connecting the Audio Cable
You can play audio CDs on your DVD
7
ROM drive through your computer. Connect one
end of the audio cable to the analogue audio connector at the rear of the DVD-ROM drive.
The other end of the cable attaches to the REALmagic Hollywood Plus DVD/MPEG-2
Playback Card once it has been installed.
Secure the DVD-ROM Drive
Push the DVD-ROM drive all the way into the slot until it is flush with your computer and
secure it in place with screws on either side. The internal drive should be mounted within 20°
of the horizontal or within
10
° of the vertical.
Installing the REALmagic Hollywood Plus
DVD/MPEG-2 Playback Card
Follow the steps below to install the REALmagic Hollywood Plus DVD/MPEG-2 Playback
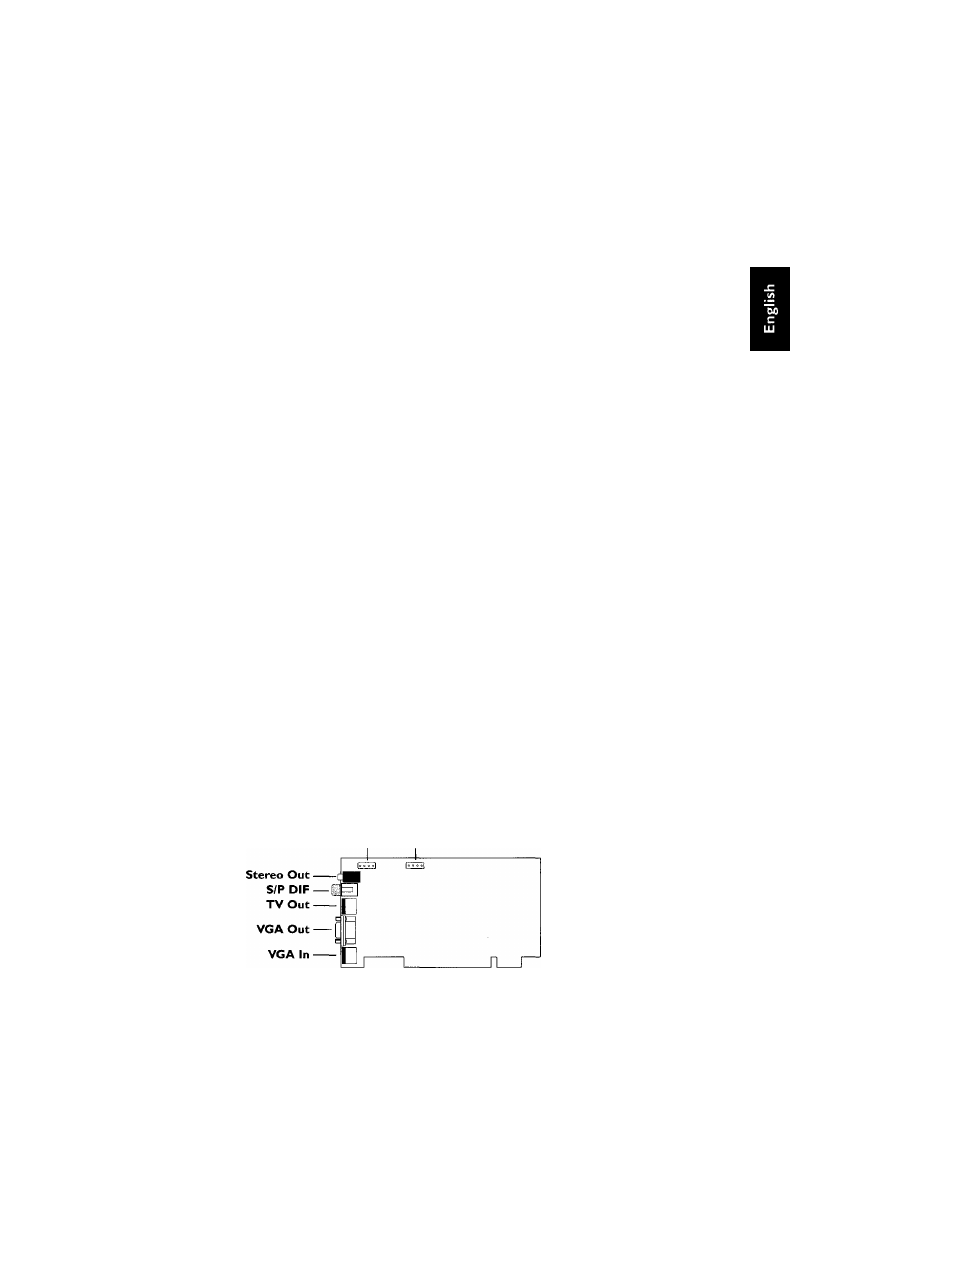
Card (Figure 1) into your computer.
Line Out CD In
Figure 1. REALmagic Hollywood Plus DVD/MPEG-2 Playback Card
Chapter 2 Hardware Installation