3 installation, 1 lens installation, 1 auto aperture lens – IC Realtime 540TVL Box Style IP Cameras (ICIPS565) User Manual
Page 23: 2 manual lens, Installation, Lens installation, Auto aperture lens, Manual lens
23
3 Installation
3.1 Lens Installation
3.1.1 Auto Aperture Lens
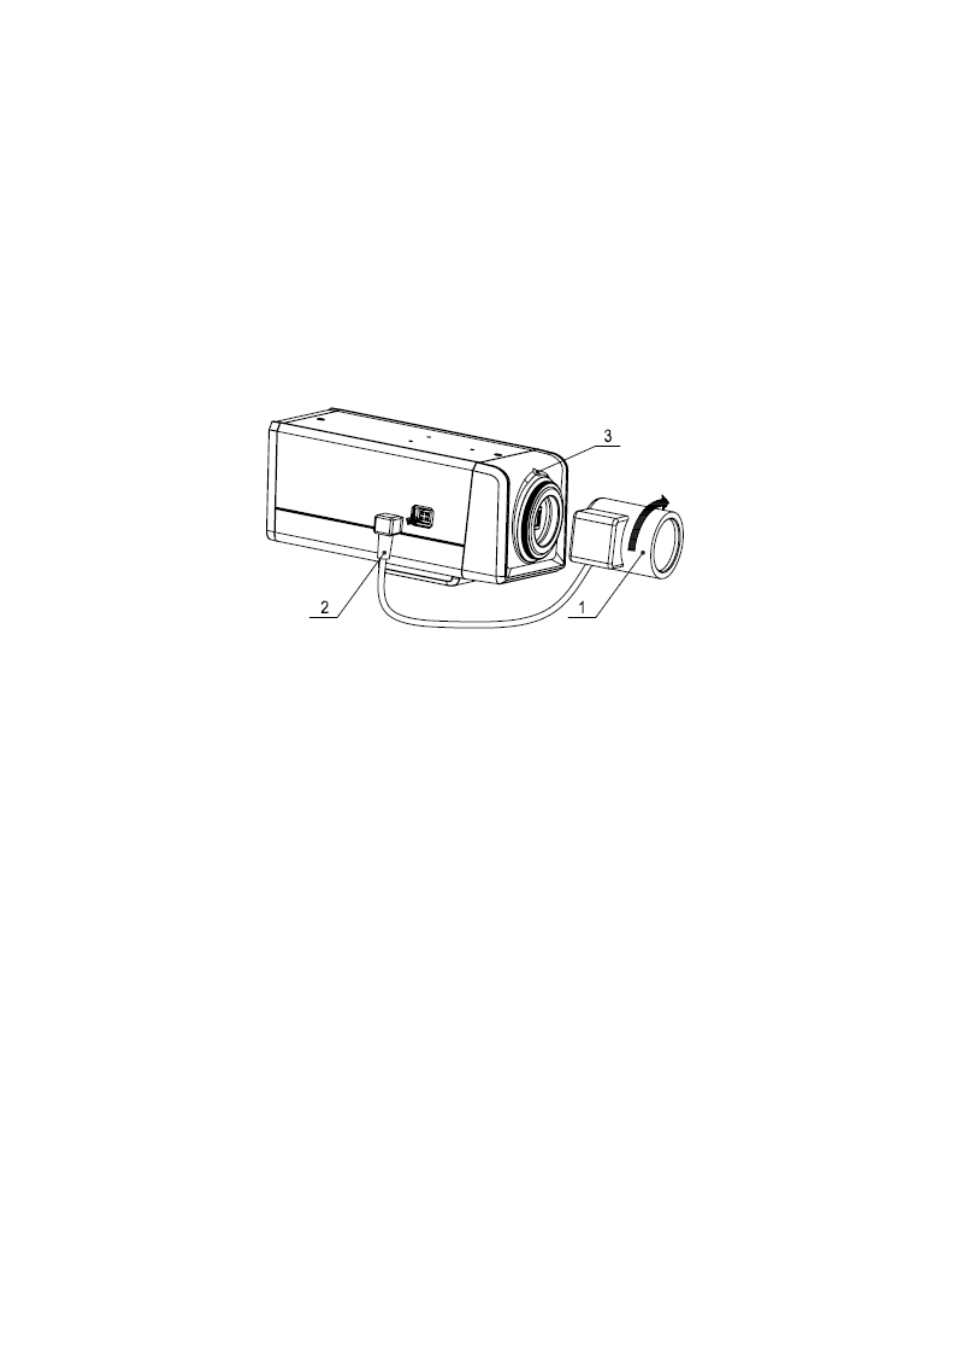
Please follow the steps listed below for auto aperture lens installation. The interface is shown as
in Figure 3-1 and Figure 3-2.
Remove the CCD protection cap of the device, and then line up the lens to the proper installation
position. Turn clockwise until the lens is fixed firmly.
Insert the lens cable socket to the auto lens connector in the side panel.
When it is ∞, you can turn the ADJUST screw to adjust the focus circle to adjust the focal
distance.
Figure 3-1
3.1.2 Manual Lens
Install C type lens
Remove the CCD protection cap; use the cross-head screwdriver to remove the screw near the
focal circle. Then please turn counter clockwise to move the focal circle out for several
millimeters. Now you can focus manually.
Then please use the cross-head screwdriver to fix the screw back firmly. Secure the focal circle.
Finally, line up lens to the proper installation. Turn clockwise to fix the lens firmly.
Install CS type lens
Remove the CCD protection cap; use the cross-head screwdriver to remove the screw near the
focal circle. Then please turn counter clockwise to move the focal circle to the end and now you
can focus manually.
Then please use the cross-head screwdriver to fix the screw back firmly. Secure the focal circle.
Finally, line up lens to the proper installation. Turn clockwise to fix the lens firmly.
Please note this series IPC is compatible with C type lens and CS type lens. Default setup
is CS lens.