Great Planes Ultra Sport 40 Plus Kit - GPMA0390 User Manual
Page 30
with thin CA. Note: If you will be installing a tricycle gear
with nose steering, you will need to repeat this procedure for
the steering pushrod on the other side of the fuselage.
❏
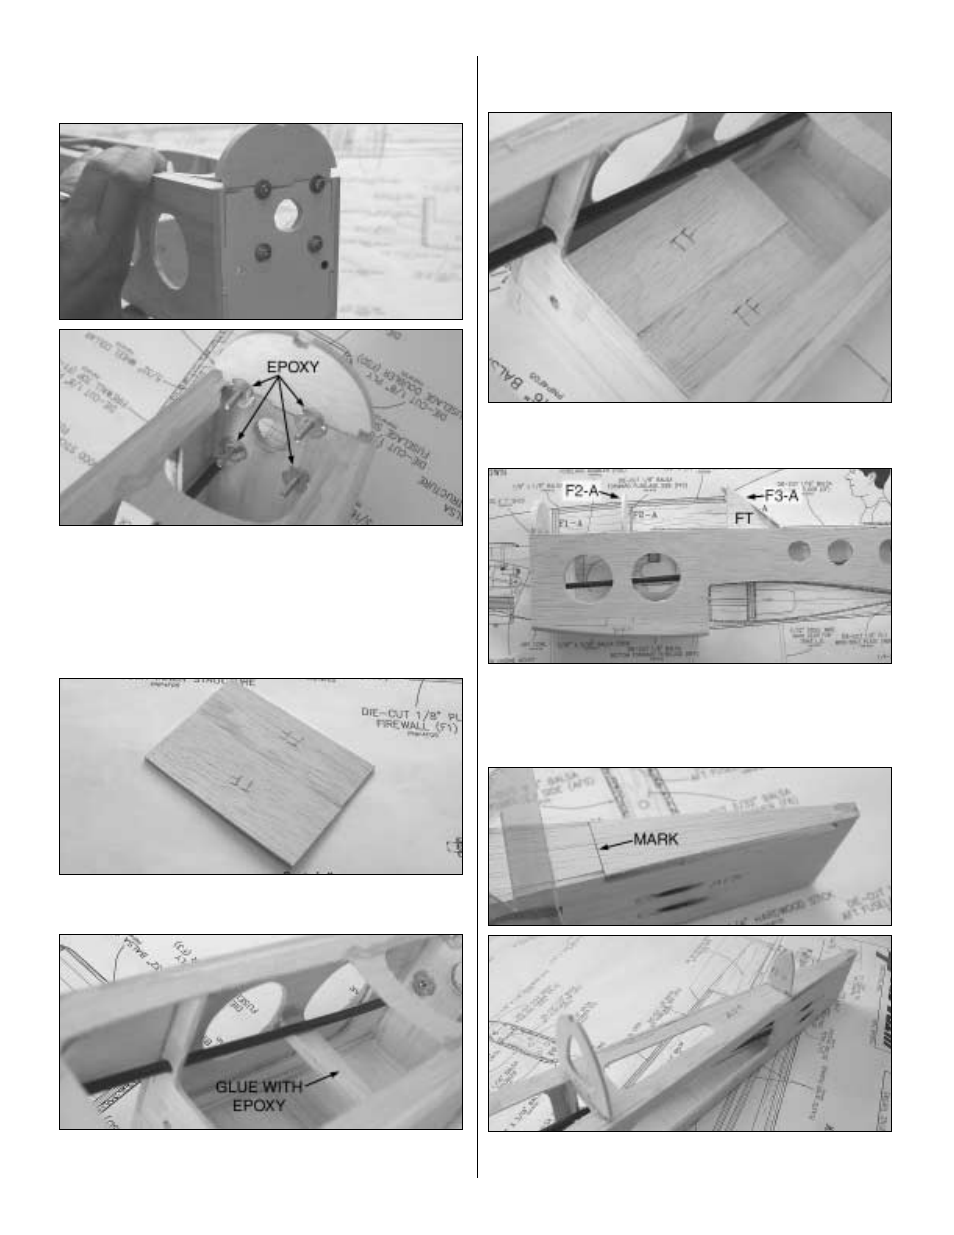
30. Locate four 6-32 blind nuts, four #6 washers and four
6-32 X 1" [25mm] SHCS. Insert a washer onto each SHCS,
then install a SHCS in each hole with a blind nut as shown
above. Tighten the bolts until the blind nuts are drawn tight
into the wood on the back of the firewall (F1). Apply a small
dab of epoxy to the nuts so that they do not come loose,
being careful not to get any in the threads.
❏
31. Locate the two die-cut 1/16" [1.6mm] balsa tank floor
parts (TF). Glue them side by side using CA as shown above.
❏
32. Cut a 1/4" x 1/2" [6.4mm x 12mm] piece of balsa stick
to length to fit in the forward fuselage as shown in the plan
just under the throttle pushrod as shown above. Use epoxy
to glue it in place.
❏
33. Glue the tank floor on top of F3 and the stick you just
glued. Use CA to glue it in place.
❏
34. Glue the die-cut 3/32" [2.4mm] balsa former F2-A as
indicated on the plans with CA. Use the die-cut 1/16"
[1.6mm] balsa forward template (FT) to glue the former
F3-A at the needed angle with CA.
❏
35. Draw a line across the top of the fuselage at the front
edge of the stab saddle as shown. Glue F6-A in front of this
30