Great Planes Ultra Sport 40 Plus Kit - GPMA0390 User Manual
Page 28
❏
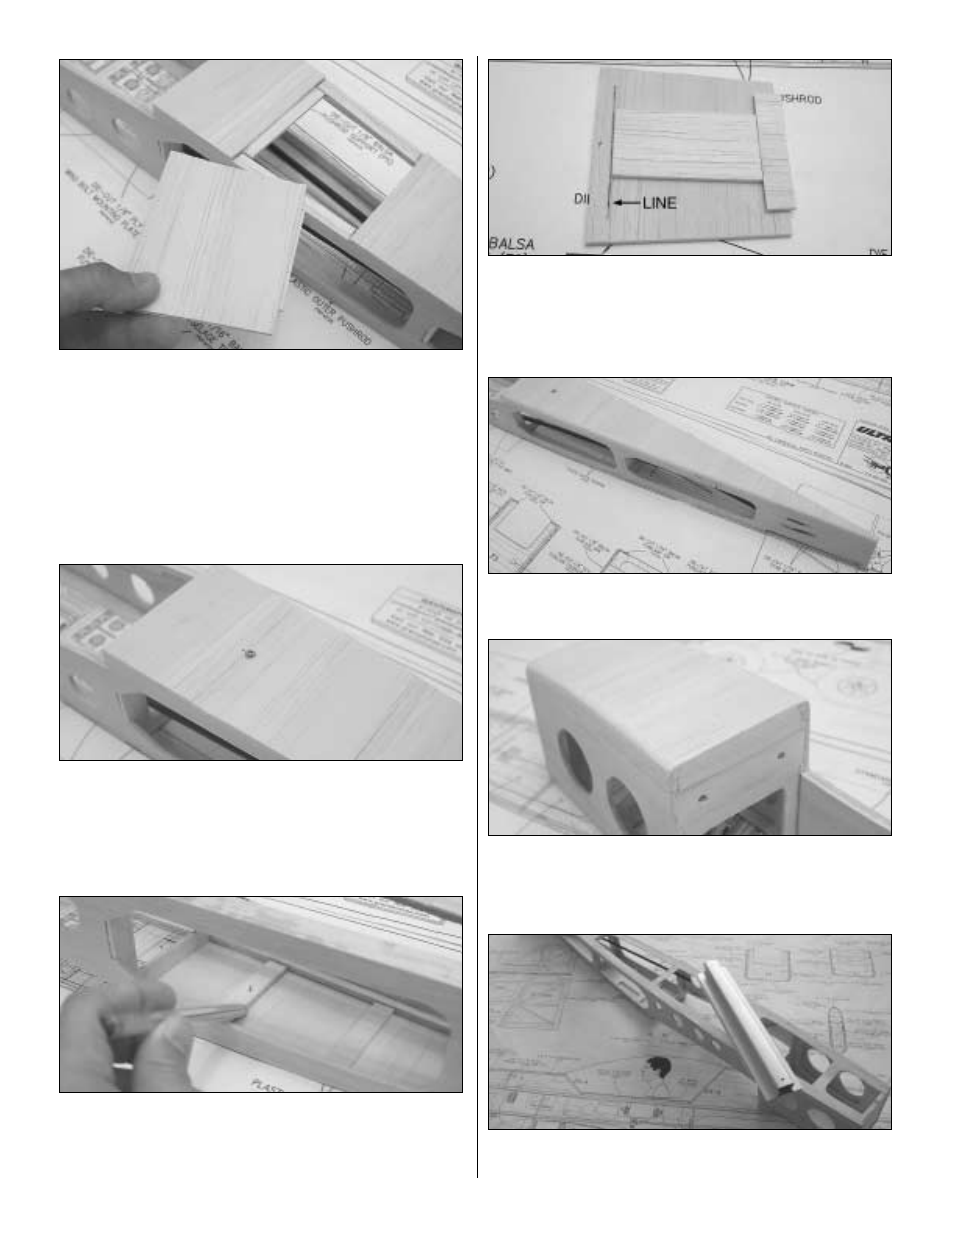
19. Cut a piece of the leftover 3/32" [2.4mm] sheeting to
a width of 3" [76mm] to be used as a hatch cover. Glue a
small piece of balsa on the bottom with the grain crossed to
act as a cover lip. Also, the lip should protrude about 1/8"
[3.2mm] past the edge of the hatch. Sand the edges of the
lip until it fits under the sheeting. Glue a leftover piece of
lite-ply on the fuselage, under the sheeting to act as a
support for the hatch screw.
❏
20. Install the hatch in place with a #2 x 1/2" [12mm]
screw and a #2 washer. Sand the edges of the hatch flush
with the fuselage sides.
❏
21. Flip the fuselage over and mark the location of the
screw hatch support. Remove the screw and the hatch
cover. Wick some thin CA into the hatch’s hole and the hatch
support hole.
❏
22. Cut another piece of leftover balsa as shown in the
above photo and glue it to the inside of the hatch cover to
stiffen it up. This piece of balsa should extend from the line
you just marked to the edge of the cover lip. Glue this in
with CA.
❏
23. After the glue has cured, reinstall the hatch and round
the edges of the aft fuselage bottom.
❏
24. Still using the same 3/32" [2.4mm] balsa sheet, sheet
and then sand the bottom forward fuselage. Round the
edges. See cross sections on the plans.
❏
25. Flip the fuselage over and sand the top of the
fuselage smooth.
28