Join the wings – Great Planes Ultra Sport 40 Plus Kit - GPMA0390 User Manual
Page 23
❏
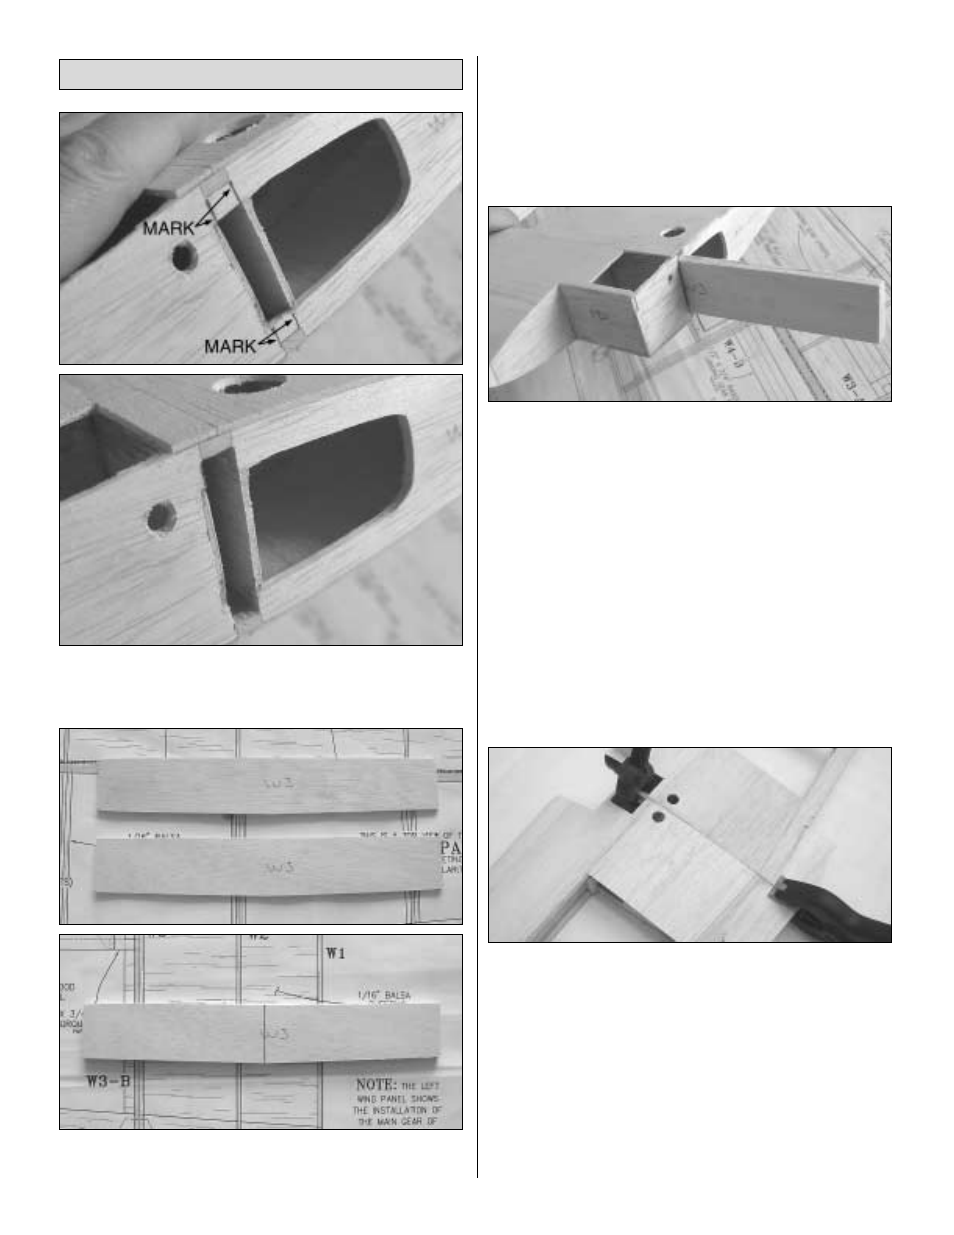
1. Make a line joining the edges of the top and bottom
main spars on both wing roots as shown above. Cut out the
wood between the lines.
❏
2. Locate the two die-cut lite-ply wing joiners (WJ). Mix
some 30-minute epoxy and glue them together. Clean up
the excess glue and sand the edges smooth. Also, make a
line at the center of the wing joiner.
❏
3. Test fit the wing joiner into the wing joiner pocket
between the main wing spars and shear webs. Note: The
top of the wing joiner is marked with a “TOP.” You will need
to sand the joiner for it to fit properly in the pocket. The fit
should be snug but not tight. The center-section of the wing
is not as strong as it will be until after the wing joiner is glued
in so do not force the joiner into the pocket. Do this for both
wing panels. Lightly sand the wing root ribs to achieve the
1-5/8" [41mm] dihedral. Note that you will need to bend the
joiner back slightly to make the wing root ribs meet because
of the taper of the main wing spars.
❏
4. Mix 1 oz of 30-minute epoxy. Coat the wing joiner and
both wing roots with epoxy. Also, drop some epoxy into both
wing joiner pockets. Insert the wing joiner into the wing
joiner pocket of the right panel, making sure the top of the
joiner is facing the top of the wing. Slide the left wing panel’s
pocket onto the wing joiner until the root ribs meet. Bend the
wing joiner until the root ribs meet. Use clamps or tape to
hold the wing roots together until the glue has cured. Check
again that the dihedral is 1-5/8" [41mm]. Clean up any
excess epoxy. Note: You need to follow the above procedure
to glue the wing joiner in place to make sure the bending
stress on the wing joiner is distributed evenly.
Join the Wings
23