Center ribs and wing joiners retracts (option b) – Great Planes Ultra Sport 40 ARF Red - GPMA1005 User Manual
Page 7
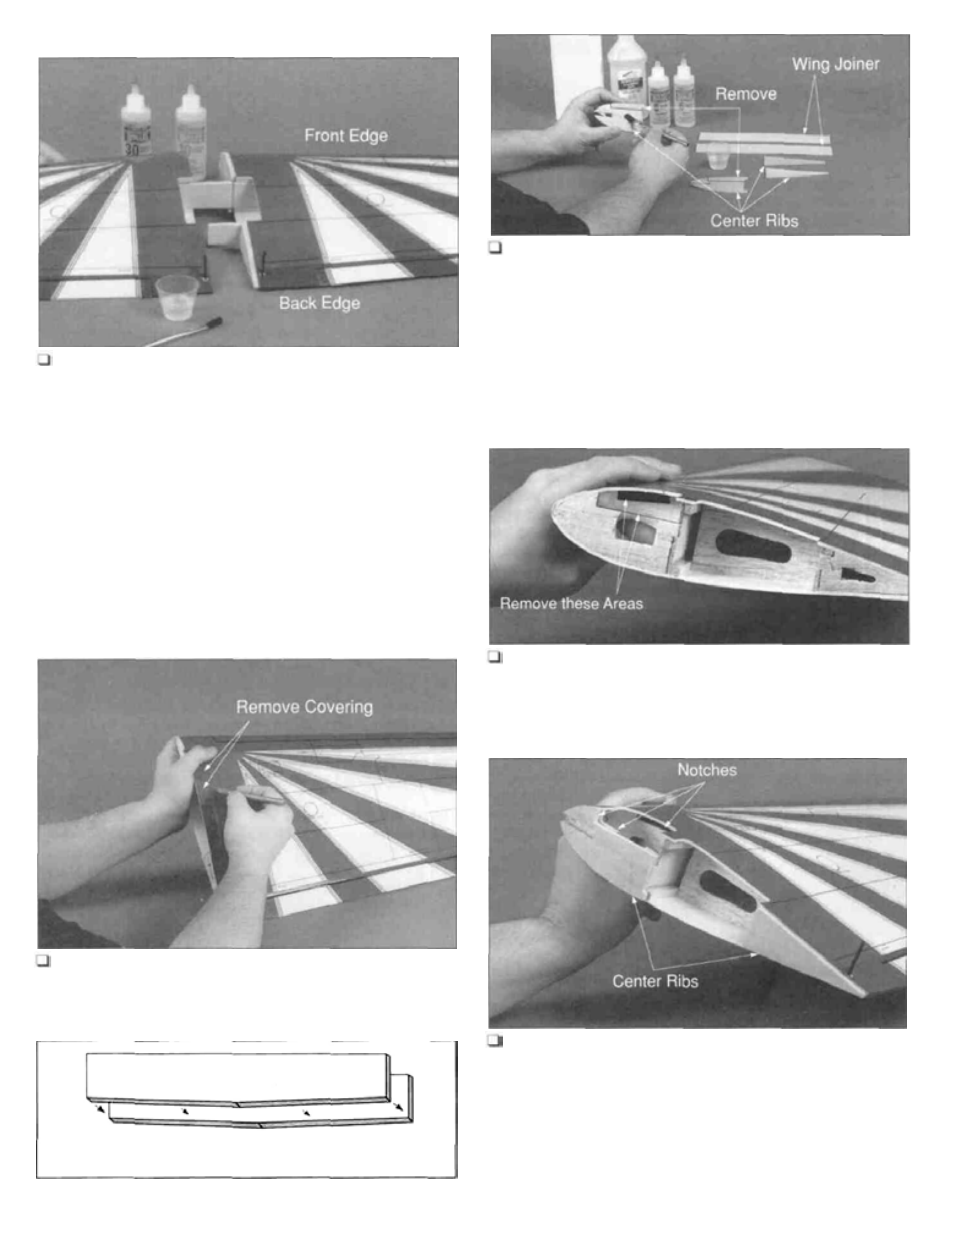
Join the Wing
6. Trial fit the two wing halves together. The wing halves
should seat together without any gaps and the front and
back edges of each wing should line up with each other.
Completely cover the wing joiners, spars and center ribs
with 30-minute epoxy. Slide the two wing halves together,
using masking tape to hold the wing in proper alignment
until the epoxy cures.
Center Ribs and Wing Joiners
Retracts (Option B)
(Skip Steps 1 -7 Option B if fixed landing gear are to be installed.)
(Continue on page 8.)
Remove the Foam Covering
1. Remove the foam covering from the aileron and
retract servo openings. The skin has been partially precut
for exact location.
Glue the Center Ribs & Wing Joiners
Wing Joiner
Dihedral Angles
2. Remove the precut area from the front center rib
before gluing. Carefully glue the plywood center ribs and
wing joiner together using 6-minute epoxy. The plywood
joiner has a slight angle on one edge. Place these angles
adjacent with each other. Use clothespins to clamp the
joiners and ribs together. Remove the excess epoxy on the
edge of the ribs and joiner using a paper towel and rubbing
alcohol.
Modify the Wing Rib
3. Using a hobby knife, remove the precut areas of the
wing ribs on the two closest ribs to the wing root in both
wing halves.
Glue the Center Rib on the Wing
for a proper fit. The ribs should not protrude past the outer
skin of the wing. Lightly sand the edges of the center ribs
until they are flush with the wing covering. Glue the
plywood center ribs to the right wing half. Note: Notice the
positions of the notches removed from the center and wing
ribs for the retract pushrods when gluing the plywood rib
onto the wing.
7