Landing gear assembly retracts (option b) – Great Planes Ultra Sport 40 ARF Red - GPMA1005 User Manual
Page 10
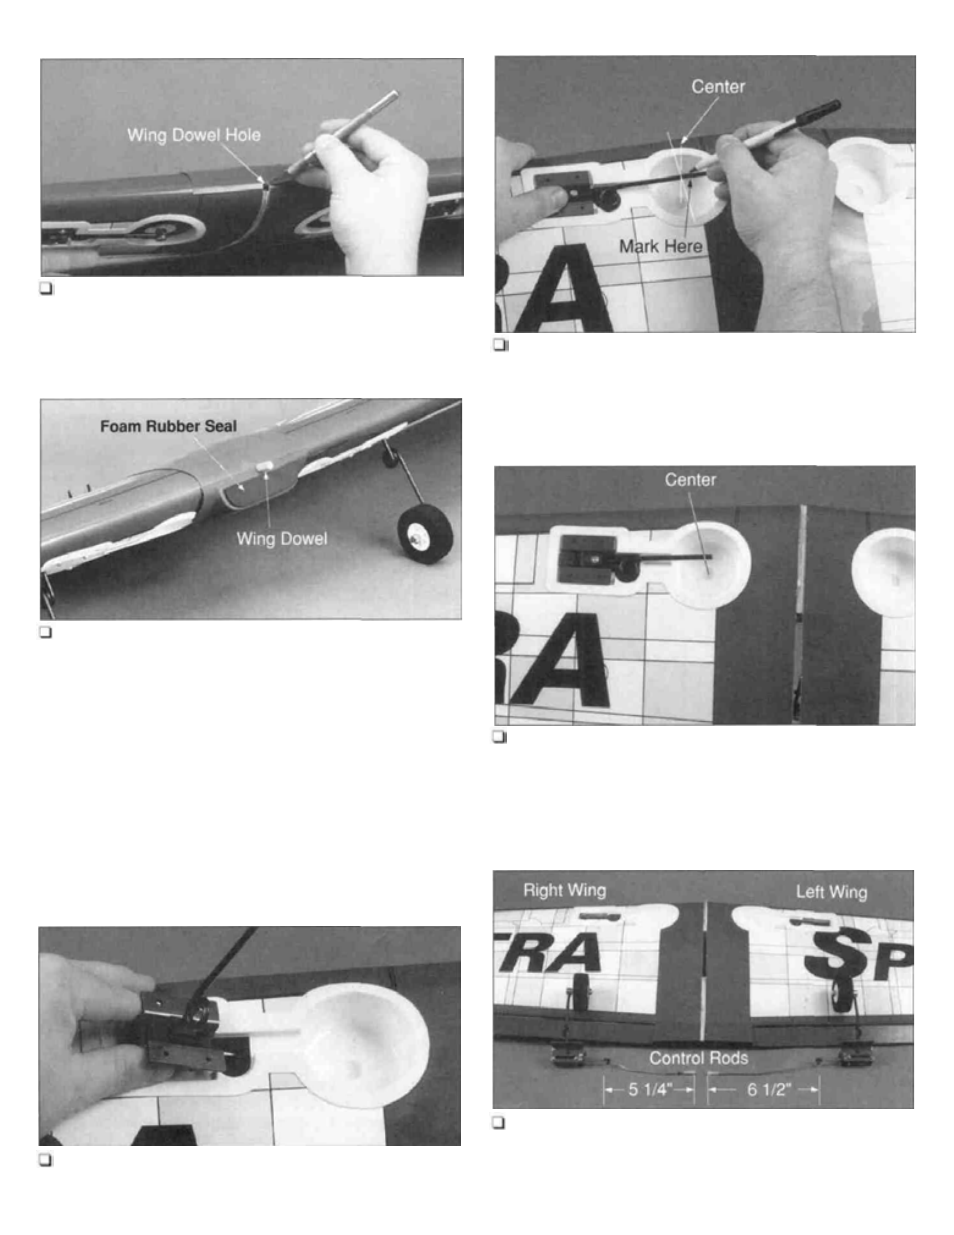
Glue the Fairing to the Wing
10. Use thick CA+ to glue the top fairing to the top of
the wing. Remove the plastic that is covering the wing
dowel hole on the leading edge of the wing. Proceed to
glue the bottom fairing to the bottom side of the wing and
remove the remaining plastic covering the dowel hole.
Glue the Wing Dowel
Mark the Retract
2. Using a pen, mark the landing gear wire at the
center of the wheel well when the retracts are folded into
the wing.
11. Use 6-minute epoxy to glue the hardwood wing
dowel into the leading edge of the wing. Work epoxy into
the dowel hole. Apply epoxy to the dowel itself and insert
the dowel. Leave 1/2" of dowel protruding from the wing.
Clean the excess epoxy from the dowel using a paper
towel and rubbing alcohol. Apply the foam rubber seal to
the front edge of the wing fairing. It will help prevent
exhaust residue from leaking into the fuselage.
Landing Gear Assembly
Retracts (Option B)
(Skip Steps 1-13 Option B if fixed gear has been installed.)
(Continue with Aileron Assembly on page 12.)
Retract Modification
1. Insert the retract into the wing with the main landing gear
wire facing toward the root of the wing when it is folded down.
Cut the Gear Wire
3. Bend the landing gear wire at the mark. Install the
wheel on the landing gear wire securing it with a 5/32"
wheel collar. Cut off the excess landing gear wire and file
the end to remove any rough edges.
Bend the Pushrods
4. Bend the pushrods to match the line drawing on page
5. The pushrods should look like the assembled retracts
shown in the photograph above, if you are using Hobbico
Main Retracts (HCAP4010).
10