Vertical stabilizer, Tail gear – Great Planes Ultra Sport 40 ARF Red - GPMA1005 User Manual
Page 16
Attach the Horizontal Stabilizer
Install the Vertical Stab Fairinq
3. Mix 30-minute epoxy to securely glue the horizontal
stabilizer into place. Adjust the alignment of the stabilizer
as described in Steps #1 and #2. Use T-pins to hold the
proper alignment until the epoxy has firmly set. Wipe off
the excess epoxy using rubbing alcohol and a paper towel.
Set the fuselage aside to cure before proceeding.
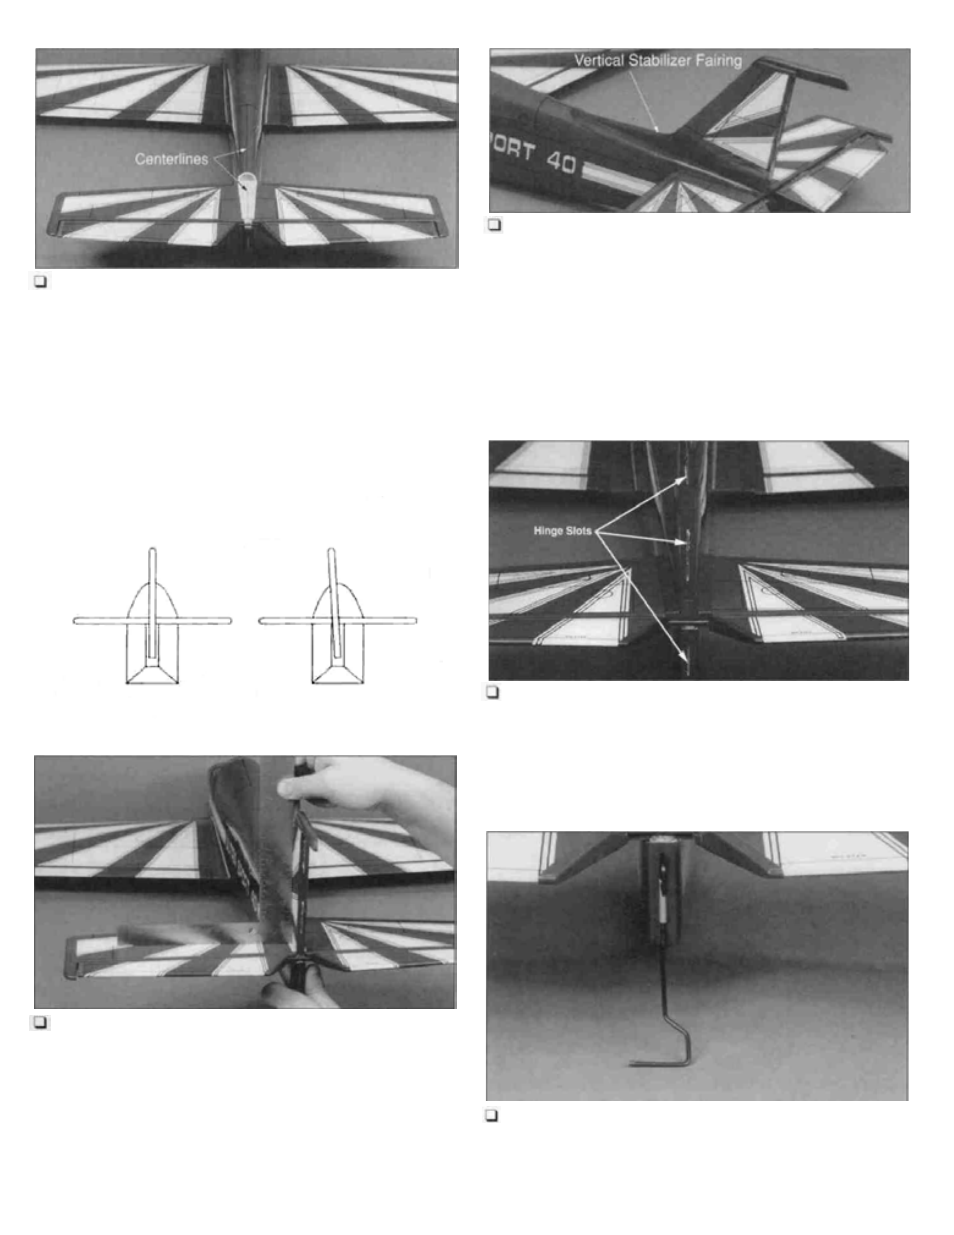
Vertical Stabilizer
Attach the Vertical Stabilizer
VERTICAL
STABILIZER
Correct
Incorrect
1. Carefully align the vertical stabilizer on the
horizontal stabilizer. The vertical stabilizer must be
perpendicular to the horizontal stabilizer and must line up
with the fuselage centerline exactly. Using 30-minute
epoxy, glue the vertical stabilizer into place. A square
should be used to assure a perfect 90° angle between the
horizontal and vertical stabilizer. Pin the vertical stabilizer
in place and keep checking its alignment by measuring
and sighting until the epoxy sets up.
2. Locate the plastic vertical stabilizer fairing and lightly
sand the underneath side of the fairing. Slide the fairing
over the vertical stab and lightly trace its outline onto the
fuselage. Remove the fairing. Lightly sand the fuselage on
the inside of the line. Using thick CA+, apply a bead of
glue to the fuselage and slide the fairing into place,
holding firmly until the glue dries. The vertical stabilizer
relies on this fairing for structural support; therefore a
good bond is essential.
Check the Hinge Slots
3. Check the rudder hinge slots to make sure they are
open and receptive to the CA hinges. Clean the slots out
with a hobby knife if necessary.
Tail Gear
Mount the Tail Gear Wire
1. Apply petroleum jelly to the tail gear to prevent glue
lock up. Use 30-minute epoxy to glue the tail gear guide
tab into the fuselage. Complete the next two steps before
the epoxy is allowed to completely set up.
16