Install the retract servo, Mount the wing bolt plates, Prepare the wing fairing – Great Planes Ultra Sport 40 ARF Red - GPMA1005 User Manual
Page 11: Connect the retract linkage, Sand the fairing and wing
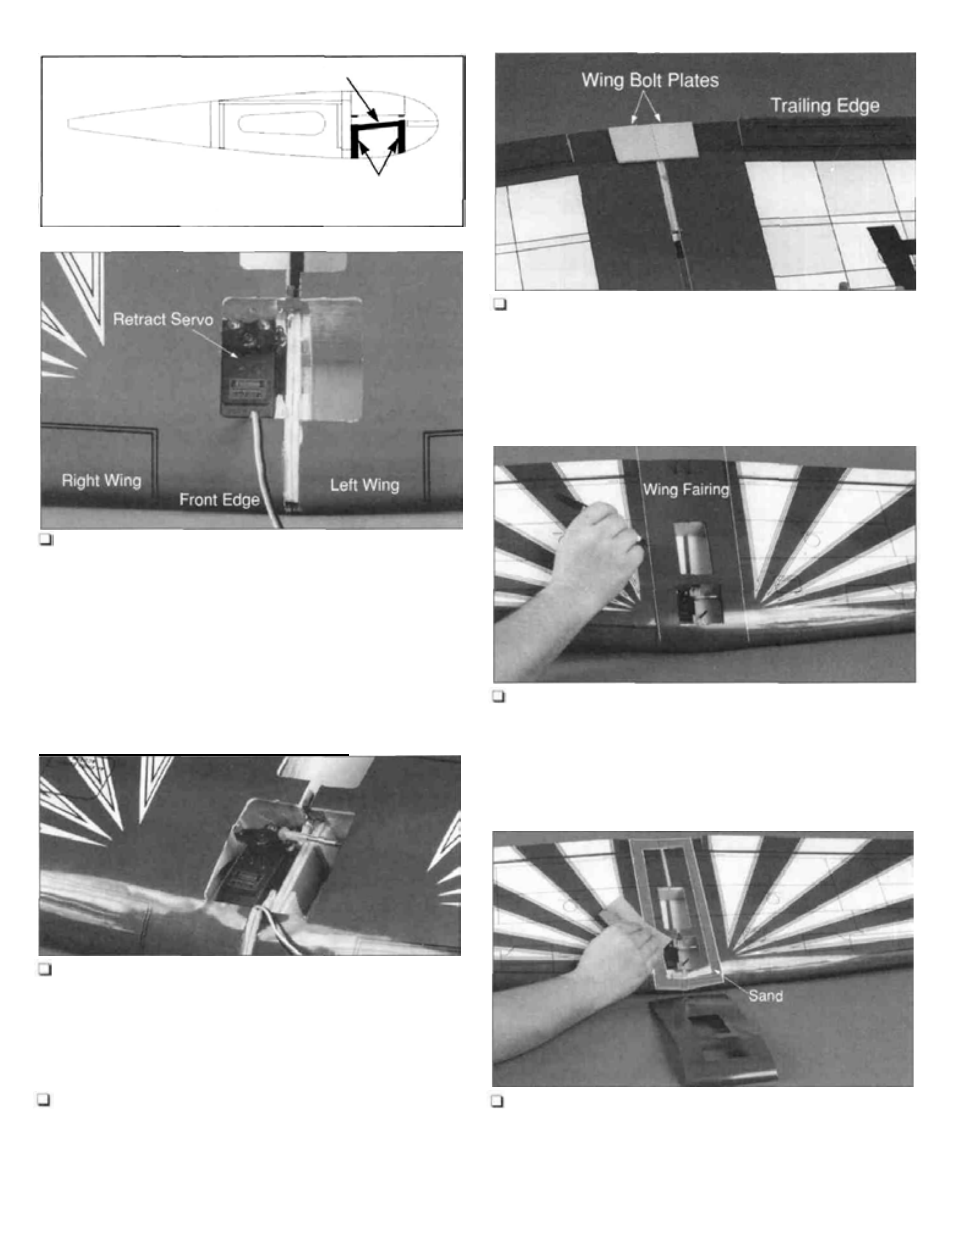
Install the Retract Servo
Retract Servo Tray
Servo Tray Mounting Blocks
Wing Cross Section
6. Glue the retract servo tray mounting blocks into the
wing as shown in the line illustration above. The servo tray
should be glued to the servo tray mounting blocks. Mount
the servo into place using the screws supplied with the
servo. Trial fit the retract servo in the servo tray. Enlarge
if necessary.
Mount the Wing Bolt Plates
9. Using 6-minute epoxy, glue the plywood wing bolt
plates to the bottom of the wing aligned with the trailing edge.
Prepare the Wing Fairing
10. Individually place each wing fairing onto the wing
and lightly trace its outline.
Connect the Retract Linkage
using threaded ball links. Important: The retract pushrods
and retracts must be adjusted so the retracts lock in both
the up and down positions.
7. The linkages in the photograph have been made by
Sand the Fairing and Wing
8. Secure the retract mechanism into the wing using the
11. Use medium grit sandpaper to lightly roughen the
four #4 x 1/2" sheet metal screws provided. Drill pilot holes
in the mounting rails using a 3/32" drill bit. Connect the
retract servo to the radio system and check for smooth,
uninterrupted action of the retracts. Adjust accordingly.
inside of each fairing where it will be glued to the wing. The
area to be sanded is shown as a lightened area in the
photograph. This will insure better adhesion of the fairing
to the wing.
11