Great Planes Sportster Bipe 40 Kit - GPMA0510 User Manual
Page 4
I
2.
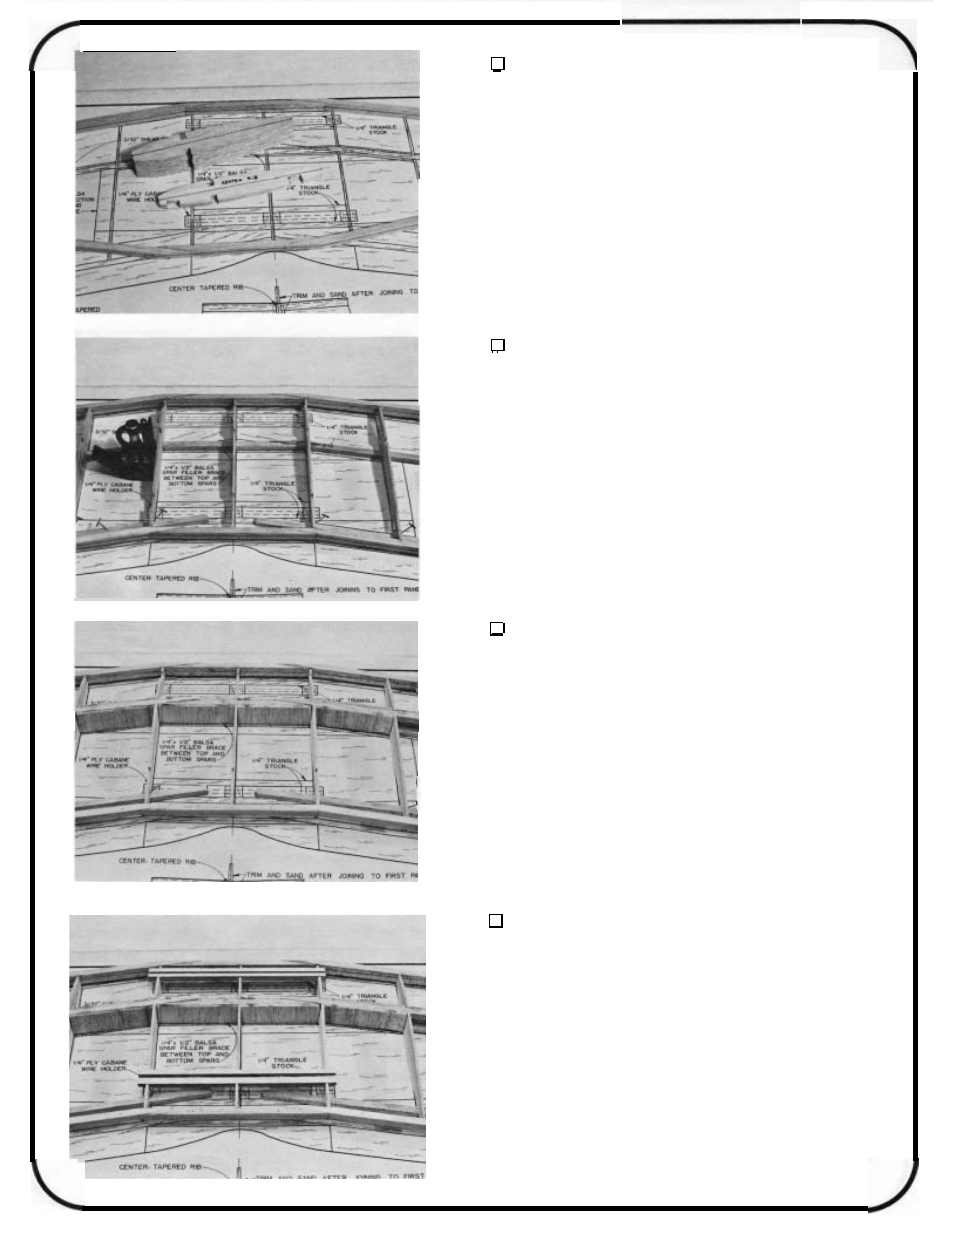
PREPARE THE RIBS
Draw a rib alignment line down the center of each
top wing rib. Note that the three center ribs have 2 extra notches
for the cabane mounting plate. Draw rib alignment centerlines
down the back of the leading edge and the front of the trailing
edge.
3.
ALIGN AND GLUE RIBS, LEADING EDGE AND
TRAILING EDGE TO TOP SPAR
Pin the top spar (the wing will be built (upside
down) over the waxed paper covered plan. Place the ribs on
the spar. Align the ribs at the positions shown on the plans.
Make sure that the three center ribs have the cabane notches
"up" as shown. Shim up the trailing edges of the ribs with the
extra 1/4 x 1/4
x 24 spars, making sure the centerlines you
drew on the ribs are parallel to the building board. When the
ribs are aligned correctly, and at 90 degrees to the building
board, glue the ribs to the spar. Line up the lines on the ribs
with the line on the leading edge. Glue the ribs to the leading
edge. Line up the trailing edge line
to
the rib lines and glue the
ribs to the trailing edge.
4.
GLUE IN SPAR FILLER BRACE, BOTTOM SPAR
AND SHEAR WEB
Cut out the area between the spar notches on the
two end center ribs for the 1/4 x 9/16 balsa spar filler brace.
Glue in the 1/4 x 9/16 filler brace pieces from the center rib out
past the spar scarf joint on both sides of the center rib. Glue
in the bottom spar. Now cut shear web pieces from 3/32 x 3
x
24 balsa to fit between the spars at the rib bays shown on the
plan. The wing should still be shimmed up with the extra spars
throughout the building process. Use epoxy in this step.
5.
ADD THE CABANE HOLDERS
Glue in the two plywood 1/4 x 1/2
x
6 1/2 cabane
wire holders with epoxy into the slots in the htree center ribs.
Make sure the cabane holders are flush with the top edges of
the ribs.
4