Great Planes Sportster Bipe 40 Kit - GPMA0510 User Manual
Page 14
ADD THE LANDING GEAR BRACES
Glue in the grooved
1/2
x
1-5/16
x
3-1
/2 landing gear
block at the bottom of bulkhead #2. Add the
1/2 triangle stock
along the front of bulkhead
#2 and the top of the landing gear
block. Cut the braces from 1/2
"
x
6 stock. You may solder the
main gear now but do not install until after the model is finished.
Note-The wider slot (groove) in the landing gear block is
positioned toward the front of the model for main gear place-
ment. The brace fits into the smaller slot.
20.
GLUE THE CHIN BLOCK TO THE FUSELAGE
With the fuselage still at 90 degrees to the board
and over the plans, align the chin block to the front of the landing
gear block and glue the chin block to the fuselage. (The fuselage
is not shown aligned to the plans
in
the photo.)
21.
ADD THE BALSA BOTTOM
SHEETING
With all pins removed from the inside of the fuselage,
cross-grain sheet the bottom rear of the fuselage. Use 3/32
x
3
x
24
balsa and cut pieces to fit. Start at the false bulkhead
and work your way back, gluing one piece at a time. Leave the
last section of sheetingout untilthe tail wheel bracket is installed
later. When the glue is dry, remove the fuselage from your
building board and sand the bottom sheeting to shape.
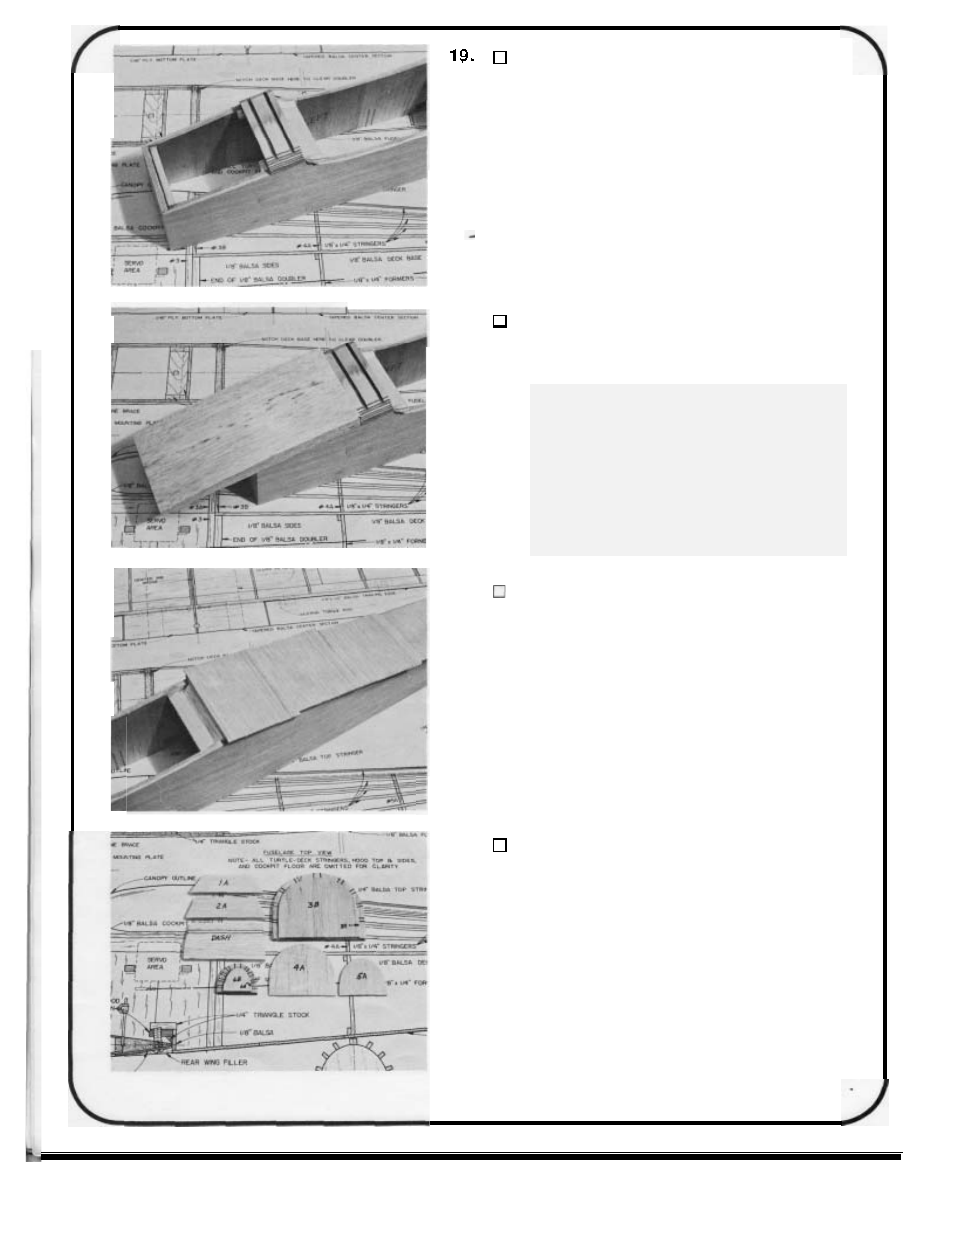
22.
PREPARE TOP FORMERS
1A THROUGH 3B
Preparethe fuselage top formers by numberingthem
to
match the plans. Mark the locations of the stringerson formers
3A and 6A by referring
to
the plans. Glue former
3B to the back
of 3A. Glue former 6B to the front of 6A. Draw the location lines
for the cockpit floor on the back of the dash and on the front
of the
3A/3B assembly.
14