Build the airplane, Assemble the horizontal tail – Great Planes Reflection FlatOuts EP ARF - GPMA1116 User Manual
Page 7
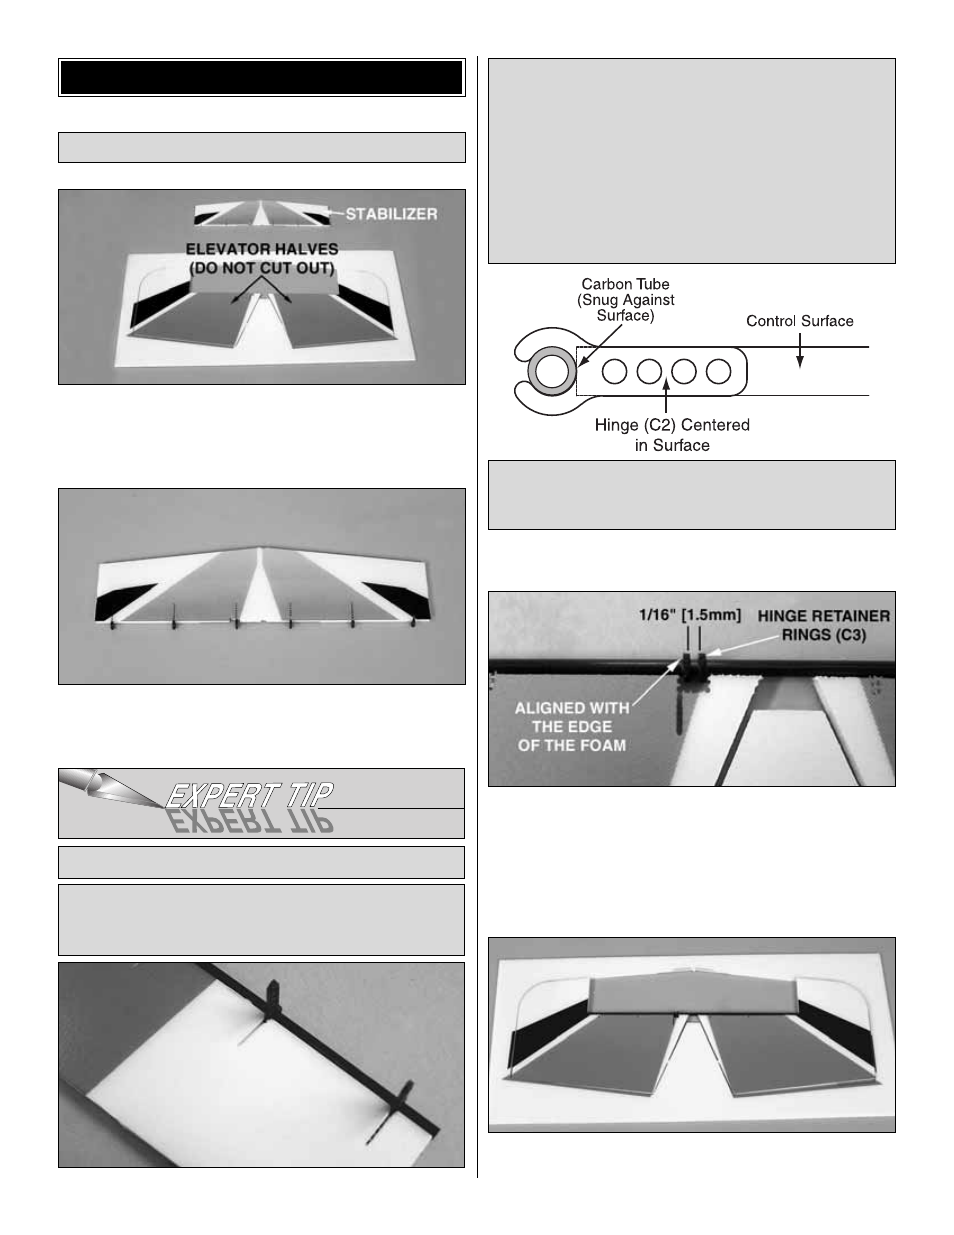
❏
1. Cut the stabilizer free from the foam sheet using a
hobby knife with a sharp #11 blade. DO NOT cut the
elevator halves free at this time.
❏
2. Following the
Expert Tip below, use foam-safe CA and
accelerator to glue six clip hinges into the stabilizer, using the
3 x 192mm [1/8" x 7-1/2"] elevator joiner tube as a guide.
❏
3. Remove the elevator joiner tube from the hinges.
❏
4. Without removing the elevator halves from the foam
sheet, slide two hinge retainer rings (C3) onto the elevator
joiner tube. Align the rings with the cutout in the right
elevator half. There should be a 1/16" [1.5mm] gap between
the two rings. Secure both rings to the tube with a drop of
glue on the outside of the gap.
❏
5. Using the
Expert Tip that follows, permanently join the
elevator halves by gluing in the elevator joiner tube.
C. One at a time, coat the sides of the rest of the hinges
and glue them into the slots.
A. Snap all of the hinges onto the carbon tube. Align the
hinges with the slots.
B. Coat both sides of one hinge with foam-safe CA where
it contacts the sides of the hinge slot. Rotate the hinge
down into the slot. Be certain the top and bottom of the
hinge remains flush with the top and bottom of the control
surface you are hinging. IMPORTANT: Avoid getting any
CA on the tube or the arms of the clips. The clips must
rotate freely on the tube.
The clip-hinge system provides a precision, free-moving
hinge. Always use this method when instructed to install
clip hinges.
HOW TO INSTALL CLIP HINGES
Assemble the Horizontal Tail
BUILD THE AIRPLANE
7