Great Planes Reflection FlatOuts EP ARF - GPMA1116 User Manual
Page 12
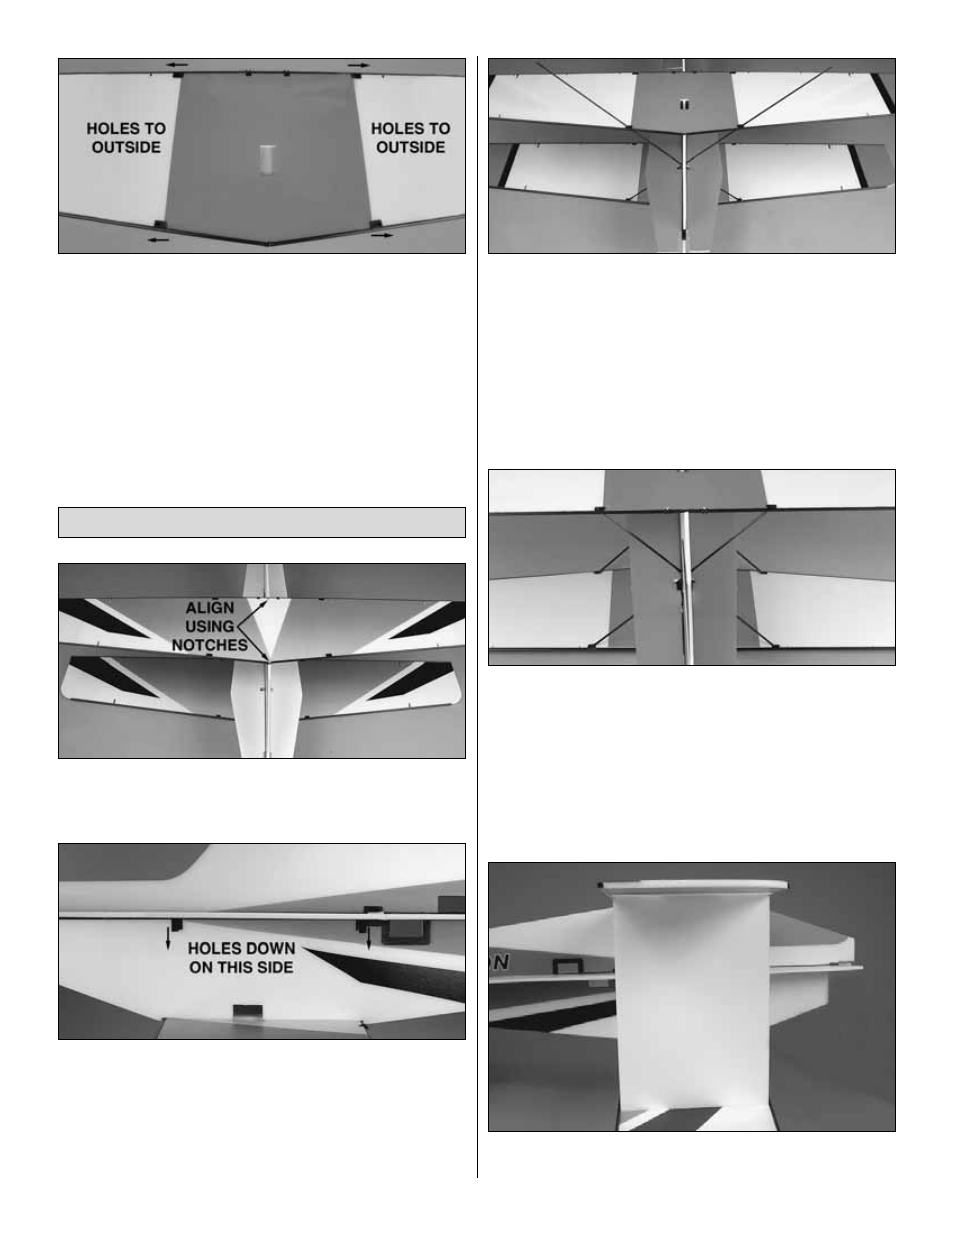
❏
12. Installing them from the bottom of the bottom wing,
glue four supports into the slots in both sides of the top wing.
Two of the supports are at the leading edge (for the landing
gear) and two are at the trailing edge (for the wing struts).
IMPORTANT: The holes in the supports must be angled
downward and outward (matching the angle of the landing
gear and the wing struts). This means that when viewed
from the bottom, the holes in each of the supports will be
toward the tips of the wing. The last four supports will be
installed in the next section.
❏
1. Glue the top and bottom wings to the vertical fuselage.
Use the slots in the LE and TE of the wings to align the
wings with the fuselage.
❏
2. Installing them from the left side, glue two more
supports into the slots in the fuselage. Note that and that the
holes in the supports should be angled downward and
outward (again, to accommodate the angles of the landing
gear and the struts). Glue the remaining two supports into
the right side of the fuselage. Be certain that the holes are
angled correctly.
❏
3. Slide the 2 x 358mm [5/64" x 14-1/16"] landing gear
legs through the landing gear supports in the front of the wings
and fuselage. Ensure that the wings are parallel with the stab
and horizontal fuselage and perpendicular to the vertical
fuselage. Once satisfied with alignment, secure the landing
gear legs with a drop of glue on both sides of each joint.
❏
4. Slide the 2 x 212mm [5/64" x 8-5/16"] wing struts
through both sets of supports in the back of the wing and
fuselage. Make sure that the TEs of the wings are aligned
with the LEs, and secure the struts with a drop of glue on
both sides of each joint.
❏
5. Glue the interplane struts between the wings, using
the precut slots and tabs for alignment.
Final Assembly
12