Assemble the wing preparations – Great Planes Reactor .46 EP/GP 3D ARF - GPMA1021 User Manual
Page 7
❏
1. If you have not done so already, remove the major
parts of the kit from the box and inspect for damage. If any
parts are damaged or missing, contact Product Support at
the address or telephone number listed in the “Kit
Inspection” section on page 6.
❏
2. Carefully remove the tape and separate all the control
surfaces. Use a covering iron with a covering sock on
medium/high heat to tighten the covering if necessary. Apply
pressure over sheeted areas to thoroughly bond the
covering to the wood.
Do the left wing first so your work matches the photos
the first time through. You can do one wing at a time, or
work on them together.
❏ ❏
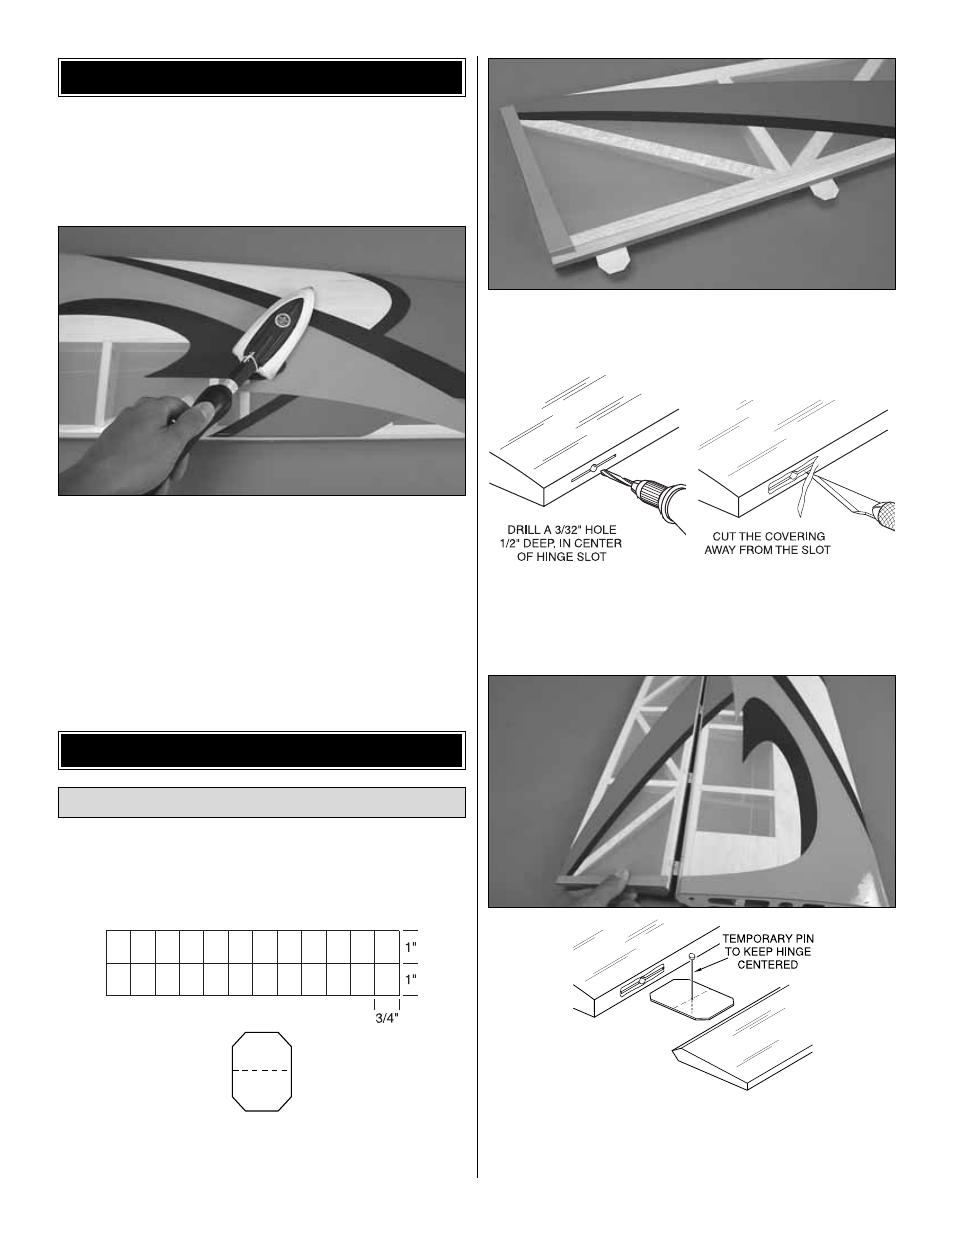
1. Cut the included 2 x 9" [51 x 229mm] CA hinge strip
into 3/4" x 1" [19 x 25mm] pieces. Trim the corners as shown
in the sketch.
❏ ❏
2. Test fit the hinges into the aileron and wing panel.
If the hinges are difficult to insert, enlarge the hinge slots
with a sharp hobby knife.
❏ ❏
3. Using a 3/32" [2.4mm] drill bit, drill a 1/2" [13mm]
deep hole in the center of each hinge slot. Cut away the
covering from just around each hinge slot with a sharp
hobby knife as shown.
❏ ❏
4. Reinsert the hinges half way into the aileron hinge
slots. Stick a T-pin through the middle of each hinge in order to
keep them centered. Join the aileron to the wing panel and
remove the T-pins. Push the aileron against the wing hinge line.
Install the Ailerons
ASSEMBLE THE WING
PREPARATIONS
7