Great Planes Reactor .46 EP/GP 3D ARF - GPMA1021 User Manual
Page 26
❏
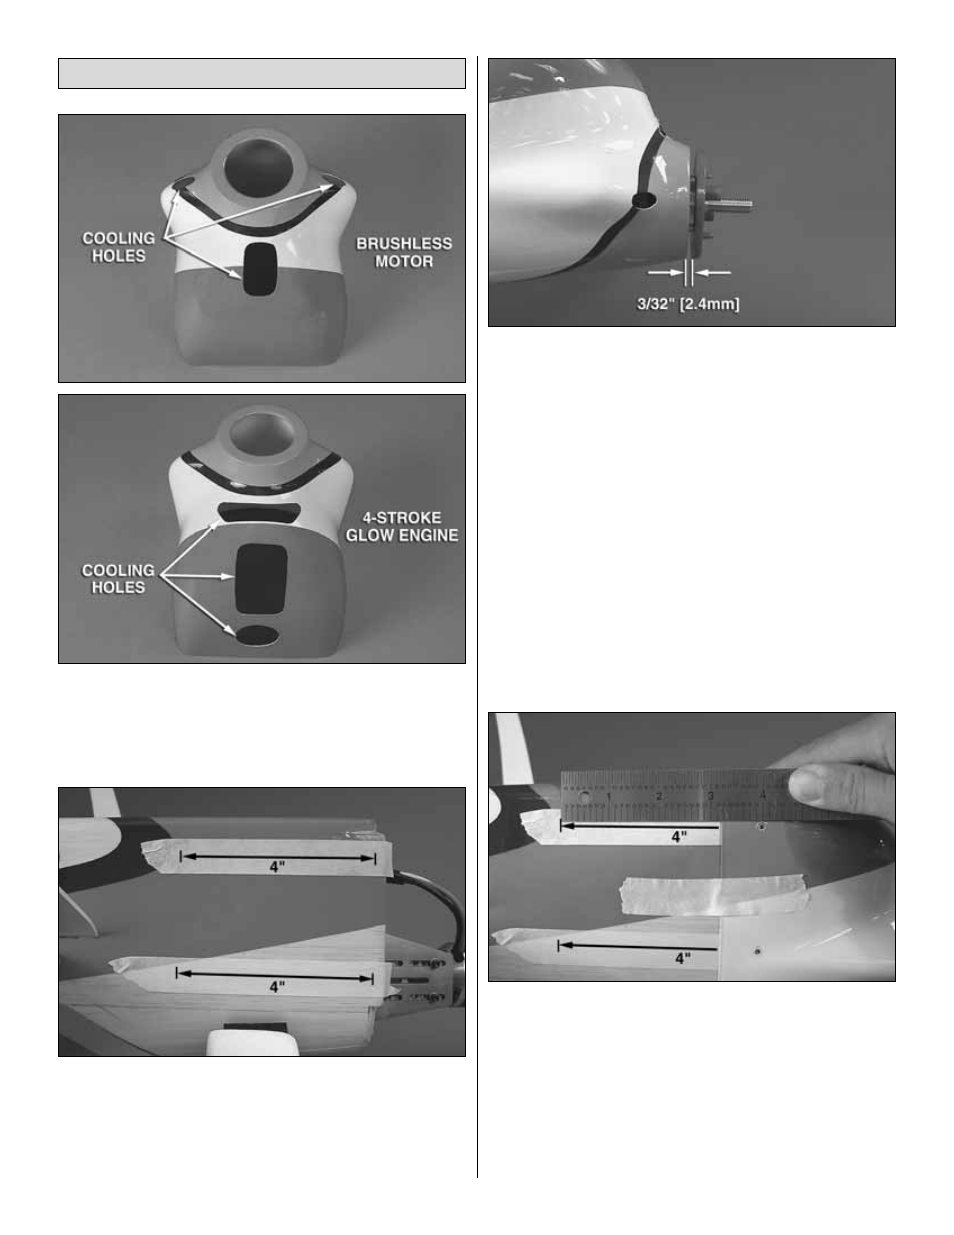
1. Use a rotary tool such as a Dremel to cut cooling holes
in the cowl to match your power system. If you are installing
a glow engine, you will need a hole for the engine head, cool
air inlet and an access hole for your needle valve.
❏
2. Put four strips of masking tape approximately 5" [127mm]
long (two pieces per side) onto the fuselage, in line with the
cowl mounting tabs as shown. Place a mark in the middle of
each piece of tape, centered over the cowl mounting tabs.
Measure 4" [102mm] back from those marks and make another
mark. Draw a line connecting your marks with a straight edge.
❏
3. Fit the cowl onto the fuselage and temporarily secure the
spinner backplate onto the prop shaft. You may need to drill
out the hole in the backplate or use a prop reamer to match
the diameter of your prop shaft (6mm diameter for the C42-
60-480kV RimFire, 5/16" [7.9mm] for the O.S. .70 Surpass
four-stroke engine). Align the colors on the cowl with the
covering on the fuselage and position the cowl allowing a
3/32" [2.4mm] gap between the front of the cowl and the
spinner backplate. When satisfied, tape the cowl into position.
❏
4. Measure 4" [102mm] from the aft marks you made on
the masking tape to determine the locations for the cowl
mounting screws. Using the straight lines on the tape as a
guide, mark the locations on the cowl for the four mounting
screws. Drill through the cowl and cowl mounting tabs at the
marks using a 1/16" [1.6mm] drill bit. Remove the cowl from
the fuselage (and the masking tape) and thread a #2 x 3/8"
[9.5mm] sheet metal screw into each hole in the cowl
mounting tabs and remove it. Add a drop of thin CA to each
hole to harden them.
Install the Cowl, Canopy and Spinner
26