Great Planes Reactor .46 EP/GP 3D ARF - GPMA1021 User Manual
Page 21
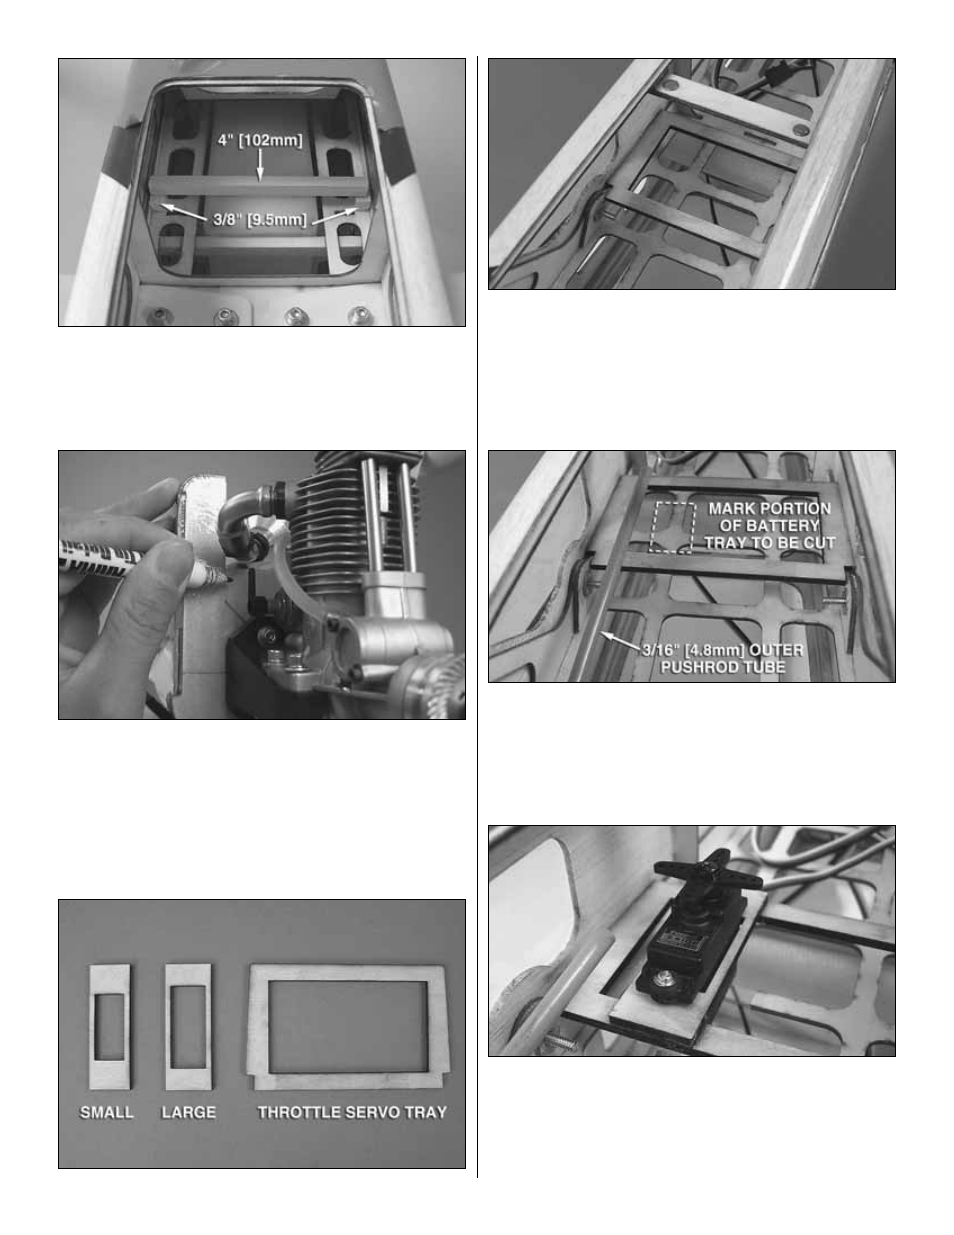
❏
9. Cut another piece 4" [102mm] long and two pieces 3/8"
[9.5mm] long. Glue the small pieces in the location shown.
Glue the 4" [102mm] piece to the small pieces across the
fuel tank. Confirm that the fuel tank is held securely in place.
❏
10. Make a mark on the firewall in line with the throttle arm
on the carburetor. Use a 3/16" [4.8mm] bit to drill a hole
through the firewall at the mark you made. Be sure that you
are not drilling through the fuel tank! If necessary, move your
mark below or to the side of the fuel tank. The throttle pushrod
can be bent after installation to reach the throttle arm.
❏
11. A throttle servo tray and two servo adapter plates are
included in the kit. The small adapter plate will hold a 1.1" x 0.5"
[28 x 13mm] micro servo such as the Futaba S3101. The large
adapter plate will hold a 1.4" x 0.6" [36 x 15mm] servo such as
the Futaba S9650. The throttle servo tray will hold a standard
size servo (1.6" [40.5mm] long) such as the Futaba S3003.
Glue the throttle servo tray into position as shown.
❏
12. Temporarily insert the 3/16" [4.8mm] outer pushrod tube
through the hole in the firewall and slide it back to the throttle
servo tray. With the outer pushrod tube straight, determine
where your throttle servo will need to be installed. Mark the
portion of the battery tray above the location of the throttle servo
that will need to be cut away in order to make room for it.
❏
13. Cut away the battery tray at the marks you made
using a Dremel tool or a hobby knife and test fit your servo
into the throttle servo tray. When satisfied, secure the throttle
servo to the servo tray using the hardware included with the
servo. If you are using an adapter plate, glue it to the servo
tray using medium CA glue.
21